Search
Complete Guide to Building Your Brewery

$19.95 USD

Support our site by using these affiliate links
Control Panel (Part 1)
Our Standard 30A Electric Brewery Control Panel outlined here is perfect for producing up to 20 gallons of finished product per batch. A single 5500W element is used in both the boil kettle and hot liquor tank.
For alternate control panel builds see:
- Standard 30A Electric Brewery Control Panel (240V only, for international use)
- 50A Electric Brewery Control Panel for back to back batches
- 50A Electric Brewery Control Panel for back to back batches (240V only, for international use)
- 50A Electric Brewery Control Panel for 30+ gallons
- 50A Electric Brewery Control Panel for 30+ gallons (240V only, for international use)
Having problems or want to test your control panel as you built it? See our testing / troubleshooting guide.
Control panels are available assembled and in kit form. For complete details see our Electric Brewery Control Panel order page.
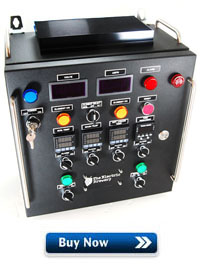 The control panel houses the lights, switches, and controls that we use to monitor and control our brewing process.
It's a 100% custom unit designed and built by us specifically for our brewing setup using mainly non-proprietary (off-the-shelf) industrial-grade components to ensure long term serviceability. (More information)
The control panel was by far the most complex part of our brewery to design, as just about every part of the brewing process has an impact on the control panel.
All brewing process decisions had to be made prior to designing the control panel to ensure that the panel included the features we needed, worked well ergonomically, and is safe to use.
Once the control panel was designed and parts were chosen, the actual assembly was fairly straight forward.
The control panel houses the lights, switches, and controls that we use to monitor and control our brewing process:
The pumps, temperature probes, and heating elements connect to the underside of the panel. All cables are detachable and feature locking plugs or connectors to avoid accidental disconnection. (Some of the cables are quite heavy).
The pumps and heating elements use female receptacles, while the 30A/240V main power input uses a male receptacle. This is done for safety reasons as it ensures that live AC power will never be available on either the plug or receptacle if something is disconnected by accident.
The temperature probes use female receptacles and are extremely low voltage DC. There is no safety concern if a temperature probe is disconnected during use.
We connect cables to the control panel using plugs, connectors, and receptacles: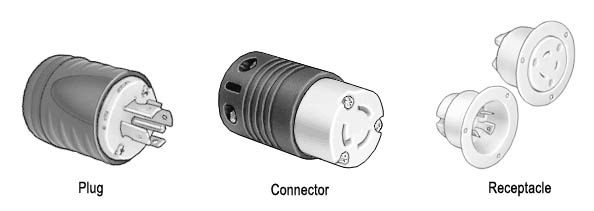
All cable receptacles are located underneath the control panel: 

Considerable time was spent designing a layout that is balanced and works ergonomically:
We received assistance from our resident Master Electrician while assembling our control panel:
Instructions for building the control panel are split into multiple articles.
In this first part we'll show you how to prepare the enclosure and install the various external components. In the second part we'll install the internal components and provide wiring details. A last (optional) part provides details on adding a safe start interlock for safety.


