Control Panel (Part 1)
STEP 2: Seal cable plate
 You may skip this step if building from one of our control panel kits as the custom enclosure we include does not have a cable plate.
The removable cable plate is normally positioned on the bottom of the enclosure to house cable receptacles and other attachments to outside devices.
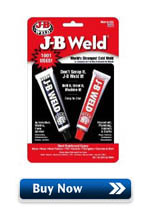
This plate is too small for all the receptacles we need to use so we epoxied it permanently to the enclosure using JB Weld cold weld compound. The cable plate also comes with a gasket to ensure a water tight seal. This is not needed since we're going to bond it permanently to the rest of the enclosure.
The enclosure was then oriented such that the plate is at the top (under the large heat sink).
The receptacles were installed on the opposite (bottom) side.
Removable cable plate:
Seal the removable cable tray using JB Weld. We wanted a flat surface so only the cable tray screws were used (not the nuts).
Use masking tape to the hold cable tray screws in place from underneath. This provides a place for the JB Weld to pool. Apply JB Weld around each screw end as shown below. Let dry overnight and then file down the screws ends and sand until the surface is flat.
The result should be a nearly flat surface ready for our heat sink.
Cable plate epoxied to the enclosure using JB Weld:


