Search
Complete Guide to Building Your Brewery

$19.95 USD

Support our site by using these affiliate links
Heating Elements
STEP 4: Punch a hole in the kettle
 Now comes the fun part: Putting a hole in your nice shiny new Blichmann Boilermaker kettle! We use the same GreenLee 1-1/4" chassis/radio punch to create a nice round hole that is 1-1/4" in diameter. This hole will let the threads of the heating element pass through.
As mentioned previously, make sure to purchase a chassis (sometimes called radio) punch to make this hole. Conduit punches are also available but their punch size does not actually match the size of the hole they make (the punch size is actually the NPT (national pipe thread) pipe size). When in doubt double check what size hole the punch will make before using it. The punch you want is the GreenLee 1-1/4" chassis/radio punch which makes a hole that is 1-1/4" (1.25") in diameter.
Decide how you want the heating element positioned inside the kettle. We suggest either to the left or right of the kettle (with the valve in front) and as low as possible. Keep in mind the conduit box that has to be positioned on the outside as it will limit how low you can install the heating element. If you place the heating element too high you may not be able to brew very small batches of beer as the element should always be 100% submersed when heating.
Don't rush this step. Think carefully about where you want the element installed. The last thing you want to do is punch a hole in the kettle and then later decide that it should have gone somewhere else.
In our Boil Kettle (BK) the center of the element is 4" from the bottom and on the right side. In our Hot Liquor Tank (HLT) the center of the element is 3" from the bottom and on the left side. The Boil Kettle element is installed slightly higher than the one in the Hot liquor tank as we have a large hop strainer installed in the boil kettle which sits on the bottom so the element could not be installed any lower. This places the element just below the 5 gallon marker in the boil kettle so 5 gallons is the minimum volume of beer we can produce with this setup. We typically brew 10-13 gallons.
We chose to install the heating elements on opposite sides of the kettles to keep the electrical boxes out of the way as seen in the photo below. In the end it would not have mattered on which sides we installed the elements.
Our kettles with heating elements installed.
The Boil Kettle (BK) is used to boil wort, the Hot Liquor Tank (HLT) is used to heat strike and sparge water: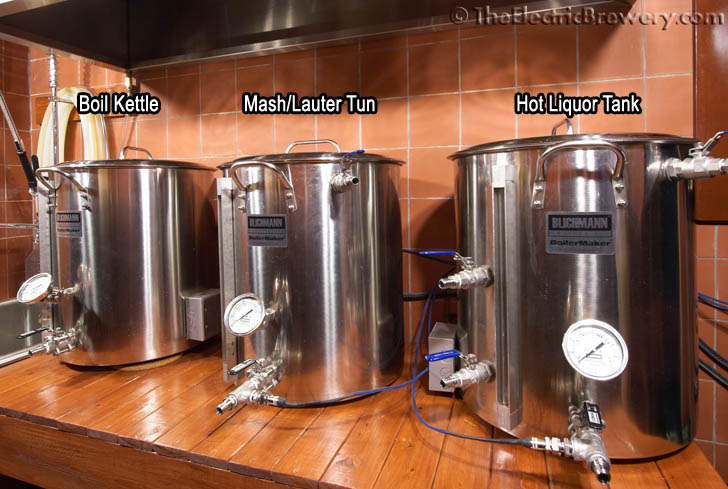
Mark the location where the heating element will be installed in the kettle with a Sharpie permanent marker:
Use the GreenLee 36414 1-3/8" step drill bit to drill a pilot hole in the kettle. Avoid cheap knockoff step drill bits as they simply don't last and end up costing you more in the end. Make sure to apply a few drops of cutting fluid first to prevent the bit from heating up. Hint: Use a hammer and a small nail to create a small dent first. This will prevent your step bit from jumping around and scratching up the nice new kettle:

A close-up of the pilot hole from the inside (see below). Even when used carefully a step bit will make quite a mess of the metal. This is why we don't recommend using regular bits, step bits, or hole saws to make precision holes. They will not be precise. They're only useful for making the initial pilot hole as we've done here.
Separate the GreenLee 1-1/4" chassis punch and place half on the inside and half on the outside of the kettle:

Using a wrench, turn the bolt on the punch to cut the hole in the kettle:
As the two halves are pulled together, the punch cutting edge easily cuts through the 18 gauge (1.2mm thick) wall:
Done! One perfectly round & clean hole with minimal effort:


