Search
Complete Guide to Building Your Brewery

$19.95 USD

Support our site by using these affiliate links
Heating Elements
STEP 3: Attach the cover plate to the bottom of the conduit box
 We want to permanently attach the metal cover plate with the hole in it to the bottom of the 2-gang conduit box.
We'll be using small nuts, bolts, and locking washers to ensure the two parts are electrically connected and then use JB Weld (epoxy) to bond the two parts together permanently.
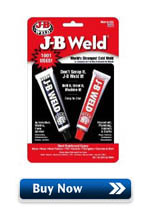
JB Weld forms a permanent bond that is as strong as steel. It's safe to use in heated environments up to 500F and is impervious to water, gasoline, chemicals, and acids (and beer). It's fantastic stuff!
File down the underside of the box so that that the cover will sit nice and flush. Using the cover plate screw holes as a guide, mark 4 holes on the box with a permanent marker and drill through:
Holes drilled. We're going to use the included machine screws, #6-32 hex nuts, and #6 locking washers to hold the cover on the bottom of the box along with some JB Weld:
Apply a bead of JB Weld around the 2-1/4" hole on the underside of the conduit box.
Sand around the hole on the underside of the cover:
Press the cover in place and remove to ensure that you've applied enough JB Weld to seal all around:
Screw down the cover using the included machine screws, #6-32 hex nuts, and #6 locking washers.
Clean away any excess JB Weld that oozes out. We want to keep the bare area of the cover clean.
Let the JB Weld dry overnight before continuing:
Some conduit boxes may have ground screws in different locations than shown in the pictures above, including near some of the holes we drilled for the machine screws to pass through. If this is the case with your conduit box, simply remove the ground screws (usually green) and file down the posts where they were attached (a Dremel rotary tool works well) to provide room for the machine screw, nut, and locking washer. In a later step we will be attaching the ground wire to one of these cover plate machine screws instead. Where the ground wire attaches is not critical. It simply needs to be properly grounded to the box chassis.
A ground post that must be removed/filed down:
To better match the stainless kettles, the box was primed with a general purpose grey enamel spray primer (shown below) and then spray painted with silver Rust-Oleum hammered metal finish (not shown - see finished photos further below) to give it a metallic finish. Any kind of primer and paint meant for metal will work.


