
|
|
|

|
 |
|
|
| View previous topic :: View next topic |
| Author |
Message |
jonymac
Joined: 18 Dec 2014
Posts: 145

|
 Link Posted: Thu Dec 24, 2015 12:48 am Post subject: JonyMac's Fermentation Refrigeration Controller Build Link Posted: Thu Dec 24, 2015 12:48 am Post subject: JonyMac's Fermentation Refrigeration Controller Build |
 |
|
A number of you have asked about the build of my fermentation refrigeration controller. I am posting this out of town on vacation, so cannot look at the controller directly, so I will need to work on a wiring diagram in a future post. For the build, I researched lots of different controllers and lots of different ways people mounted their controllers. CAVEAT: I am SURE there are probably lots of better ways to go about this - this is just one way, knowing you guys, you will take the concept and improve on it immensely and I will rebuild mine to match.
I wanted a system that:
1. Mounted all in one place in one box so I could remotely view the temps with my webcam
2. Looked like Kal's brewing controller so they looked like a matched pair
3. Was the same color scheme and LED colors as Kal's
4. Was safe and reliable for someone with no electrician's background
5. Had a weather station that monitored temp and humidity in the brewery and outside
This system does the following:
1. Controls temp for keezer (8kegs and 2 cooling reservoirs), freezer (for hops storage and 50' copper cooling loop for tap pump), cooler (for conditioning/lagering 4 kegs, keeping glasses cool, storing harvested yeast, curing cheese) and tap pump (for keeping beer pouring at a frosty 39º). I use flashing indicator lamps to visually see when calls fro cooling kick on and the compressor runs.
2. Controls 3 separate conicals - each has its own aquarium pump and seat heaters tied to a controller for cooling and heating each fermenter separately. In my current configuration, I have it set to either heat or cool, I haven't played with it yet to switch it to combined mode - and after brewing 10 batches, haven't seen a compelling reason to do so. I use flashing red lamps to show when call for heating is made and flashing blue lamps to show when calls for cooling is made.
3. Displays weather, time, date, and temperature and humidity in brewery and outside - cuz it looks cool and I love watching weather.
---
So it was early in thinking about my brewery build that I decided to let The Electric Brewery build my brew controller so I could focus on this controller and the rest of the build - I didn't want to build and troubleshoot two boxes.
I was easy enough to look at Kal's build list and pick up the box, handles, paint, etc. that was needed to match his box. I already had the punch tools from building my kettles. Other tools needed were a good soldering iron, grinder, coping saw, jig saw, sandpaper, files of various sizes, primer, paint, etc.
Here is a ROUGH list of parts based on memory and confirmation emails - prices are what I paid. Kal's box and handles, heat sink and such you can get from his list of parts.
- 1 La Crosse Technology Wireless Atomic Digital Color Weather Forecast Station with Alerts and Remote Sensor - Black - $48
- 4 Love controllers from Dwyer Instruments: Series TSX3 Digital Refrigeration Temperature Switch - Blue LED, Silver Case - $70
- 4 TS2 Temp Probes from Dwyer instruments
- 3 WH7016C Digital Temperature Controller Thermostat Range -50 ~ 110 deg C Controllers - these are the same controller used by SSBrewtech for their FTSS system - I bought the FTSS kit from SSBrewtech for this build.
- 7 uxcell Angeleye lighted green 12v LED ring power switches - ebay - $7.50
- 3 uxcell Angeleye lighted red 12v LED ring power switches - ebay - $7.50
- 3 uxcell Angeleye lighted blue 12v LED ring power switches - ebay - $7.50
- 4 flashing yellow 12v LED indicator lamps - ebay - $7.50 (shows when compressor is running for refrigeration)
- 3 flashing red 12v LED indicator lamps - ebay - $7.50 (shows when heating is called for for fermenters)
- 3 flashing blue 12v LED indicator lamps - ebay - $7.50 (shows when cooling is called for for fermenters)
- 4 24-480V AC DC to 3-32VDC Output Single Phase SSR Solid State Relay 40A - 120v to 12v relay to be mounted to heat sink - $10
- 4 JACKYLED New DC 12V 2A 2.0A Switching Power Supply Adapter For 110V- 240V AC 50/60Hz 2.1mm - used with relays and controllers - $6.25
- 2 Alpinetech NPL-22 Green 22mm 120V AC/DC LED Pilot Indicator Light - $6 - used to show power strip power status
- 2 power strips
- 2 4pc Universal 12V Carbon Fiber Winter Heated Seat Heater Heating Cover Pad Mat - amazon - $40 for heating fermenters
- 3 Sports Imports LLC Illuminated Seat Heater Hi/lo/off Round Rocker Switch - used to switch between heating and cooling for fermenters - $4
- Labels - I sent off for labels from Kal's link
- Lots of wire and connectors, shrink tubing, solder, etc.
I started with a sketch and ended up changing the layout once all the parts came in:
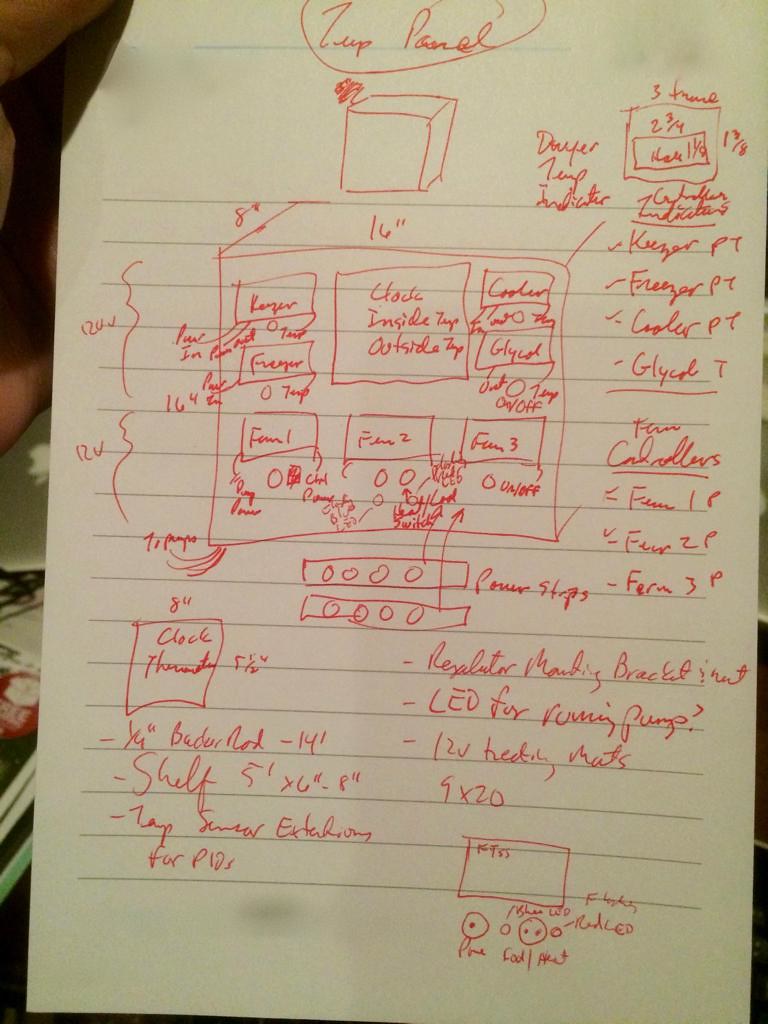 IMG_8859 by jonymac, on Flickr IMG_8859 by jonymac, on Flickr
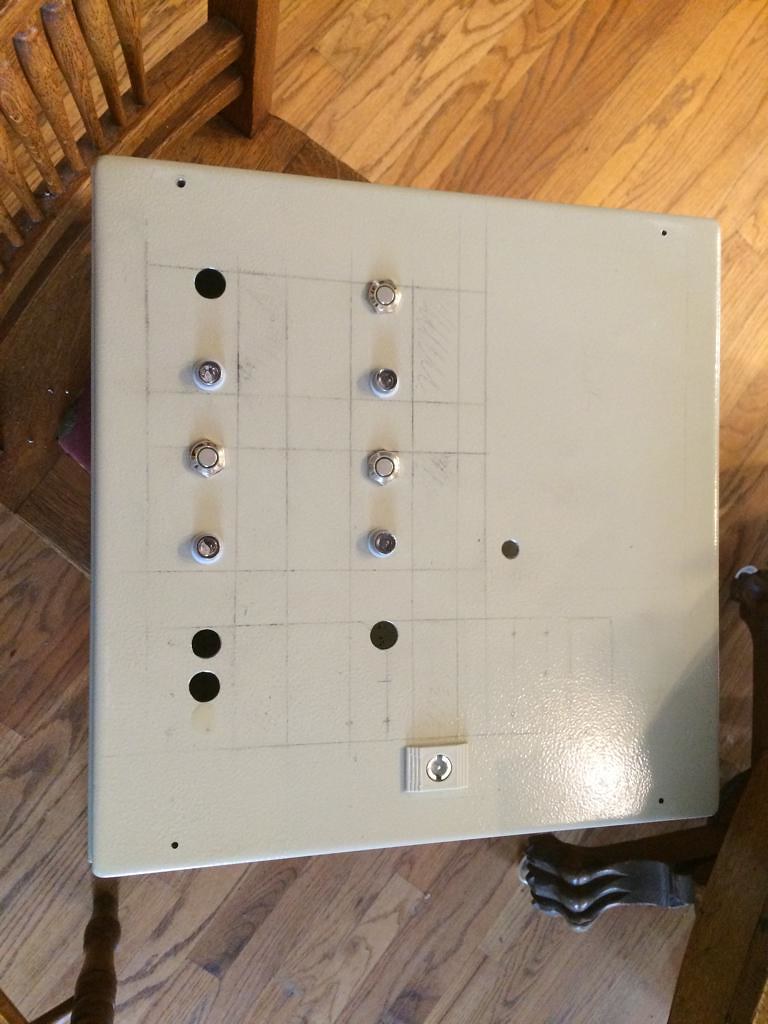 IMG_8949 by jonymac, on Flickr IMG_8949 by jonymac, on Flickr
Laying out the panel front - should have gotten a drill press for this, maybe everything would have lined up....
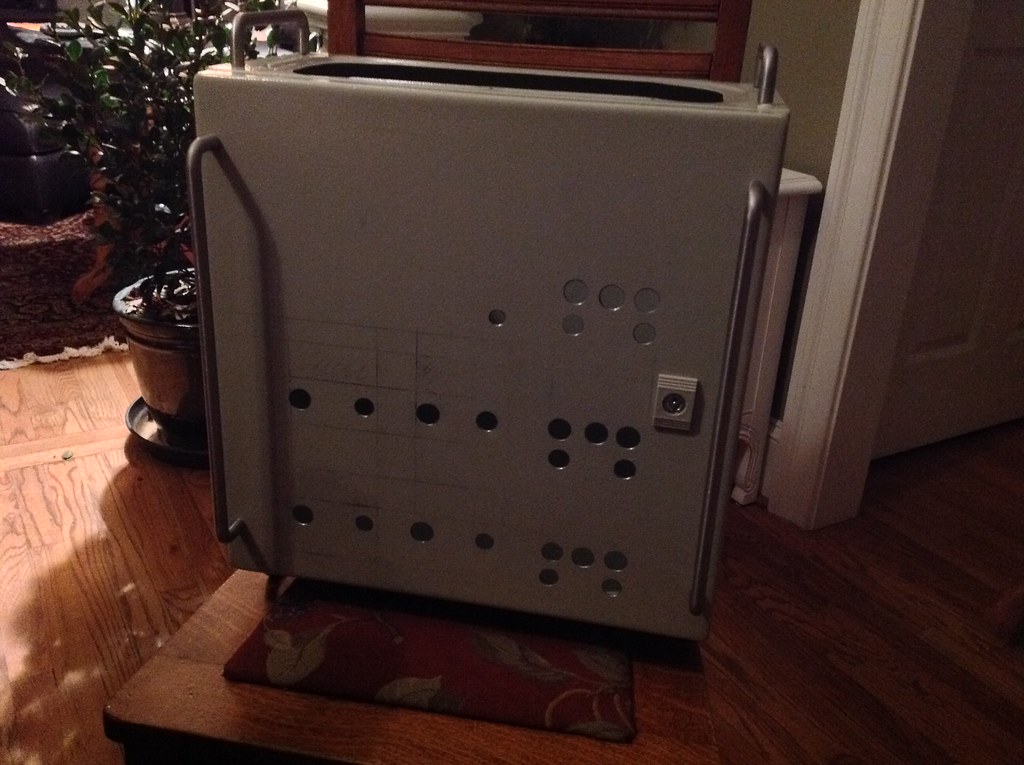 IMG_0536 by jonymac, on Flickr IMG_0536 by jonymac, on Flickr
Handles mounted.
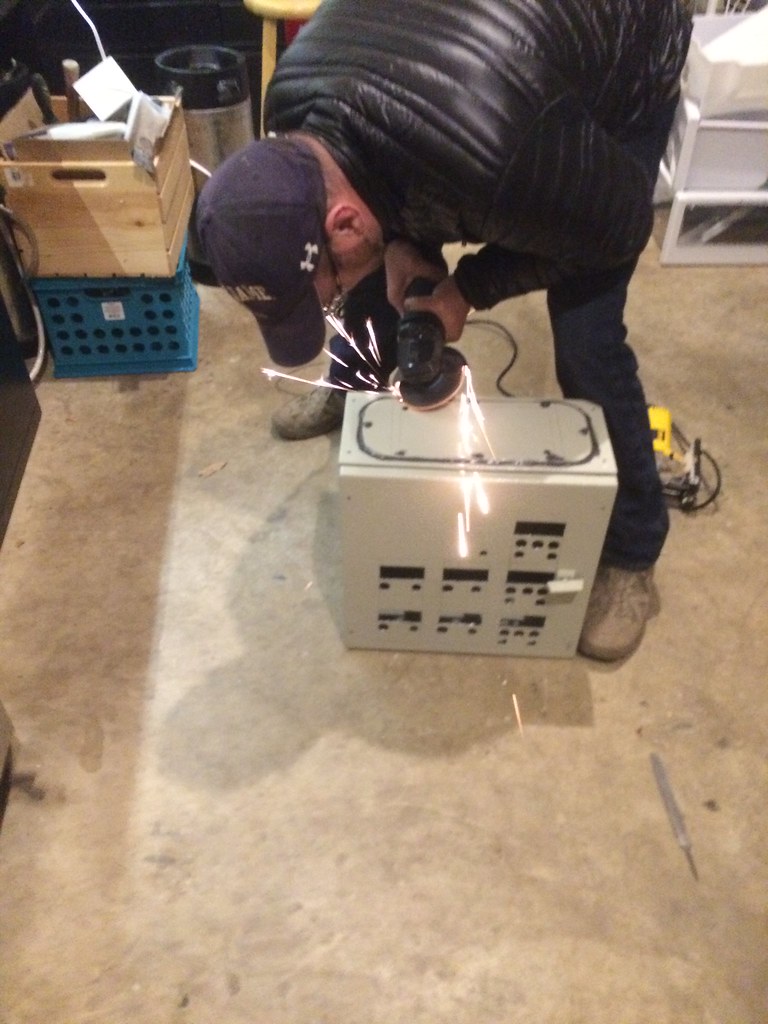 IMG_9001 by jonymac, on Flickr IMG_9001 by jonymac, on Flickr
Used JB Weld for the top, grinding off the screw ends - note the safety glasses - thanks SWMBO!
Grinding Video! https://youtu.be/-qGRfK_-n6k
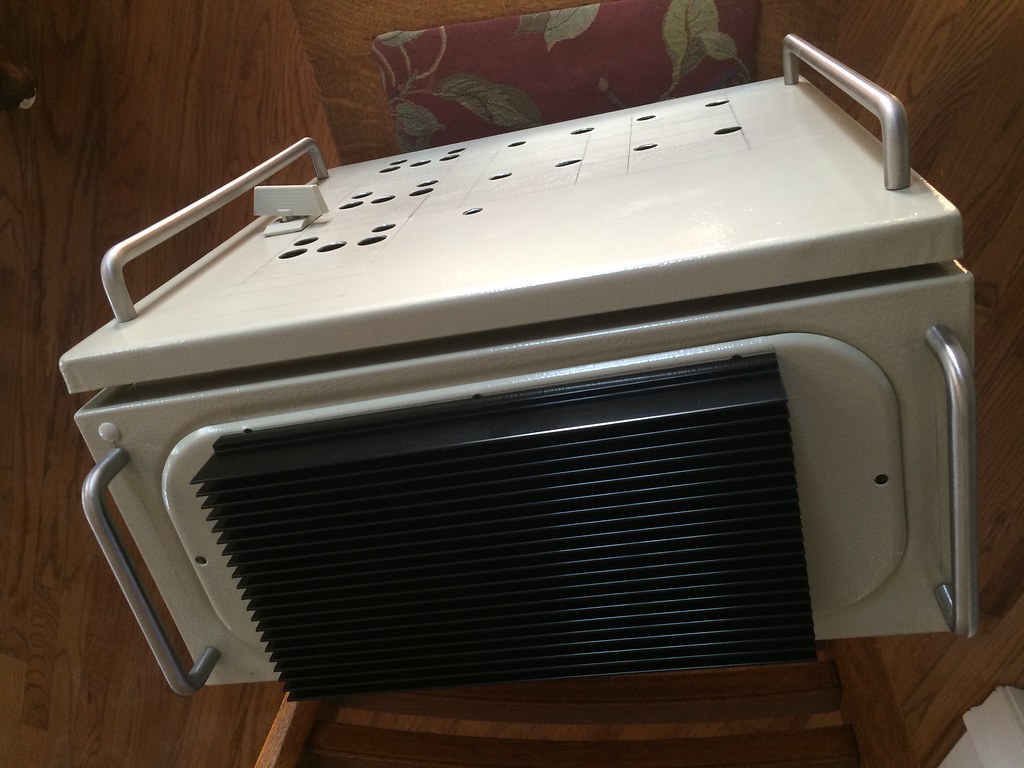 IMG_8975 by jonymac, on Flickr IMG_8975 by jonymac, on Flickr
Heat sink and handles installed.
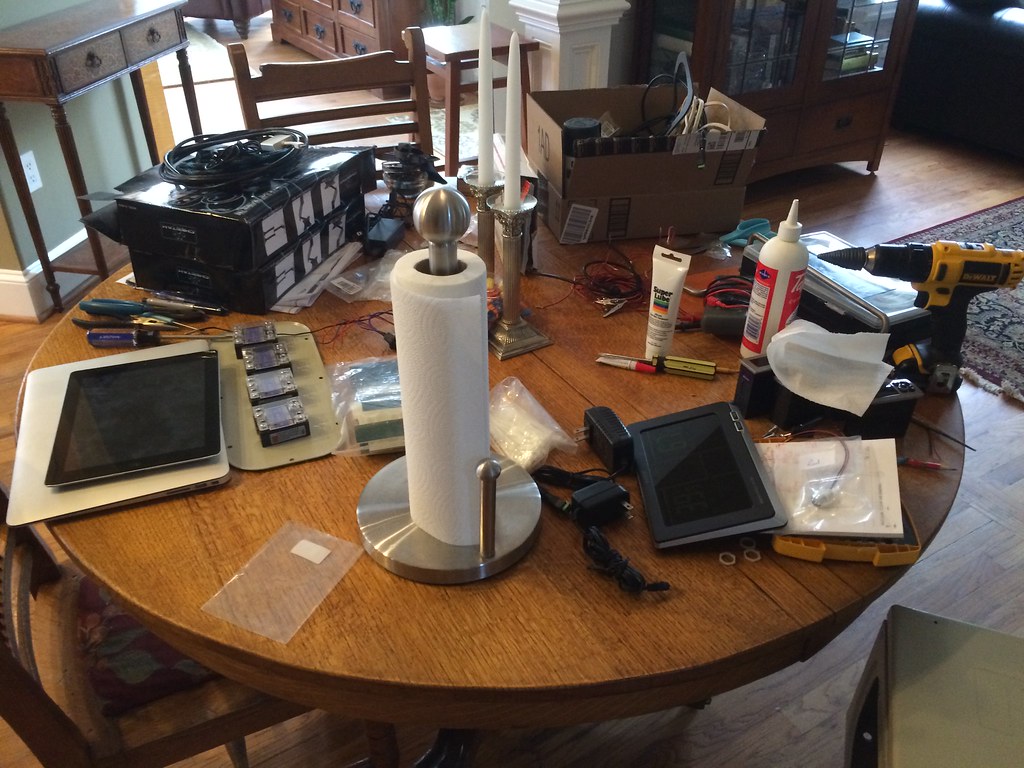 IMG_8950 by jonymac, on Flickr IMG_8950 by jonymac, on Flickr
Work table full of stuff.
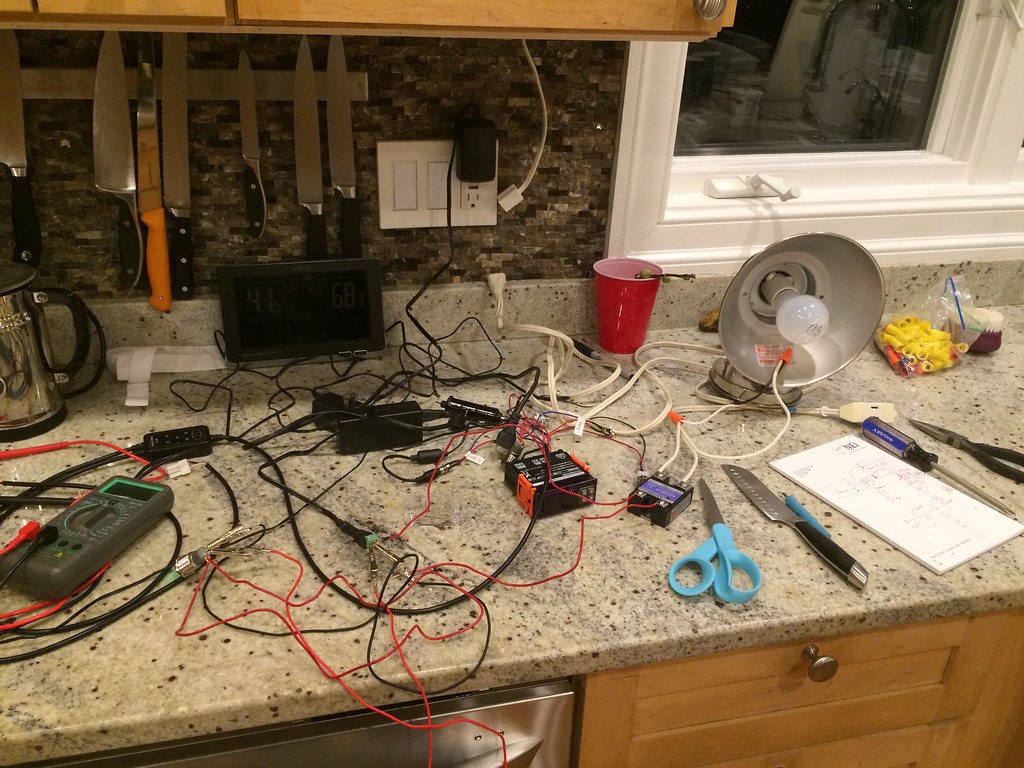 IMG_8943 by jonymac, on Flickr IMG_8943 by jonymac, on Flickr
More wiring.
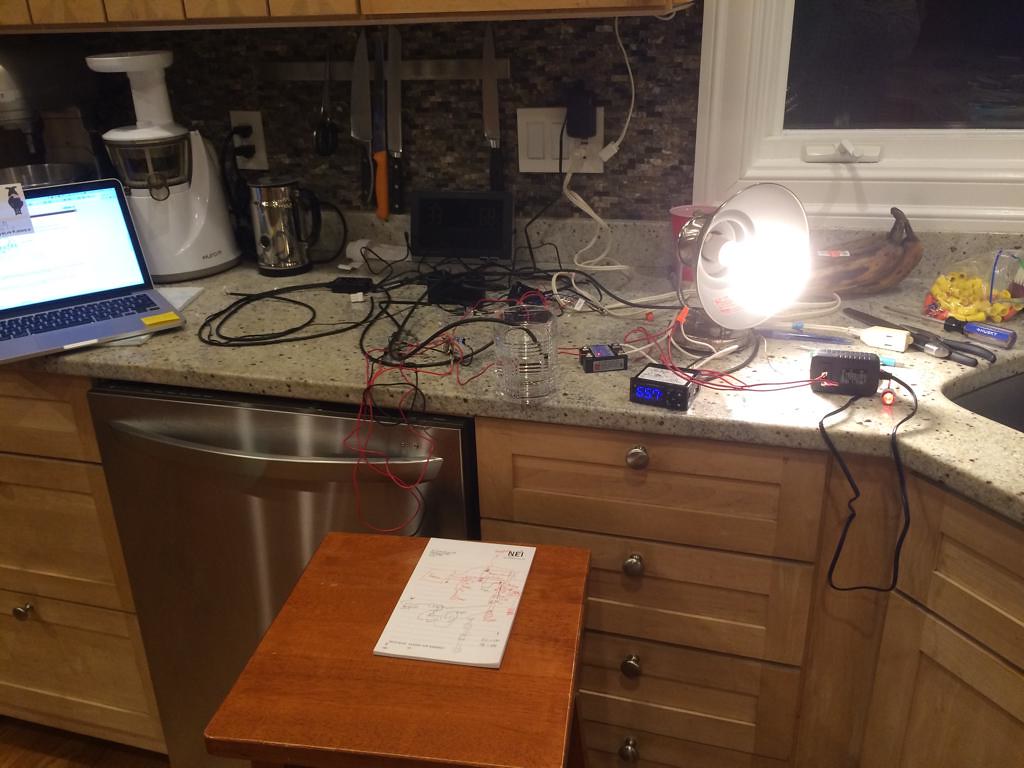 IMG_8944 by jonymac, on Flickr IMG_8944 by jonymac, on Flickr
Even more wiring - using a light as a test keezer.
 IMG_8999 by jonymac, on Flickr IMG_8999 by jonymac, on Flickr
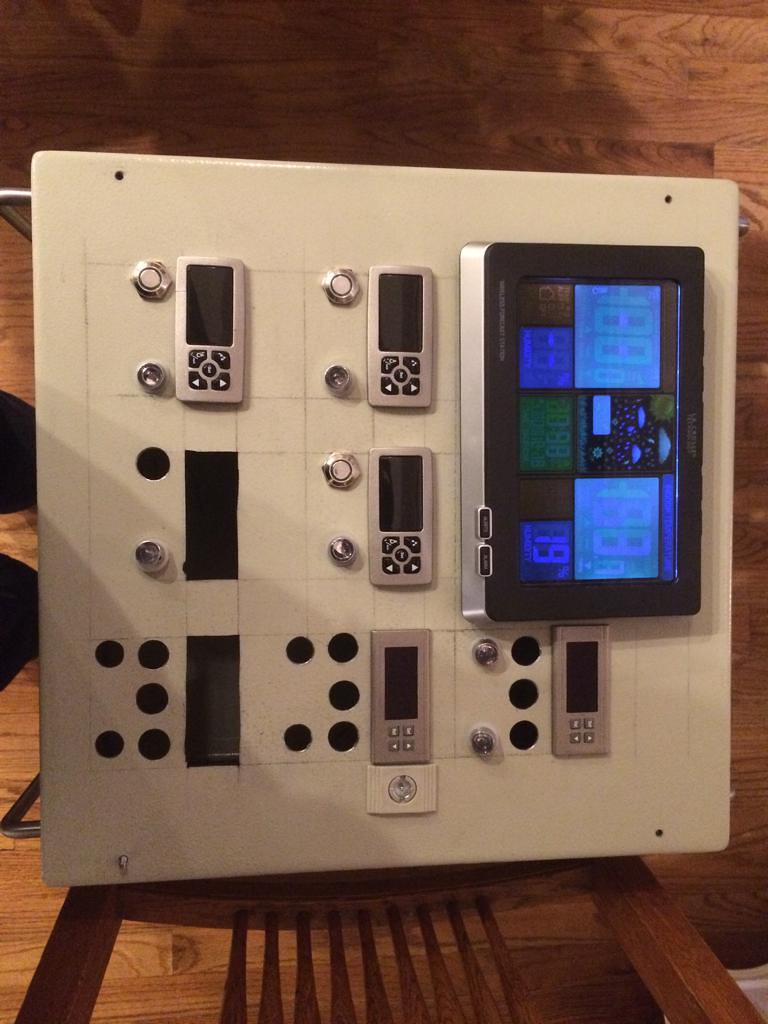
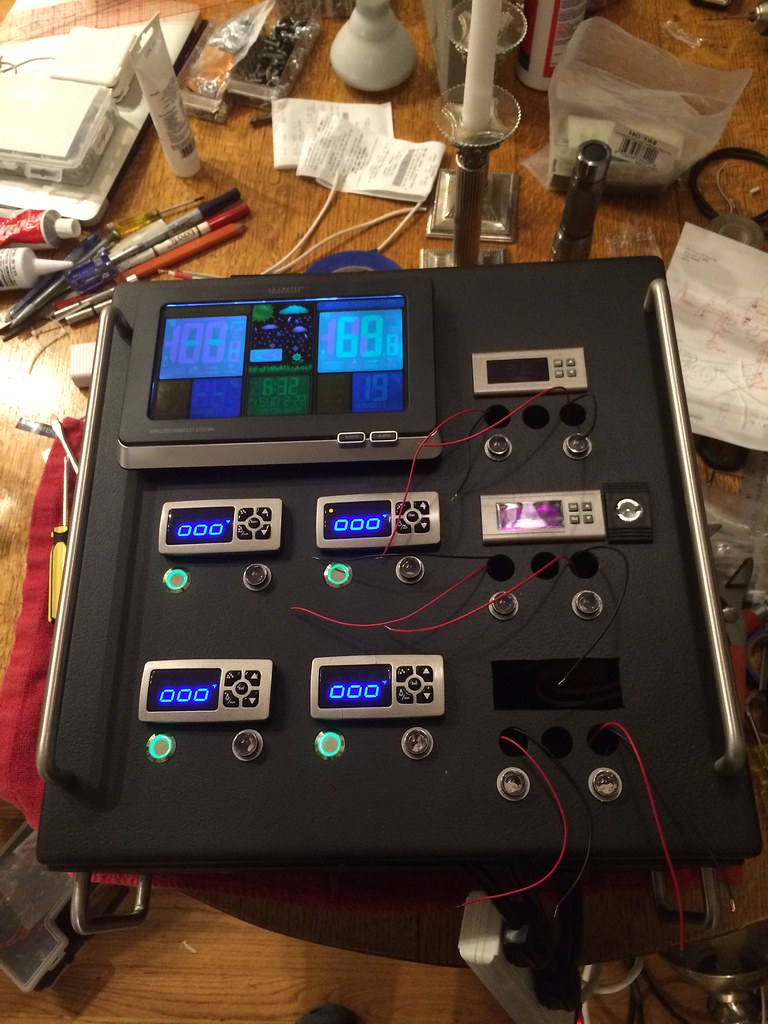
Starting to mount the controllers and weather station.
 IMG_9016 by jonymac, on Flickr IMG_9016 by jonymac, on Flickr
After painting.
 IMG_9029 by jonymac, on Flickr IMG_9029 by jonymac, on Flickr
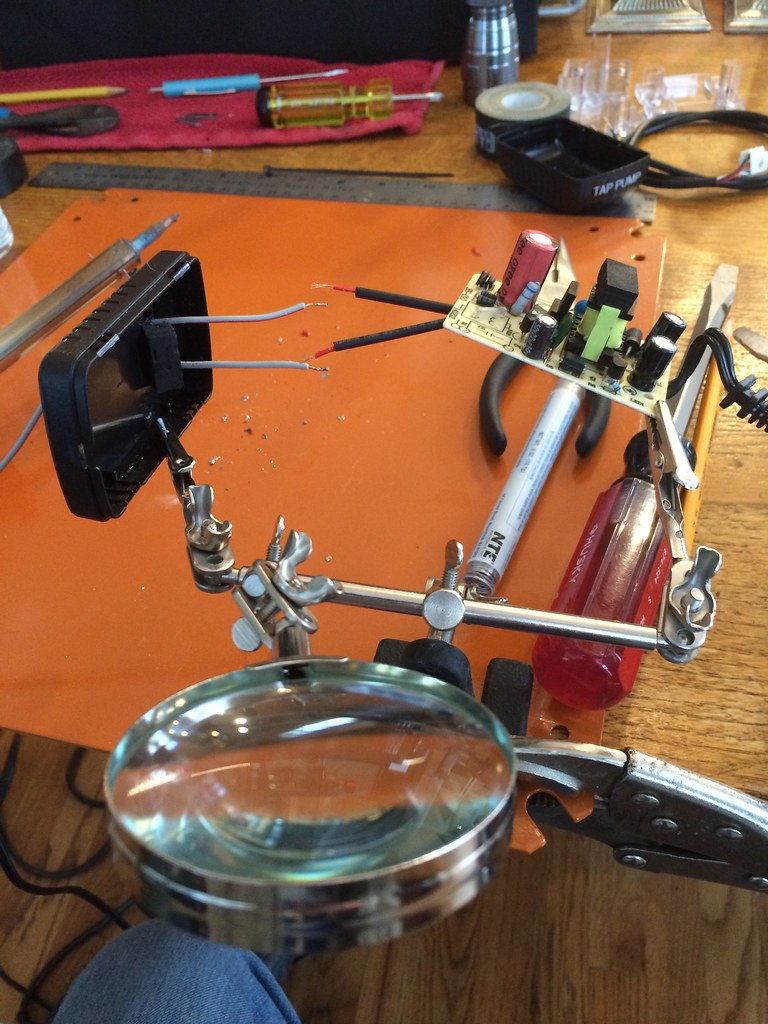
Rewiring power adapters.
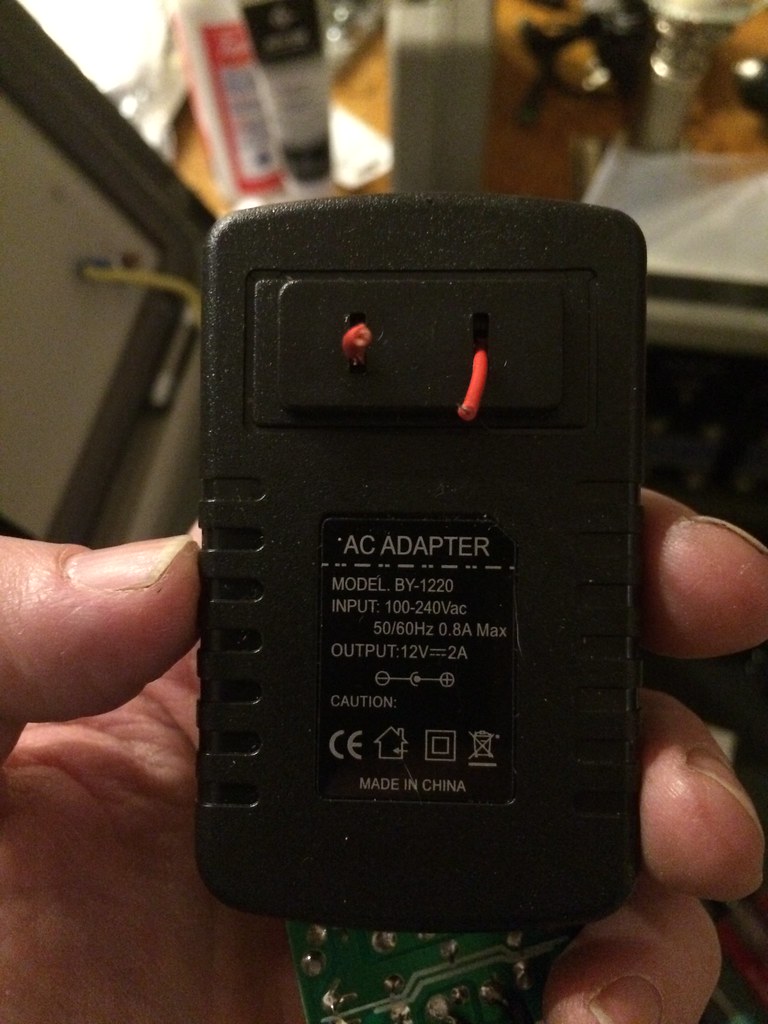 IMG_9018 by jonymac, on Flickr IMG_9018 by jonymac, on Flickr
Pulled the blades and inserted wires.
 IMG_9019 by jonymac, on Flickr IMG_9019 by jonymac, on Flickr
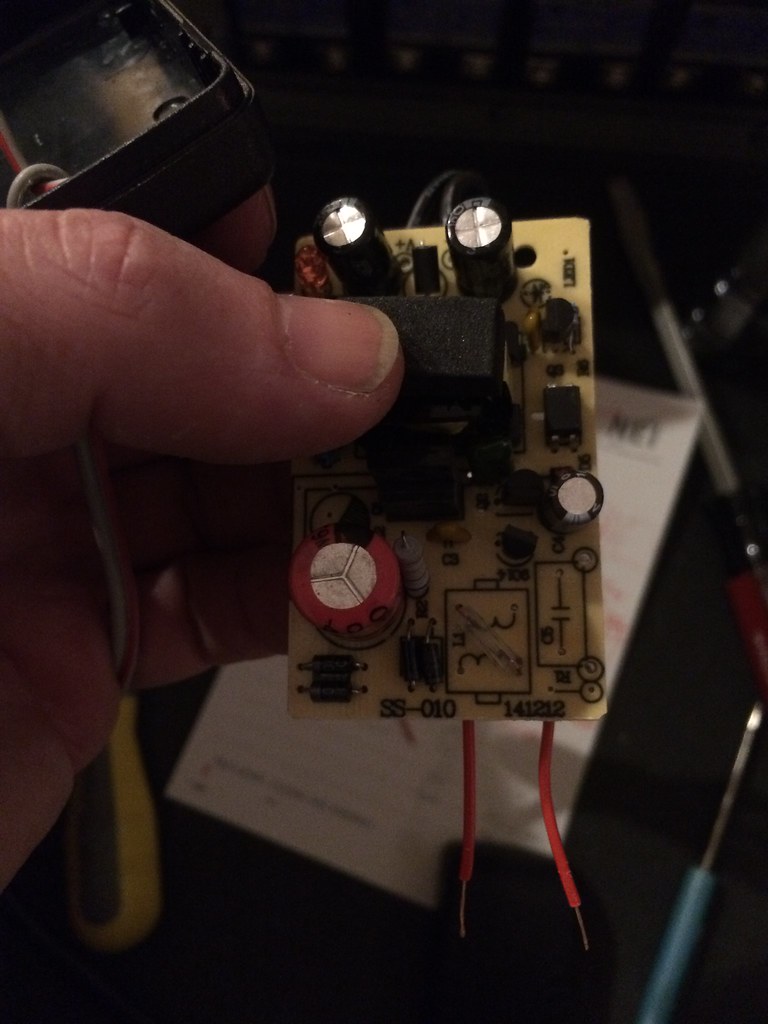
Power converter board.
 IMG_8889 by jonymac, on Flickr IMG_8889 by jonymac, on Flickr
Testing SS Brewtech pump controller.
 IMG_8838 by jonymac, on Flickr IMG_8838 by jonymac, on Flickr
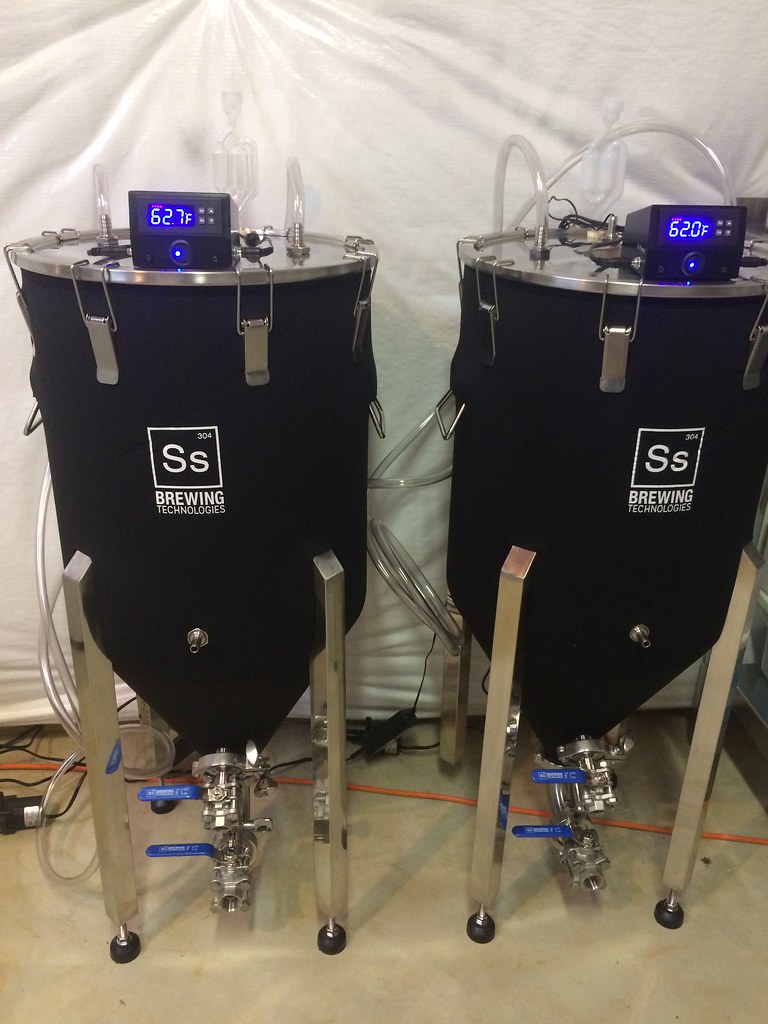
SS Brewtech Controllers the way they were designed to work on the fermenters.
 IMG_9028 by jonymac, on Flickr IMG_9028 by jonymac, on Flickr
Starting wiring up the controller for reals.
 IMG_9060 by jonymac, on Flickr IMG_9060 by jonymac, on Flickr
Everything wired and operational.
 IMG_9032 by jonymac, on Flickr IMG_9032 by jonymac, on Flickr
First power ups!
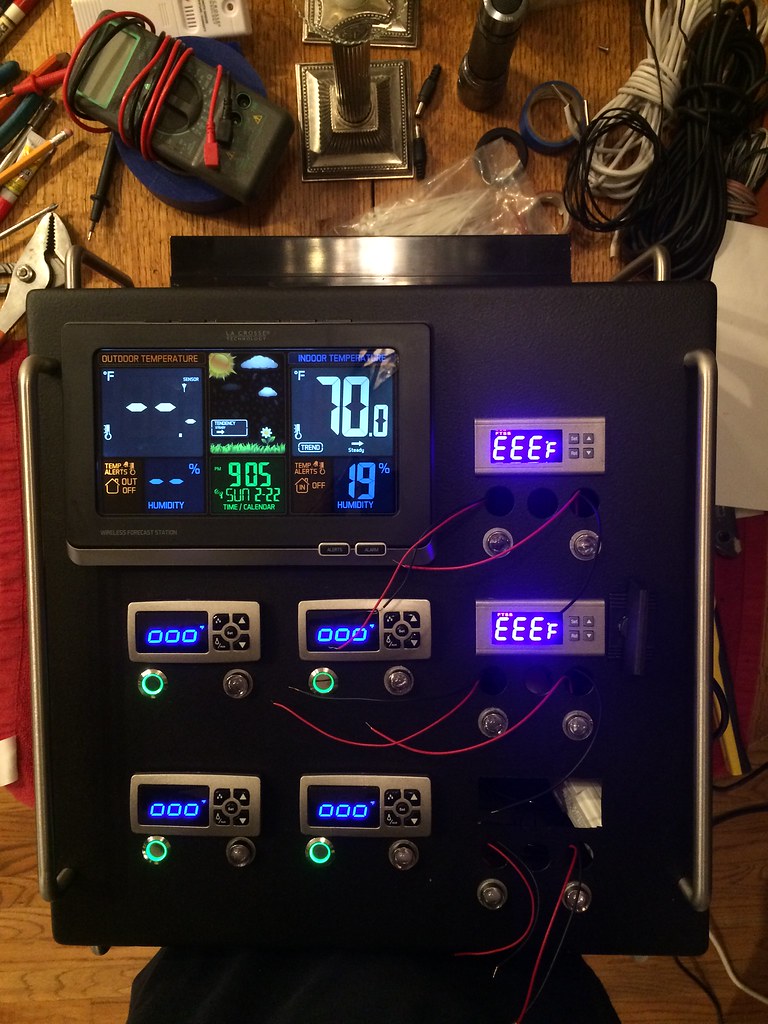 IMG_9033 by jonymac, on Flickr IMG_9033 by jonymac, on Flickr
Testing continues.
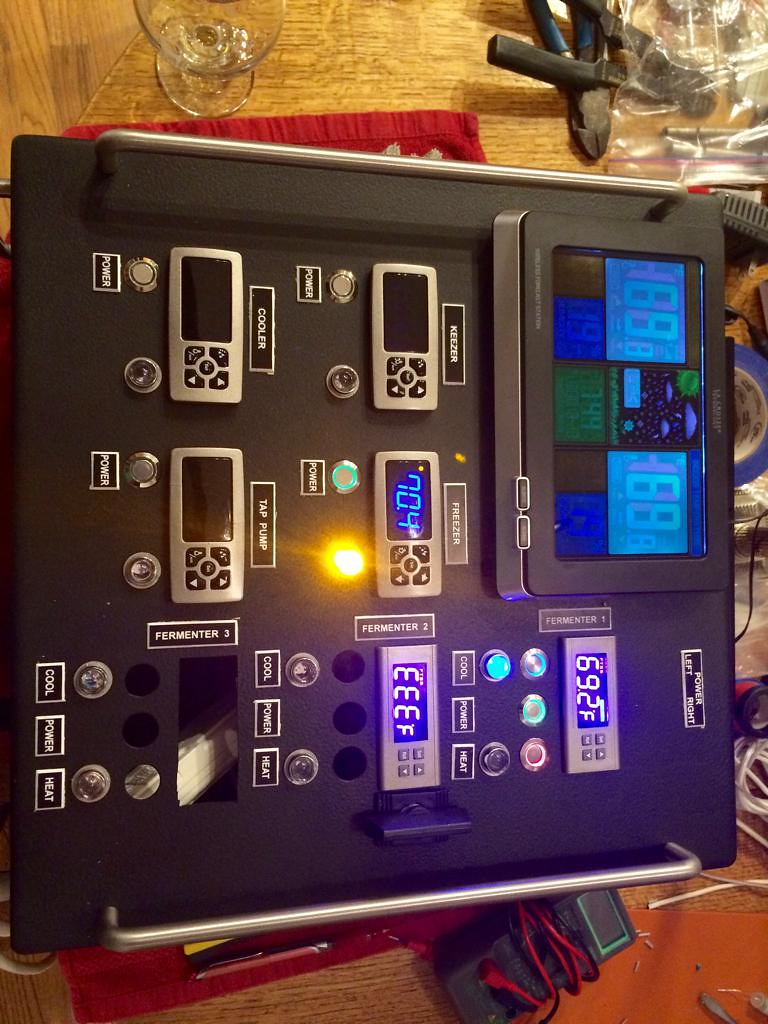 IMG_9055 by jonymac, on Flickr IMG_9055 by jonymac, on Flickr
More testing.
 IMG_9059 by jonymac, on Flickr IMG_9059 by jonymac, on Flickr
Even more testing.
 IMG_9084 by jonymac, on Flickr IMG_9084 by jonymac, on Flickr
All working!
Video of panel working with all working lights engaged: https://youtu.be/NwTyNAHTCiA
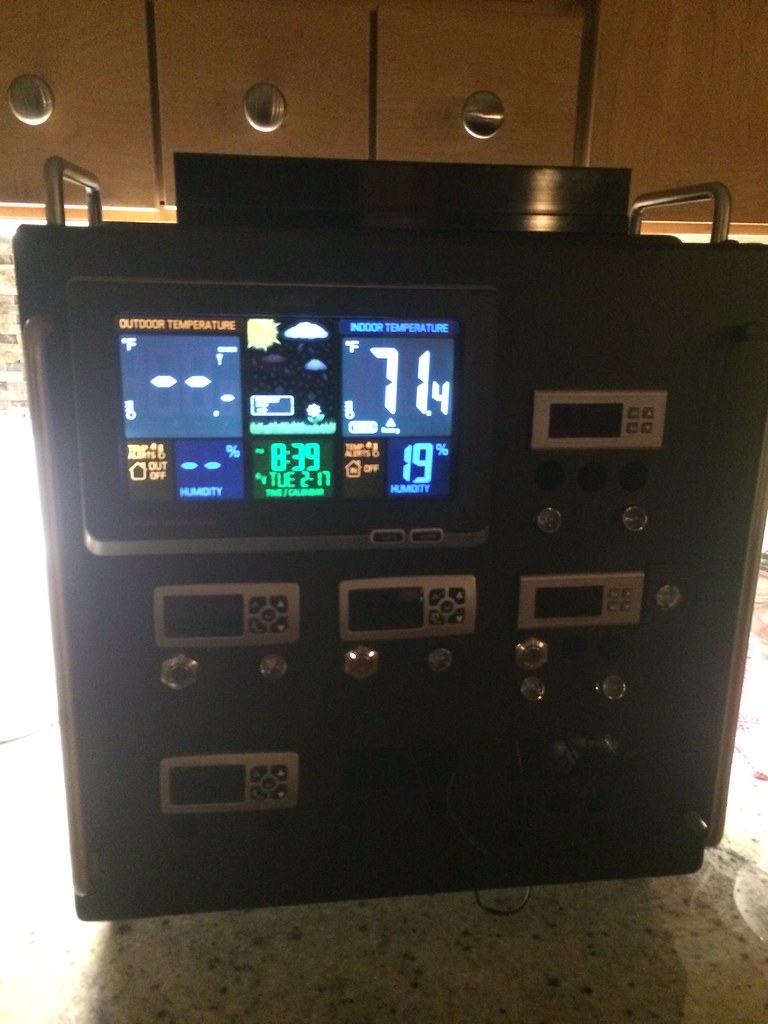
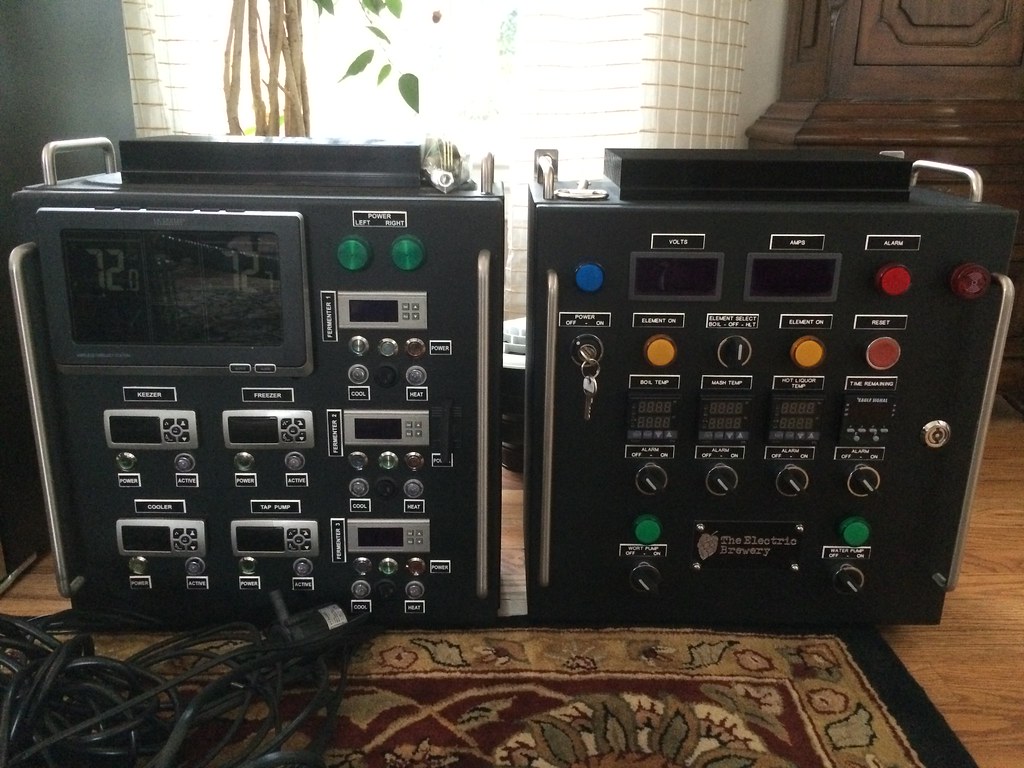 IMG_9103 by jonymac, on Flickr IMG_9103 by jonymac, on Flickr
A matched pair!!
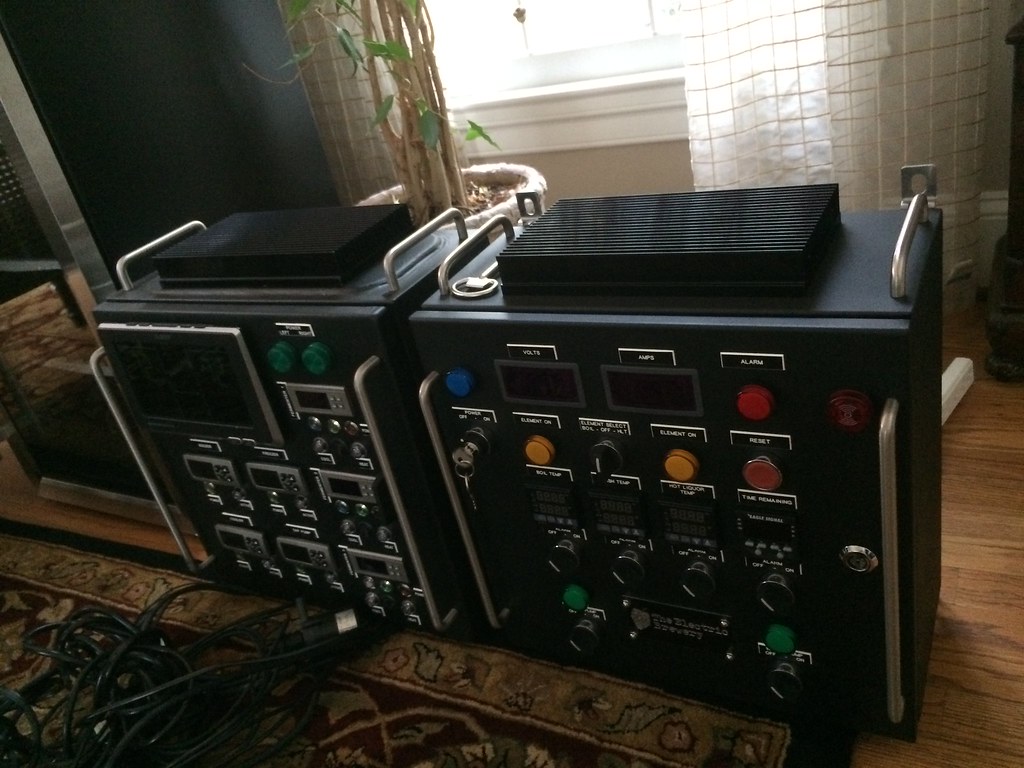 IMG_9104 by jonymac, on Flickr IMG_9104 by jonymac, on Flickr
Sweet!
 IMG_9725 by jonymac, on Flickr IMG_9725 by jonymac, on Flickr
Starting the wiring process.

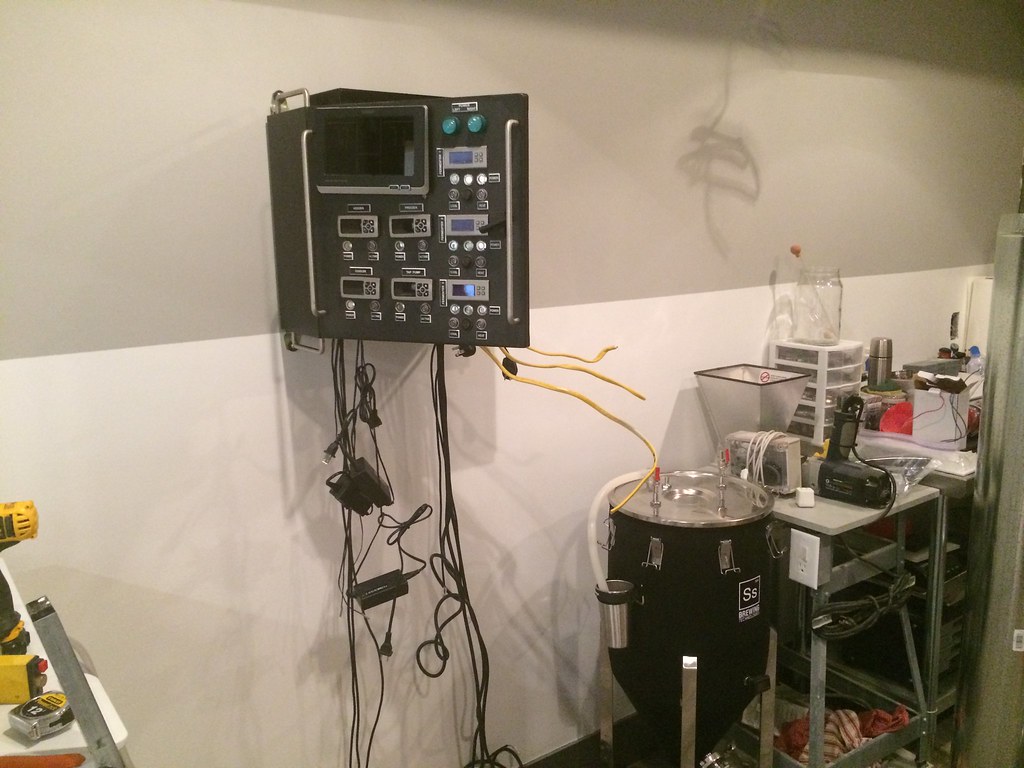
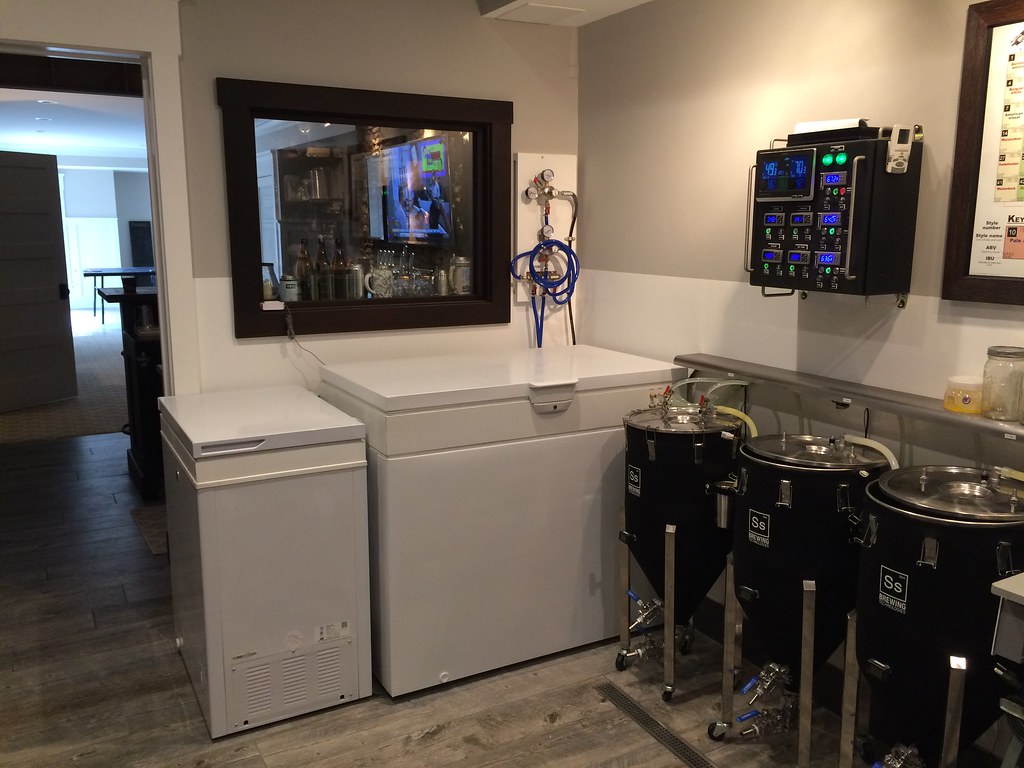
Mounting controller to wall - cut the back out and mounted it over a double GFCI outlet. Wired in the Keezer, Freezer and Cooler directly to the solid state relays. The rest of the wires are leads for temperature sensors and power leads from the appliances.
 IMG_9731 by jonymac, on Flickr IMG_9731 by jonymac, on Flickr
Ran all the wiring behind the wall and under the stainless shelf.
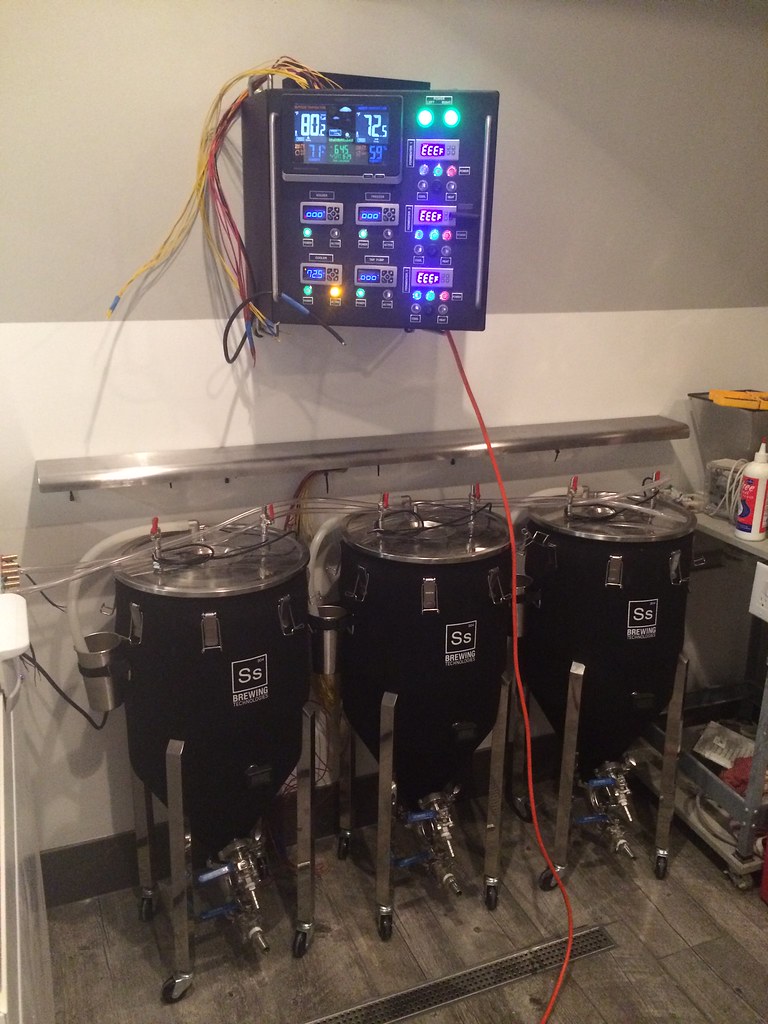
 IMG_9745 by jonymac, on Flickr IMG_9745 by jonymac, on Flickr
Up and completely operational controlling all devices prior to first brew.
Video of panel working on wall of brewery: https://youtu.be/R7ATFciW_VI
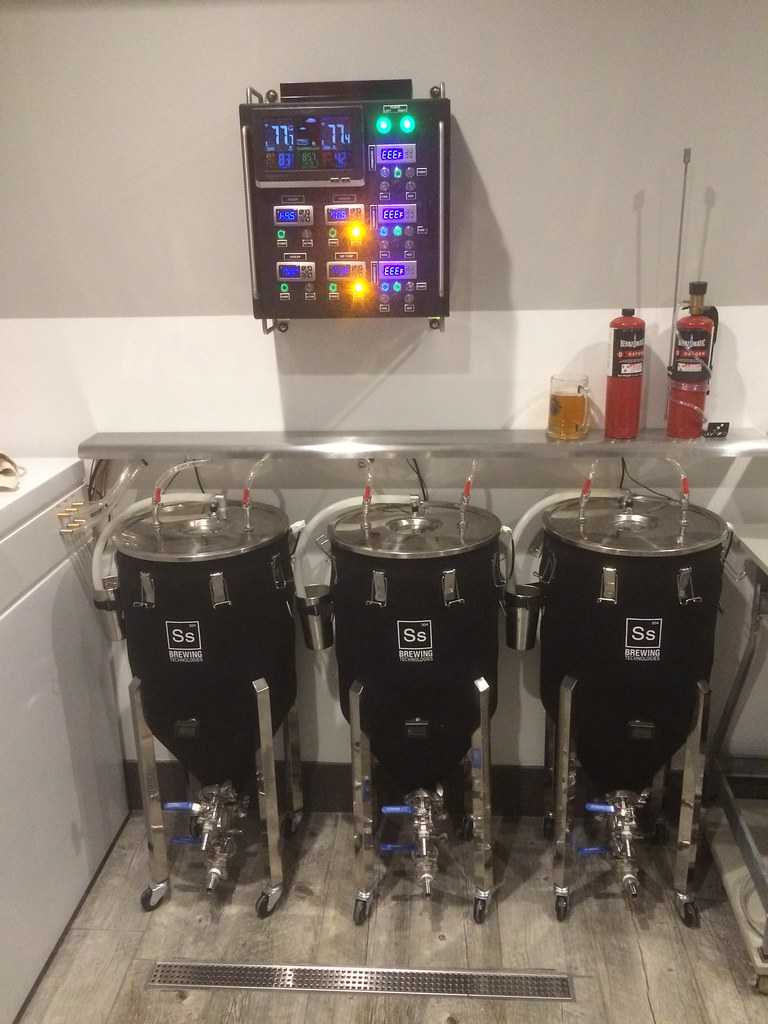
 IMG_9727 by jonymac, on Flickr IMG_9727 by jonymac, on Flickr
I'm ready for my close up!
 IMG_0159 by jonymac, on Flickr IMG_0159 by jonymac, on Flickr
Everything working as planned!
_________________
JonyMac's Stillwater Home Brewery Build
http://www.theelectricbrewery.com/forum/viewtopic.php?p=314470#314470
Last edited by jonymac on Mon Oct 09, 2017 9:51 pm; edited 2 times in total
|
|
| Back to top |
|
 |
kal
Forum Administrator

Joined: 12 Dec 2010
Posts: 11121
Location: Ottawa, Canada
Drinking: Pub Ale, Electric Creamsicle, Mild, Pliny the Younger, Belgian Dark Strong, Weizen, Russian Imperial Stout, Black Butte Porter
|
|
| Back to top |
|
|
rcrabb22
Joined: 23 Dec 2010
Posts: 462
Location: Illinois
|
| Link Posted: Sat Dec 26, 2015 3:59 pm Post subject: |
|
|
|
I am making an assumption there are multiple circuits from your home load center to provide power to the different units being controlled. How many circuits do you use?
|
|
| Back to top |
|
|
kal
Forum Administrator
Joined: 12 Dec 2010
Posts: 11121
Location: Ottawa, Canada
Drinking: Pub Ale, Electric Creamsicle, Mild, Pliny the Younger, Belgian Dark Strong, Weizen, Russian Imperial Stout, Black Butte Porter
|
| Link Posted: Sat Dec 26, 2015 4:23 pm Post subject: |
|
|
The temp controller box is (should be) all low current so a single 15A / 120V outlet should be more than is required. I doubt it even pulls a 1A when in use. Jonymac can confirm.
The fridges / freezers should all be on separate 15A circuits if possible. They themselves only draw 1-2A when under load but they have a huge inrush of current when first turned on which can cause issues of you ever have a power outage: The power comes back all of a sudden and if all those compressors are on the same circuit you may blow the breaker.
Kal
_________________
Our new shop with over 150 new products: shop.TheElectricBrewery.com
We ship worldwide and support our products and customers for life.
Purchasing through our affiliate links helps support our site at no extra cost to you. We thank you!
My basement/bar/brewery build 2.0
Last edited by kal on Sat Dec 26, 2015 7:08 pm; edited 1 time in total
|
|
| Back to top |
|
|
rcrabb22
Joined: 23 Dec 2010
Posts: 462
Location: Illinois
|
| Link Posted: Sat Dec 26, 2015 4:49 pm Post subject: |
|
|
| kal wrote: | The temp controller box is (should be) all low current so a single 15A / 120V outlet should be more than is required. I doubt it even pulls a 1A when in use.
The fridges / freezers should all be on separate 15A circuits if possible. They themselves only draw 1-2A when under load but they have a huge inrush of current when first turned on which can cause issues of you ever have a power outage: The power comes back all of a sudden and if all those compressors are on the same circuit you may blow the breaker.
Kal |
Then the question I have is based on his parts list. There are 4 SSRs in his parts list. What are they for if not to feed power to the 2 freezers, tap room cooler and tap pump?
| Quote: | | 4 24-480V AC DC to 3-32VDC Output Single Phase SSR Solid State Relay 40A - 120v to 12v relay to be mounted to heat sink - $10 |
|
|
| Back to top |
|
|
kal
Forum Administrator
Joined: 12 Dec 2010
Posts: 11121
Location: Ottawa, Canada
Drinking: Pub Ale, Electric Creamsicle, Mild, Pliny the Younger, Belgian Dark Strong, Weizen, Russian Imperial Stout, Black Butte Porter
|
|
| Back to top |
|
|
jonymac
Joined: 18 Dec 2014
Posts: 145
|
| Link Posted: Sat Dec 26, 2015 8:03 pm Post subject: |
|
|
Kal is correct.
I have 1 15A GFCI circuit feeding the ferm/fridge controller - the outlet is mounted on the wall behind the box and I have cut the back of the box out and mounted it over the outlet. I have one power strip coming out of each of the two outlets mounted in the box. One power strip feeds the weather station, freezer, cooler and tap pump; the other powers the keezer and fermentation pumps. The SSRs control the refrigeration and the tap pump - my LOVE controllers are low voltage and they complete the circuit through the SSRs. The controllers that came with the SS Brewtech FTSS system are low voltage on both sides so do not require SSRs. (I hope that makes sense - not being an electrician, I am not sure of the proper terms.)
Here are some pics - note - this is version 1 of my box and looks nothing like the professional results from SpikeInnovations... Maybe version 2 could be awesome... However, the system works flawlessly, we have lost power at least two times since I went online with the system, and I haven't blown the circuit. The frequency of compressor kick on from highest to lowest is: Keezer, Cooler, Freezer, Tap Pump. My compressors don't run very often either.
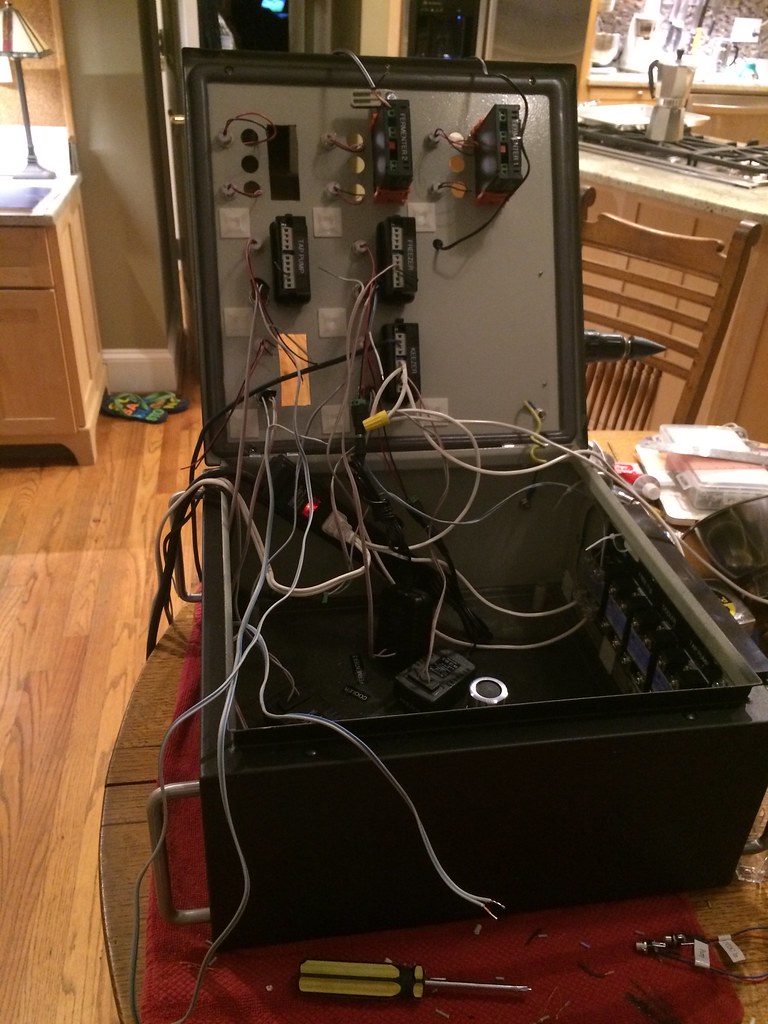
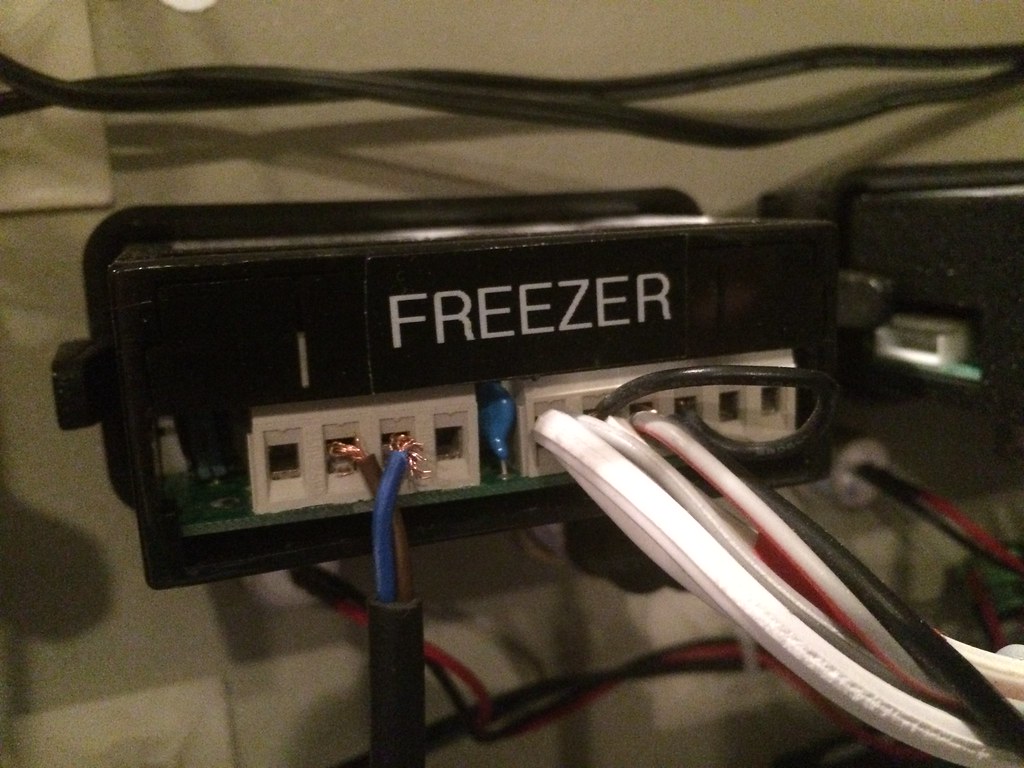
Here are some pics from the internals of the box:

The yellow wires come directly from the outlets that the keezer, cooler and freezer are plugged into. The outlets have both my power strips plugged into them. At the bottom are the transformers for the pumps.

SSRs for relaying power from LOVE controllers.

Wall warts for powering LOVE controllers.

Rear of front door.

Lookie what Santa brought!!
_________________
JonyMac's Stillwater Home Brewery Build
http://www.theelectricbrewery.com/forum/viewtopic.php?p=314470#314470
|
|
| Back to top |
|
|
rcrabb22
Joined: 23 Dec 2010
Posts: 462
Location: Illinois
|
| Link Posted: Sat Dec 26, 2015 8:49 pm Post subject: |
|
|
My thinking is a little cloudy today. Must be the sugar plums still dancing in my head........
I will isolate my understanding of your system to the freezer as I think the keezer, conditioning cooler and tap pump are similar.
If I follow it correctly, the hot wire of the power cord from the power strip to the freezer goes to an SSR hot input terminal and then the hot output goes to the freezer itself along with the neutral wire. The Love controller signals the SSR to close or open the circuit as needed to keep the freezer at temperature.
You have (1) 15A circuit feeding your entire post brewing temperature control system.
|
|
| Back to top |
|
|
jonymac
Joined: 18 Dec 2014
Posts: 145
|
|
| Back to top |
|
|
rcrabb22
Joined: 23 Dec 2010
Posts: 462
Location: Illinois
|
| Link Posted: Tue Dec 29, 2015 1:00 am Post subject: |
|
|
|
Thanks jonymac!
|
|
| Back to top |
|
|
jonymac
Joined: 18 Dec 2014
Posts: 145
|
| Link Posted: Thu Jan 07, 2016 4:56 am Post subject: |
|
|
| rcrabb22 wrote: | My thinking is a little cloudy today. Must be the sugar plums still dancing in my head........
I will isolate my understanding of your system to the freezer as I think the keezer, conditioning cooler and tap pump are similar.
If I follow it correctly, the hot wire of the power cord from the power strip to the freezer goes to an SSR hot input terminal and then the hot output goes to the freezer itself along with the neutral wire. The Love controller signals the SSR to close or open the circuit as needed to keep the freezer at temperature.
You have (1) 15A circuit feeding your entire post brewing temperature control system. |
That is correct - the hot from the freezer goes into the SSR and comes back out and goes to the controller to switched connector 7. The neutral comes from the freezer and goes directly to the controller power connector 6. The ground comes from the freezer and goes to the ground plug in the power strip which is pugged into the GFCI outlet. The controller manages the 12v input for turning on and off the freezer.
Got it?
_________________
JonyMac's Stillwater Home Brewery Build
http://www.theelectricbrewery.com/forum/viewtopic.php?p=314470#314470
|
|
| Back to top |
|
|
rcrabb22
Joined: 23 Dec 2010
Posts: 462
Location: Illinois
|
| Link Posted: Thu Jan 07, 2016 1:29 pm Post subject: |
|
|
Yes I do! Thanks for your inspiration and help
|
|
| Back to top |
|
|
jonymac
Joined: 18 Dec 2014
Posts: 145
|
|
| Back to top |
|
|
epiphanybrewing
Joined: 16 Jul 2016
Posts: 1
|
| Link Posted: Sat Jul 16, 2016 5:04 pm Post subject: |
|
|
Beautiful setup - I'm researching trying to build a similar one myself.
My question for you is why you used the LOVE controllers. They are definitely expensive and seem a bit like overkill compared to using cheaper ones like SSBrewtech uses to power their fermentation pumps.
I'm just curious if you found any advantage to using these controllers. From the diagram it appears they only power the compressors of the keeper/freezer/cooler/tap pump through the SSR's to their individual power cords.
Thanks for the help and excited to hear and update on how the brewery is still working.
Cheers!
|
|
| Back to top |
|
|
jonymac
Joined: 18 Dec 2014
Posts: 145
|
| Link Posted: Sat Jul 30, 2016 6:32 pm Post subject: |
|
|
They may be a little overkill, but the LEDs and surrounds matched the ones that came form SSBrewTech and they are dual probe, dual zone controllers - although I only use them currently as heating or cooling - but it leaves my options open for the future. You are correct on how they work through the SSRs.
The brewery is still awesome! I have been using it almost a year and everything works perfectly. Have 7 of 8 taps filled and am planning my pumpkin porter for the 8th.
_________________
JonyMac's Stillwater Home Brewery Build
http://www.theelectricbrewery.com/forum/viewtopic.php?p=314470#314470
|
|
| Back to top |
|
|
jonymac
Joined: 18 Dec 2014
Posts: 145
|
|
| Back to top |
|
|
|
|
|
|
|
|
You cannot post new topics in this forum
You cannot reply to topics in this forum
You cannot edit your posts in this forum
You cannot delete your posts in this forum
You cannot vote in polls in this forum
You cannot attach files in this forum
You can download files in this forum
|
Forum powered by phpBB © phpBB Group
|
|


