| View previous topic :: View next topic |
| Author |
Message |
ShortVersion
Joined: 06 Apr 2013
Posts: 26
Location: Florida

|
 Link Posted: Mon Aug 26, 2013 8:16 pm Post subject: Link Posted: Mon Aug 26, 2013 8:16 pm Post subject: |
 |
|
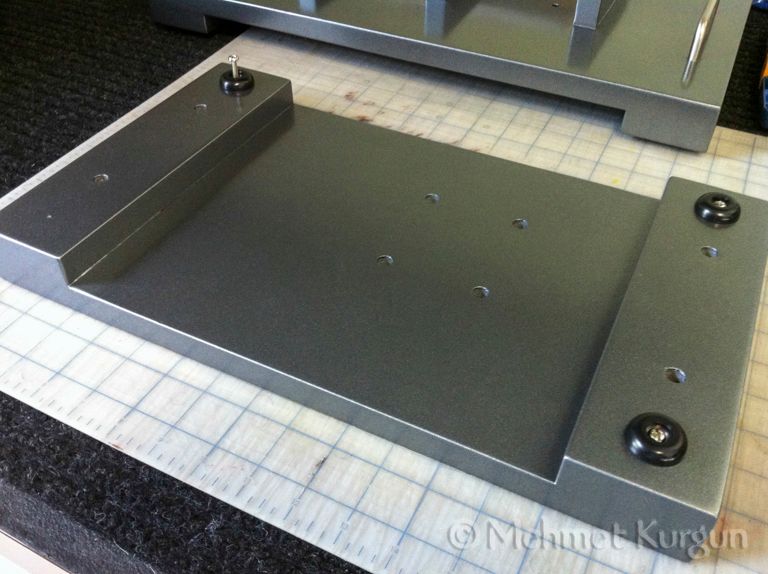
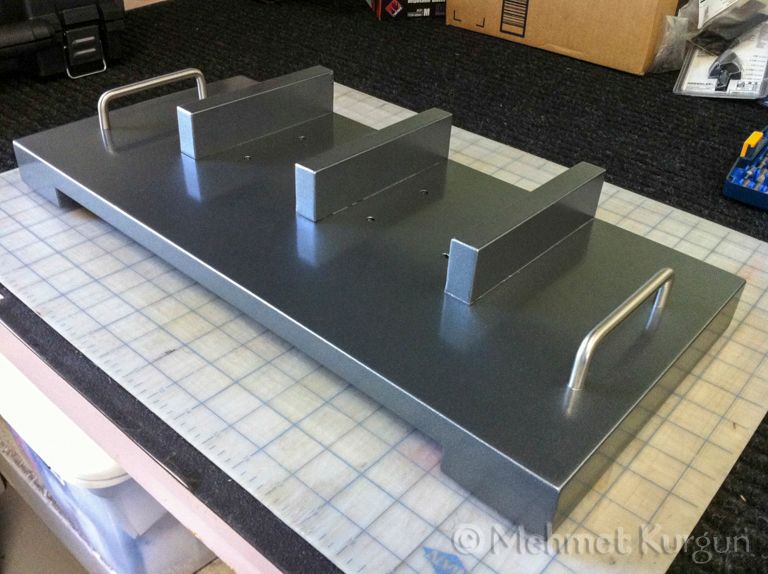
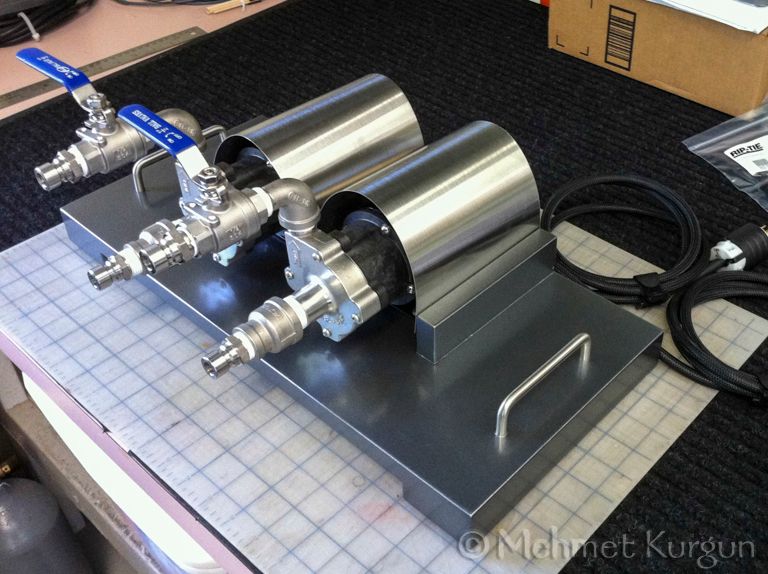
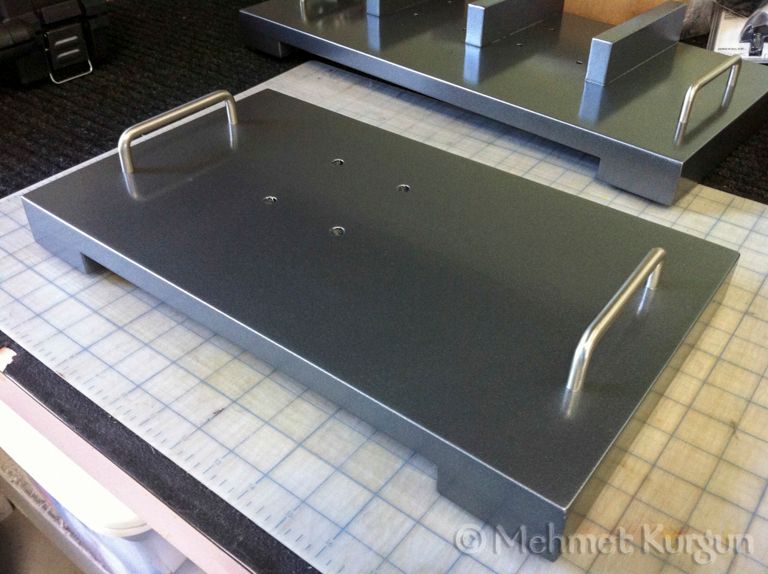
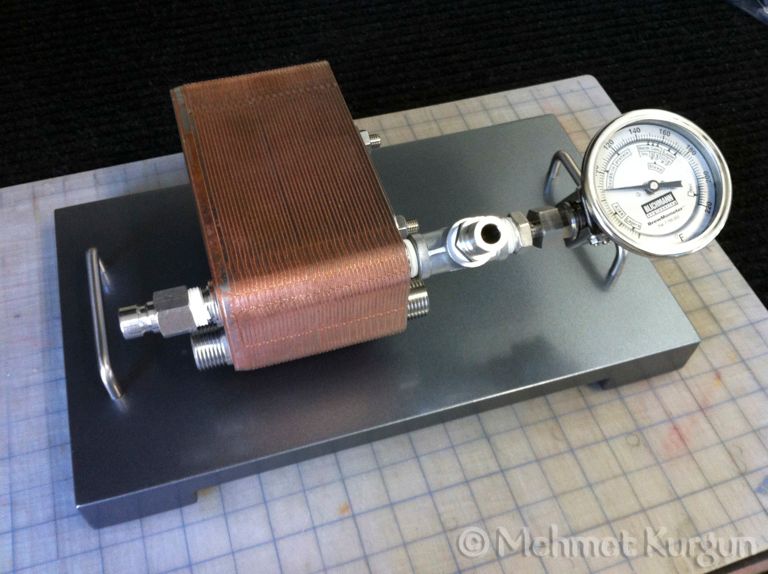
I finished the chiller and pump bases. Here are a few pictures.
[/img]
|
|
| Back to top |
|
 |
kal
Forum Administrator

Joined: 12 Dec 2010
Posts: 11120
Location: Ottawa, Canada
Drinking: Pub Ale, Electric Creamsicle, Mild, Pliny the Younger, Belgian Dark Strong, Weizen, Russian Imperial Stout, Black Butte Porter
|
|
| Back to top |
|
|
Rotten
Joined: 25 Jun 2013
Posts: 6
Location: Chicago IL
|
| Link Posted: Tue Aug 27, 2013 5:46 pm Post subject: |
|
|
|
Question about the stainless shields your using there.... Are they the heat shields from Blichmann kettles like Kal's? I recently got some Blichmanns and the shields I got from them now have a big slot in the middle of them for latching onto the Blichmann stands which basically renders them useless for this.
|
|
| Back to top |
|
|
ShortVersion
Joined: 06 Apr 2013
Posts: 26
Location: Florida
|
| Link Posted: Wed Aug 28, 2013 3:33 am Post subject: |
|
|
@Kal ~ Thanks. I don't think anyone will notice the pump bases in that awesome setup you have. 
@Rotten ~ I did not use the heat shields that came with the Blichmann Kettles because of the slots. I ordered two 24 gauge 6"x10" SS sheets from onlinemetals.com at a very reasonable price. Here is the link:
http://www.onlinemetals.com/merchant.cfm?pid=714&step=4&showunits=inches&id=30&top_cat=1
Use the section for Custom Cut.
Cheers...
|
|
| Back to top |
|
|
biglakewill
Joined: 30 Dec 2012
Posts: 69
Location: NC
Drinking: Barley Wine
Working on: Weissbeir
|
| Link Posted: Wed Sep 25, 2013 11:54 pm Post subject: |
|
|
ShortVersion, First off absolutely fantastic build!! I have downloaded your cutting files, with the hope of getting my CP, that will arrive Friday, cut out. You said some waterjetting facilities can't handle the top and bottom of the box. Why is that? I have sent the files out to a local waterjet cutting facility and am waiting for a quote. Hopefully they will be able to handle the job.
Again fantastic job and I am sure your pics will be a great help during my build.
Brgds/Bill
|
|
| Back to top |
|
|
ateene
Joined: 02 Apr 2012
Posts: 55
Location: Fort Collins, CO
|
| Link Posted: Thu Sep 26, 2013 1:36 pm Post subject: |
|
|
I used a local waterjet company to cut my CP. They were able to cut the bottom holes, they had to dissemble part of the table to be able to cut the bottom holes and use a blast shield in order to protect the inside and avoid cutting the top. It was still reasonable priced, it cost $30 to cut the holes in the door and $50 for the bottom.

|
|
| Back to top |
|
|
thirsty
Joined: 16 May 2013
Posts: 6
Location: Behind the zion curtain, UT
|
| Link Posted: Fri Sep 27, 2013 11:28 pm Post subject: |
|
|
Incredible! Really nice work man. I really like the wiring mod.
I'm going to pm you about your cad file for the cutouts. I have a buddy who is more than willing to do it for me if I get him some cad files.
Can't wait to see more. 
|
|
| Back to top |
|
|
davejtaylor1
Joined: 05 Jan 2013
Posts: 5
Location: Royal Oak, Michigan
|
| Link Posted: Fri Oct 04, 2013 2:43 am Post subject: |
|
|
ShortVersion - great looking build. Definitely something to strive for as I assemble my kit. I was looking at the internals and just wondering where you sourced your fuse holder and ground strip?
Looking forward to seeing more pics as the build progresses
|
|
| Back to top |
|
|
ShortVersion
Joined: 06 Apr 2013
Posts: 26
Location: Florida
|
| Link Posted: Sat Oct 05, 2013 3:15 pm Post subject: |
|
|
| Quote: | | I was looking at the internals and just wondering where you sourced your fuse holder and ground strip? |
Thanks, davejtaylor1.
I bought the fuse holder on ebay, here is the link: http://cgi.ebay.com/ws/eBayISAPI.dll?ViewItem&item=321076478429&ssPageName=ADME:L:OC:US:3160. You can purchase the terminal blocks at any Radio Shack.
Good luck with your kit.
Edit - Sorry, I don't know what I was thinking when I responded to your question. In reference to the ground strip, you can get that at your local HD or any electrical supply house.
Last edited by ShortVersion on Mon Oct 07, 2013 3:09 am; edited 1 time in total
|
|
| Back to top |
|
|
ShortVersion
Joined: 06 Apr 2013
Posts: 26
Location: Florida
|
| Link Posted: Sat Oct 05, 2013 3:49 pm Post subject: |
|
|
| captwill wrote: | ShortVersion, First off absolutely fantastic build!! I have downloaded your cutting files, with the hope of getting my CP, that will arrive Friday, cut out. You said some waterjetting facilities can't handle the top and bottom of the box. Why is that? I have sent the files out to a local waterjet cutting facility and am waiting for a quote. Hopefully they will be able to handle the job.
Again fantastic job and I am sure your pics will be a great help during my build.
Brgds/Bill |
Thanks, Bill. Sorry for the late response. I must have overlooked your post. I hope the CAD files were helpful in getting your CP cut out. The water jet and the computer assisted drilling/milling machines come in different sizes and they have maximum capacity limits. Capacity dictates the cost of the machine. Most of the water jet companies use machines for flat work and that's what the machine is usually set up for and it takes time to change the height of the table to cut something that is bulky. Some shops will not make that change and some will at an additional cost. Depending on what type of work a shop does, production or custom. Shop around. Use the beer card. People are always interested in home brewed beer.
Have you got your CP cut out yet?
|
|
| Back to top |
|
|
biglakewill
Joined: 30 Dec 2012
Posts: 69
Location: NC
Drinking: Barley Wine
Working on: Weissbeir
|
| Link Posted: Sun Oct 06, 2013 2:03 pm Post subject: |
|
|
|
Shortversion.... CP is out being cut now. The door is being waterjetted and the top and bottom of the box being machine cut. I hope to have them back this week. We will see how your files worked when they return. I couldn't pass up the price....$50!! I will post a couple of pictures once I get them back.
|
|
| Back to top |
|
|
fireslayer
Joined: 28 Dec 2012
Posts: 9
|
| Link Posted: Mon Oct 07, 2013 6:41 pm Post subject: |
|
|
|
Nice looking build!
|
|
| Back to top |
|
|
biglakewill
Joined: 30 Dec 2012
Posts: 69
Location: NC
Drinking: Barley Wine
Working on: Weissbeir
|
| Link Posted: Fri Oct 18, 2013 3:11 pm Post subject: |
|
|
ShortVersion - Just got my CP back after having it cut using your DFX files. They worked great for everything except the power light on the door. Your placement is exactly where the ground post is located on the new and improved box. No one noticed it until the door was cut and the ground post was removed. Oh well, the box still looks GREAT! I will come up with a fix for the ground post. Thank you again for making your files and work available.
Bill
|
|
| Back to top |
|
|
kal
Forum Administrator
Joined: 12 Dec 2010
Posts: 11120
Location: Ottawa, Canada
Drinking: Pub Ale, Electric Creamsicle, Mild, Pliny the Younger, Belgian Dark Strong, Weizen, Russian Imperial Stout, Black Butte Porter
|
|
| Back to top |
|
|
bundlz
Joined: 21 Mar 2013
Posts: 1
|
| Link Posted: Fri Nov 01, 2013 7:22 pm Post subject: |
|
|
ShortVersion,
Thanks for the CAD files, fantastic job man! I'm in the process of my build and I'm absolutely inspired by this.
Thank you again,
Bundz
|
|
| Back to top |
|
|
kungfudrinx
Joined: 13 Nov 2013
Posts: 30
Location: Stamford, CT
|
| Link Posted: Wed Nov 13, 2013 9:12 pm Post subject: |
|
|
|
Fantastic Job! I'm extremely jealous! Thank you for providing the cutout files, but where / how did you find a waterjet machine to use? I always assumed that they were rather expensive and specialized services, not something you could just do one-off stuff on.
|
|
| Back to top |
|
|
Kian
Joined: 27 Nov 2013
Posts: 4
|
| Link Posted: Wed Nov 27, 2013 3:11 pm Post subject: Re: Control Panel (30A Kit) Build with Some Mods |
|
|
| ShortVersion wrote: |
The CP had to be sand blasted to bare metal (see test area on the picture above) before powder coating so I had to remove the door gasket.
|
Awesome build. I had my panel powder coated as well but I am having a tough time finding the NEMA 4 and 12 rated foam tape to replace the door gasket that I had to remove. Did you buy the replacement foam gasket tape (not sure if that is the proper terminology) online? If so, do you mind posting a link of where you bought it from?
Thanks in advance.
|
|
| Back to top |
|
|
BayArea
Joined: 04 Dec 2013
Posts: 2
Location: Bay Area, CALIF.
|
| Link Posted: Sat Dec 07, 2013 6:48 am Post subject: wiring used |
|
|
Shortversion,
Great job on your build so far, cant wait to see more of your entire setup. I have a question regarding the wiring used. I see very nice 90 degree bends in your wiring, were you able to do this with stranded wire, or did you use solid core wiring?
|
|
| Back to top |
|
|
kuestess
Joined: 08 Feb 2013
Posts: 4
|
| Link Posted: Fri Jan 10, 2014 8:34 pm Post subject: |
|
|
|
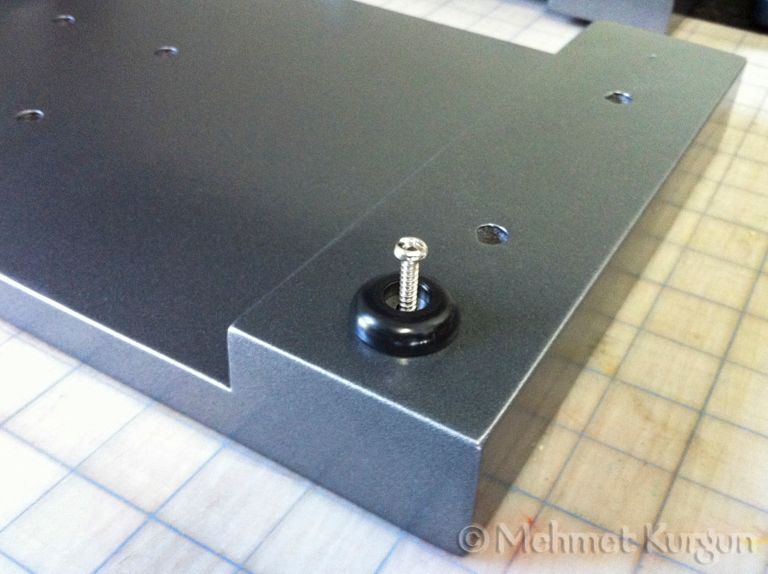
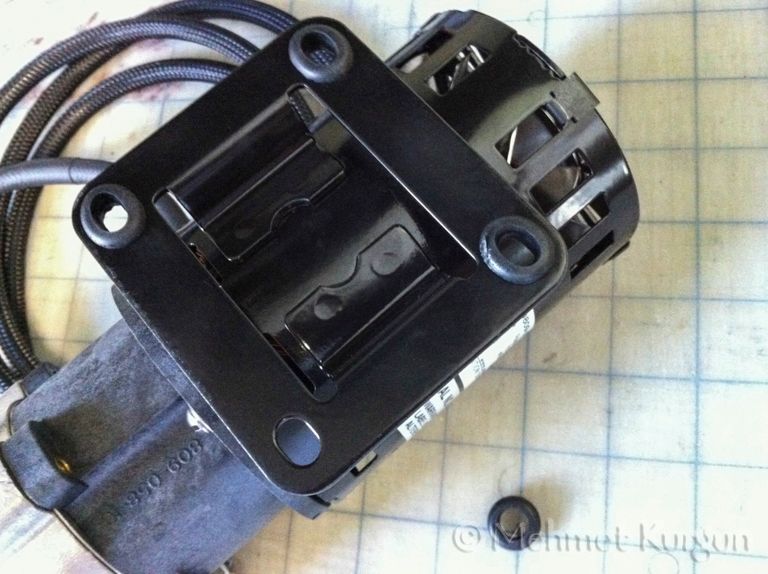
Kal or Mehmet, can you share what you used on your pump motors to dampen vibration? From the picture above, it almost looks like an airlock grommet. Thanks!
|
|
| Back to top |
|
|
kal
Forum Administrator
Joined: 12 Dec 2010
Posts: 11120
Location: Ottawa, Canada
Drinking: Pub Ale, Electric Creamsicle, Mild, Pliny the Younger, Belgian Dark Strong, Weizen, Russian Imperial Stout, Black Butte Porter
|
|
| Back to top |
|
|
|
|


