| View previous topic :: View next topic |
| Author |
Message |
travis

Joined: 10 Oct 2017
Posts: 9

|
 Link Posted: Tue Oct 10, 2017 7:43 pm Post subject: Volt Meter Wiring Question Link Posted: Tue Oct 10, 2017 7:43 pm Post subject: Volt Meter Wiring Question |
 |
|
The volt meter that came with my kit seems to be the same one in the how to build guide, but the wires that came with mine are far too short to connect to the DC power supply, the hot bus, or the boil relay. I am referring to this step of the build guide: http://www.theelectricbrewery.com/control-panel-part-2?page=9
The pins on the back of the meter slide into plastic with what came in the packaging, what is the safe way for me to wire this on my own?
I am at work right now so can't provide pictures at the moment, but if needed I can post pictures when I get home if clarification is needed.
Thanks,
Travis
|
|
| Back to top |
|
 |
kal
Forum Administrator
Joined: 12 Dec 2010
Posts: 11122
Location: Ottawa, Canada
Drinking: Pub Ale, Electric Creamsicle, Mild, Pliny the Younger, Belgian Dark Strong, Weizen, Russian Imperial Stout, Black Butte Porter
|
| Link Posted: Tue Oct 10, 2017 8:12 pm Post subject: |
|
|
Hi Travis,
I would extend the wires with some of the low current 22ga wire that was included in your kit. Soldering works best, and then covered with some heat shrink tubing. Good luck!
Kal
_________________
Our new shop with over 150 new products: shop.TheElectricBrewery.com
We ship worldwide and support our products and customers for life.
Purchasing through our affiliate links helps support our site at no extra cost to you. We thank you!
My basement/bar/brewery build 2.0
|
|
| Back to top |
|
|
travis
Joined: 10 Oct 2017
Posts: 9
|
| Link Posted: Tue Oct 17, 2017 2:45 am Post subject: |
|
|
|
Thanks Kal, I'll give this a try when I get my soldering iron. Just wanted to make sure I didn't miss anything when the kit was shipped.
|
|
| Back to top |
|
|
kal
Forum Administrator
Joined: 12 Dec 2010
Posts: 11122
Location: Ottawa, Canada
Drinking: Pub Ale, Electric Creamsicle, Mild, Pliny the Younger, Belgian Dark Strong, Weizen, Russian Imperial Stout, Black Butte Porter
|
|
| Back to top |
|
|
hobbes
Joined: 08 Sep 2017
Posts: 26
|
| Link Posted: Sun Oct 22, 2017 7:21 pm Post subject: |
|
|
Slightly off this topic, but related to the wiring of the volt meter:
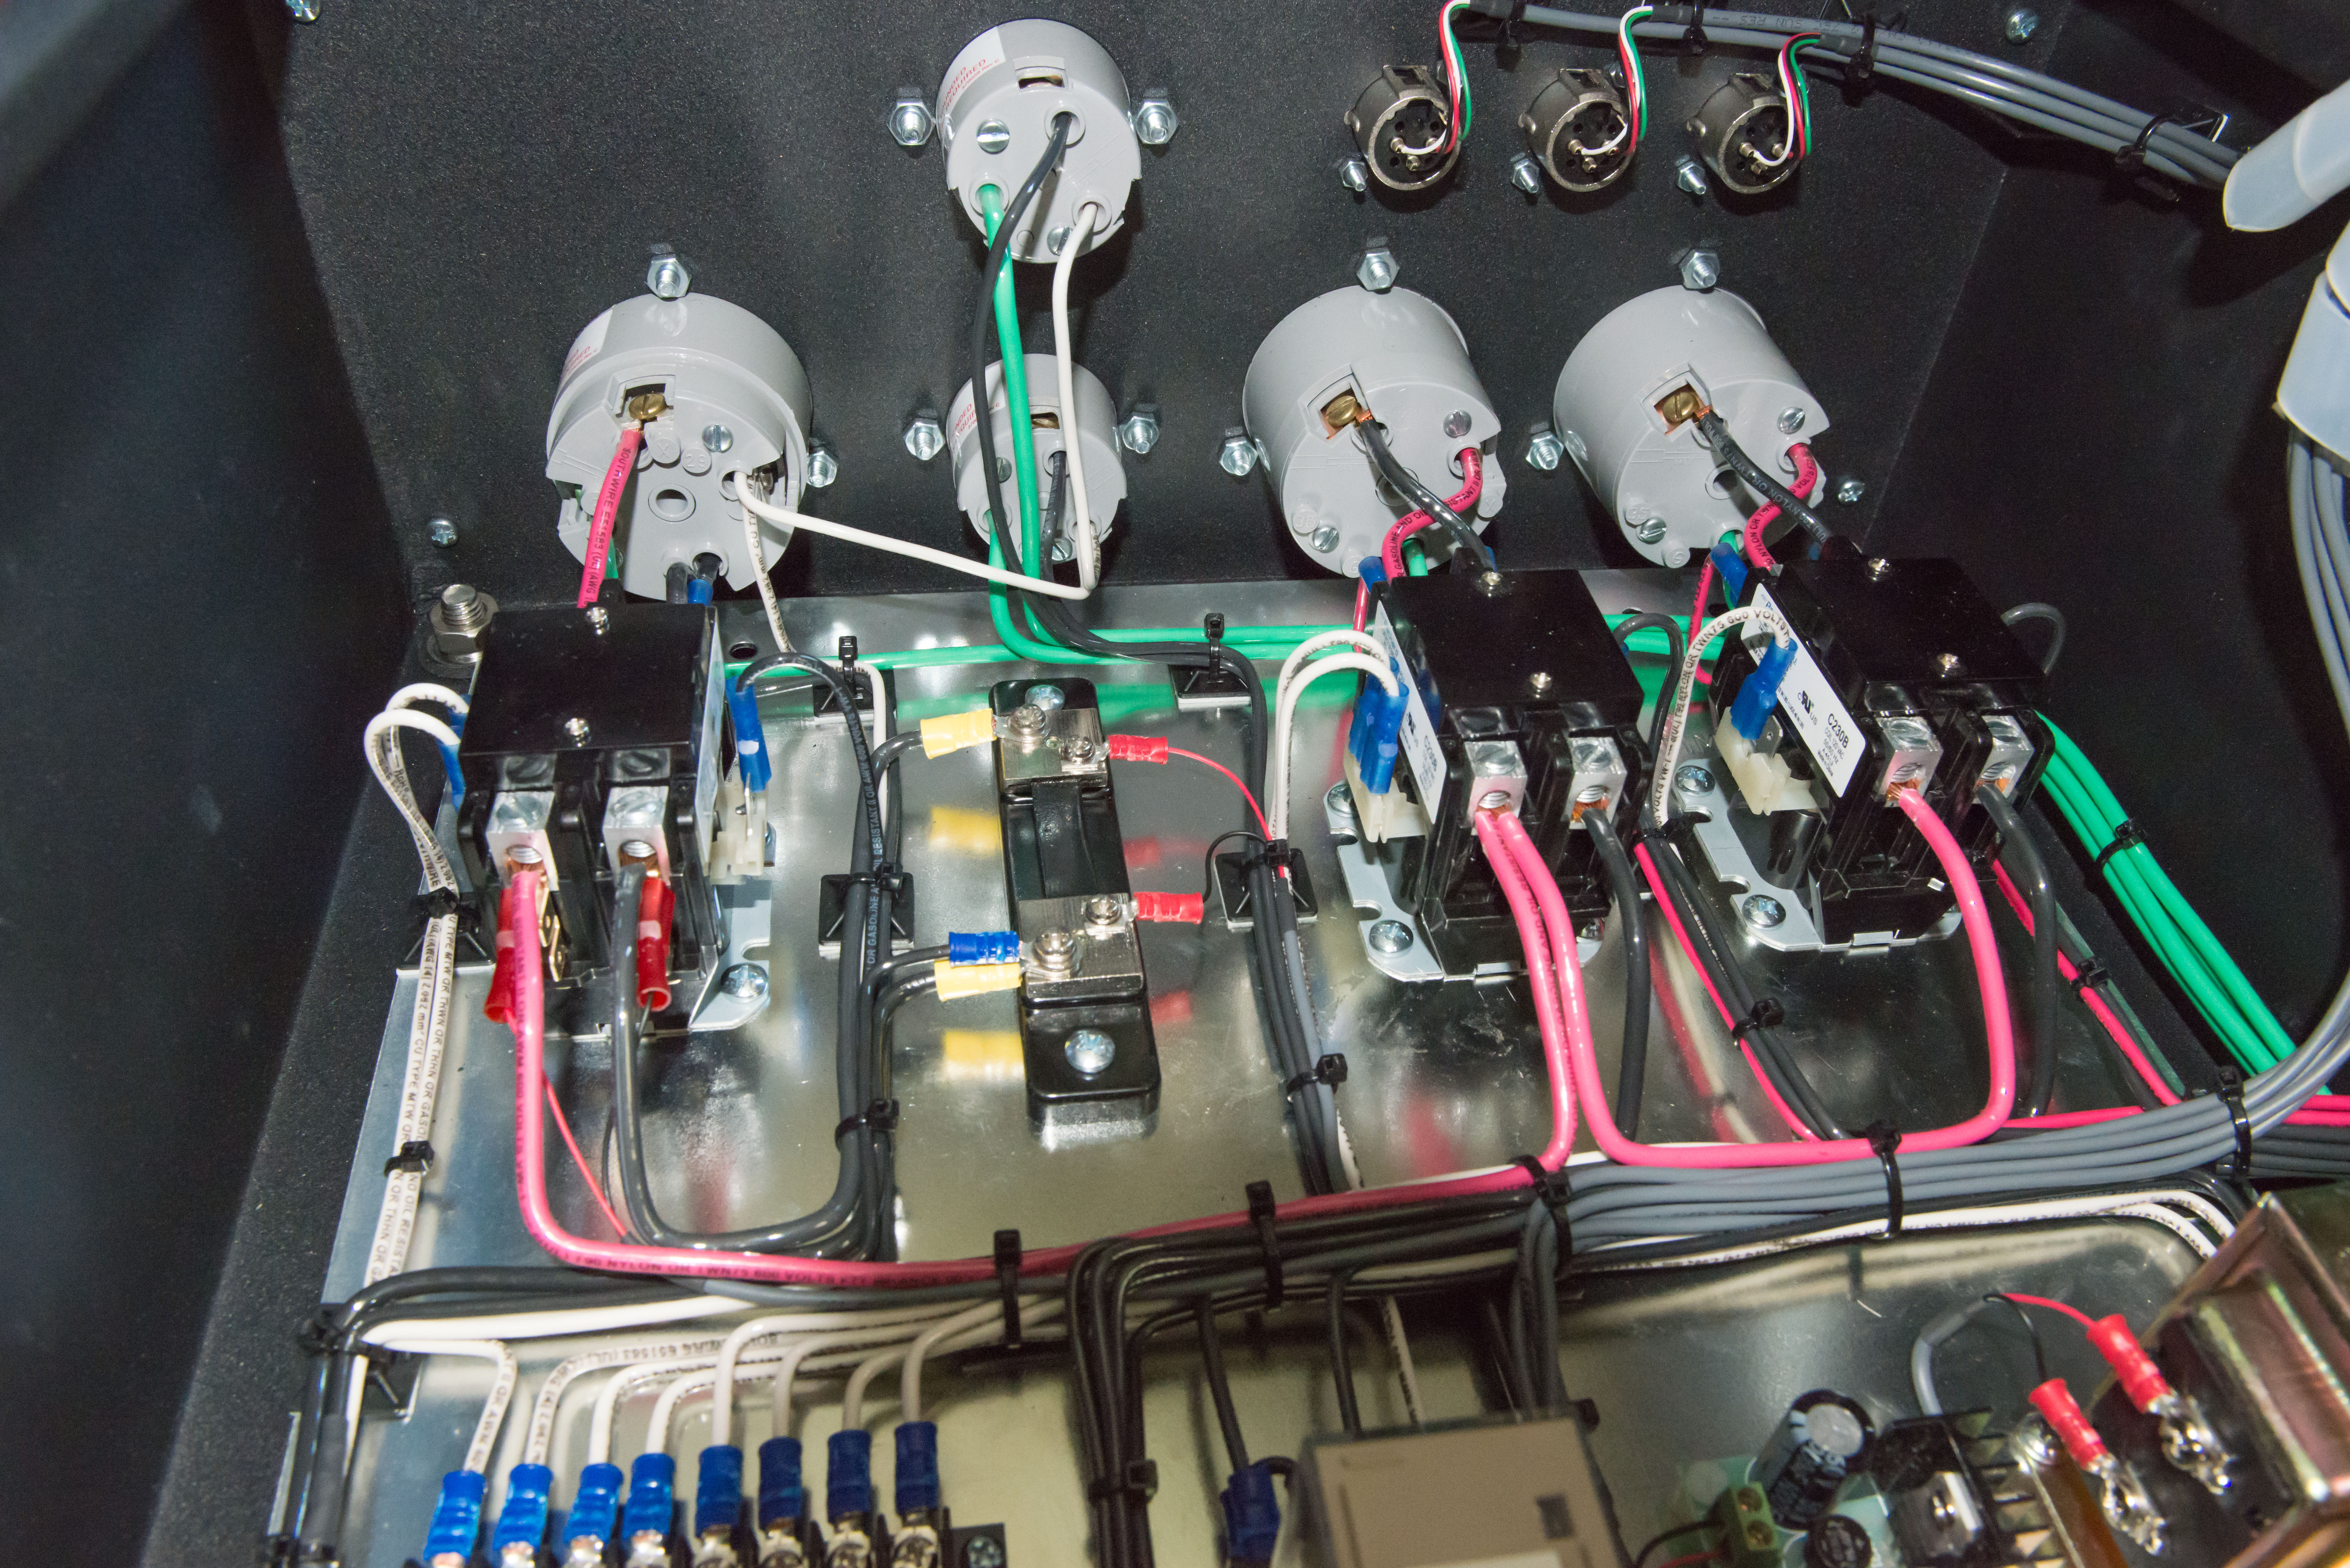
In both the normal 30amp wiring instructions and the 50amp I noticed the diagram shows the A/C going to the hotbus (X) and the boil kettle contactor (W). I was thinking with the 4wire and 2wire 22gauge we have it would make more sense to run this over to the power in contactor and get the black(X) and red (Y) there. Branching off at the HLT contactor and then running a single 22gauge wire seems more messy.
When i checked the hi-res photos to see if this was actually what was done it appears that Spike Innovations did the wiring for the volt meter to the power in contactor like I was thinking. The only adv i can think of to stopping off at the HLT and hot bus would be to see if there is a voltage drop somewhere in the panel.
|
|
| Back to top |
|
|
hobbes
Joined: 08 Sep 2017
Posts: 26
|
| Link Posted: Sun Oct 22, 2017 7:24 pm Post subject: |
|
|
Link to the picture in question... I don't see anything attached with 22gauge to the HLT contactor but I do see both black + red attached to the power in contactor.

|
|
| Back to top |
|
|
kal
Forum Administrator
Joined: 12 Dec 2010
Posts: 11122
Location: Ottawa, Canada
Drinking: Pub Ale, Electric Creamsicle, Mild, Pliny the Younger, Belgian Dark Strong, Weizen, Russian Imperial Stout, Black Butte Porter
|
| Link Posted: Sun Oct 22, 2017 8:29 pm Post subject: |
|
|
| hobbes wrote: | Slightly off this topic, but related to the wiring of the volt meter:
In both the normal 30amp wiring instructions and the 50amp I noticed the diagram shows the A/C going to the hotbus (X) and the boil kettle contactor (W). I was thinking with the 4wire and 2wire 22gauge we have it would make more sense to run this over to the power in contactor and get the black(X) and red (Y) there. Branching off at the HLT contactor and then running a single 22gauge wire seems more messy.
When i checked the hi-res photos to see if this was actually what was done it appears that Spike Innovations did the wiring for the volt meter to the power in contactor like I was thinking. The only adv i can think of to stopping off at the HLT and hot bus would be to see if there is a voltage drop somewhere in the panel. |
Welcome to the forum hobbes!
As long as the voltmeter AC signal wires are attached to the two HOT lines somewhere, it'll read the ~240v correctly. Where you happen to connect to can be anywhere where HOT1 and HOT2 are available. They don't have to be where the instructions show. If you have a spot to connect that's more convenient for the way you've pulled the wires by all means go for it. The results will be the same. There will not be any voltage drops at all given the short distances.
Good luck and enjoy your build!
Kal
_________________
Our new shop with over 150 new products: shop.TheElectricBrewery.com
We ship worldwide and support our products and customers for life.
Purchasing through our affiliate links helps support our site at no extra cost to you. We thank you!
My basement/bar/brewery build 2.0
|
|
| Back to top |
|
|
hobbes
Joined: 08 Sep 2017
Posts: 26
|
| Link Posted: Sun Oct 22, 2017 9:52 pm Post subject: |
|
|
|
Thanks for the quick reply, I'll just tap in similar to the photo. I think it'll make for a cleaner install.
|
|
| Back to top |
|
|
|
|