
|
|
|

|
 |
|
|
| View previous topic :: View next topic |
| Author |
Message |
GTACanuck
Joined: 13 Jun 2017
Posts: 3

|
 Link Posted: Sun Sep 17, 2017 6:46 pm Post subject: GTACanuck's Basement Brewery Build Log Link Posted: Sun Sep 17, 2017 6:46 pm Post subject: GTACanuck's Basement Brewery Build Log |
 |
|
Hey all,
First off I want to thank Kal for everything he has done, without your hard work sharing this information, I would not have even though that I could do it. So, thank you Kal.
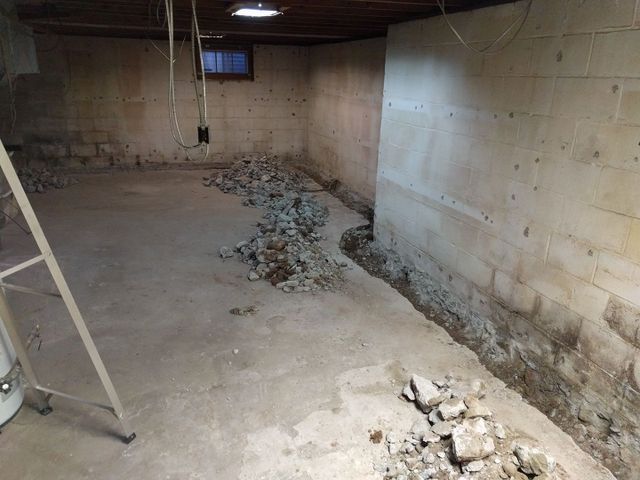
I have pretty much a blank slate in the basement. We had extensive water leaks and poor weeping tile drainage causing floods with even the littlest of rainfall. I have documented some of this process here as the wife would not let me build the brewery until this was completed. (rightfully so)
So, without further, I will start dumping some of those images.
Cutting 18 inches of concrete around the hole base of the house to install new weeping tile
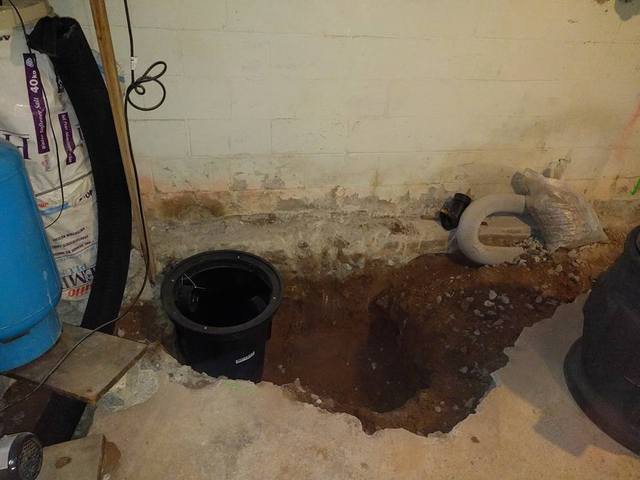
Installing new injection pump and sump system
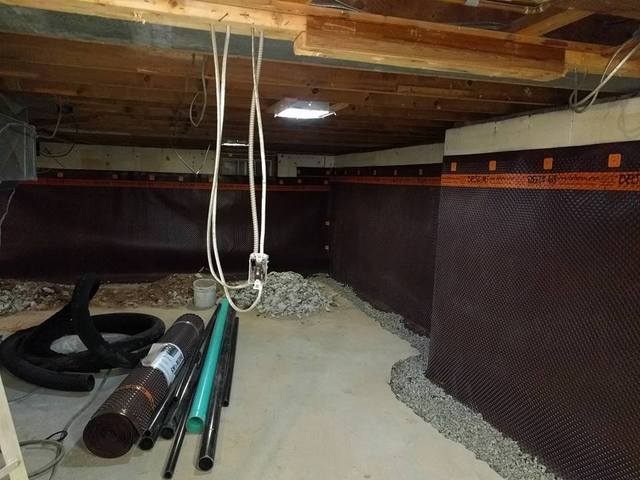
Finishing up, needs concrete poured. Dont have a pic of it all done, but is viewable in the rest of my brewery images
So happy this portion is done, now to making the brewery!
Now that I have had a couple days in to the construction, here is where I am at. The plan is to have a 4'x2' Stainless table run along the half-wall, followed by a 18"x18" sink that is 2 feet wide and then a 5 foot stainless table where the meat and potatoes will go.
It was funny, my wife came downstairs yesterday and asked if I am making the panel a flush mount in the wall. So I got thinking and quickly got the framing to look like this.
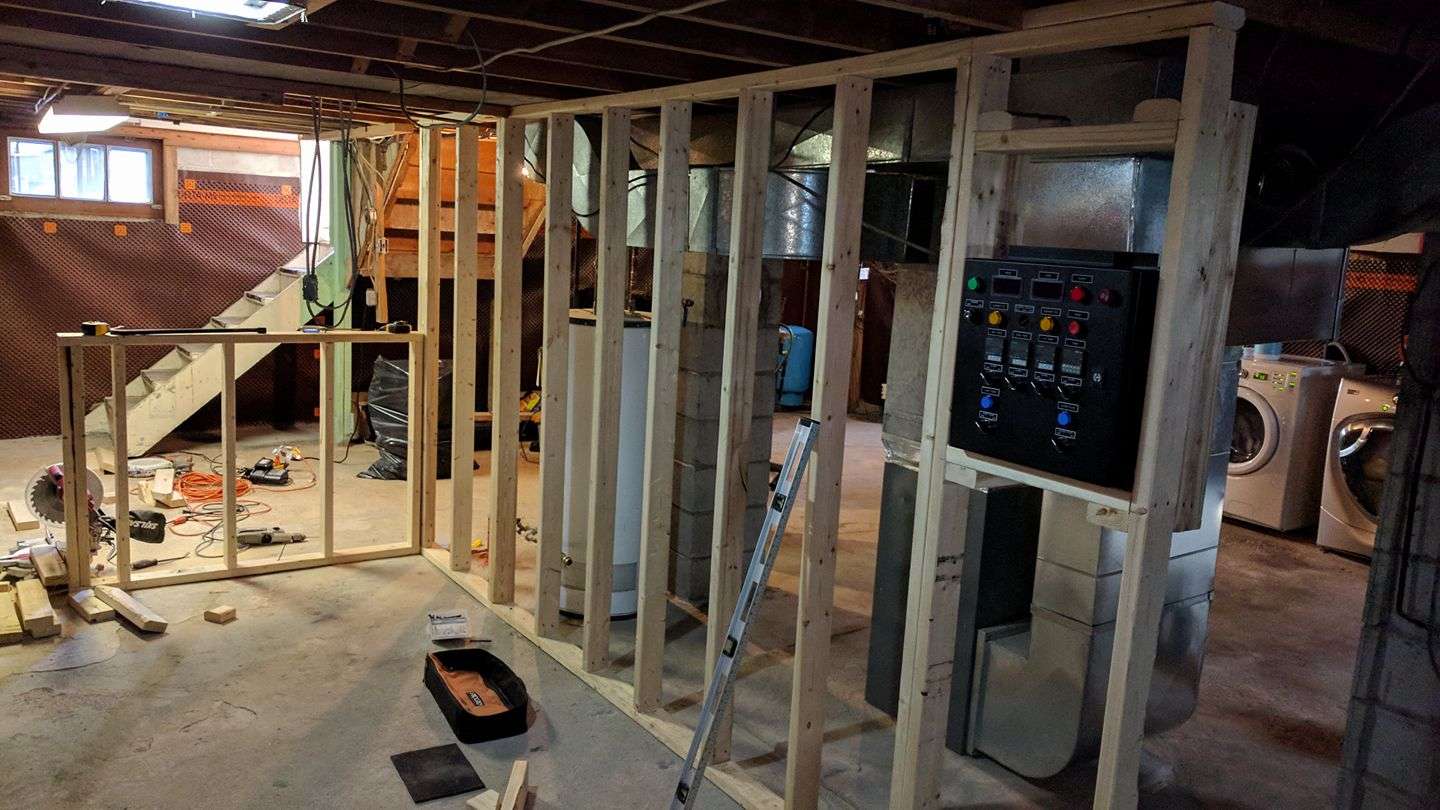
I know its not much for now, but its exactly the start I needed to continue the project. The length of the brewery from the half wall measured in at 12'6" and it is 8' wide. It will be somewhat of a "walkthrough" to the new living/theatre room that I will be adding on to it once I get brewing. All that extra time waiting while making beer will let me get working on that when the time is right. Talk about being productive, right? 
Thanks for looking, I will keep updating as progress is made 
|
|
| Back to top |
|
 |
kal
Forum Administrator

Joined: 12 Dec 2010
Posts: 11123
Location: Ottawa, Canada
Drinking: Pub Ale, Electric Creamsicle, Mild, Pliny the Younger, Belgian Dark Strong, Weizen, Russian Imperial Stout, Black Butte Porter
|
| Link Posted: Sun Sep 17, 2017 7:24 pm Post subject: |
|
|
Thanks for sharing! If flush mounting the panel make sure you have room to plug in devices on the bottom, can easily remove the panel if you have to, and that you have adequate airflow for cooling.
I've never seen dimpled membrane and weeping tile on the *inside* of a foundation - interesting!
Kal
_________________
Our new shop with over 150 new products: shop.TheElectricBrewery.com
We ship worldwide and support our products and customers for life.
Purchasing through our affiliate links helps support our site at no extra cost to you. We thank you!
My basement/bar/brewery build 2.0
|
|
| Back to top |
|
|
GTACanuck
Joined: 13 Jun 2017
Posts: 3
|
| Link Posted: Sun Sep 17, 2017 9:08 pm Post subject: |
|
|
Yeah, I made the "box" 26" in height so we have provisions for wire bending etc.
I plan on mounting a couple PC fans on the top to encourage better cooling with it being in a closed space. I believe this should do the trick.
The plan is to have right below all this would be for a 14G SS BME and behind the wall would be the glycol chiller with a quick disconnect pass-through at the wall. The glycol temp panel mounted above the main control panel in that 8" gap above. (It's only a 7ft tall room)
With how my house is situated, if we were to seal from the outside, we would have to demo our detached garage and attached sunroom. So this seemed like the most cost effective choice and to be honest it has worked wonders. The house is 60 years old and didn't have much down there to begin with. Had to demo 1 room that had those tacky cedar panel walls. Was gross anyways.
Cheers!
|
|
| Back to top |
|
|
|
|
|
|
|
|
You cannot post new topics in this forum
You cannot reply to topics in this forum
You cannot edit your posts in this forum
You cannot delete your posts in this forum
You cannot vote in polls in this forum
You cannot attach files in this forum
You can download files in this forum
|
Forum powered by phpBB © phpBB Group
|
|


