
|
|
|

|
 |
|
|
| View previous topic :: View next topic |
| Author |
Message |
chastuck

Joined: 06 Oct 2013
Posts: 193
Location: Beckenham, Kent, UK
Drinking: Bitter
Working on: IPA

|
 Link Posted: Mon Jul 21, 2014 11:27 am Post subject: Adding additional elements to my pots Link Posted: Mon Jul 21, 2014 11:27 am Post subject: Adding additional elements to my pots |
 |
|
I recently fitted extra 2400w elements to both my HLT and boil kettle. The elements are SS from angel home brew. The thread on these elements is 1inch BSP and they are supplied with a cable and shroud. I initially fitted the elements as supplied and they worked fine, but I didn't like the way the shroud and cable stuck out from the pot, so I ditched the supplied shroud and used the same fitting technique I used for the existing 5500w elements. In addition, rather than have a fixed power cable sticking out from the element mounting box, I fitted Neutrik Powercon sockets to both the 2400w and 5500w mounting boxes.
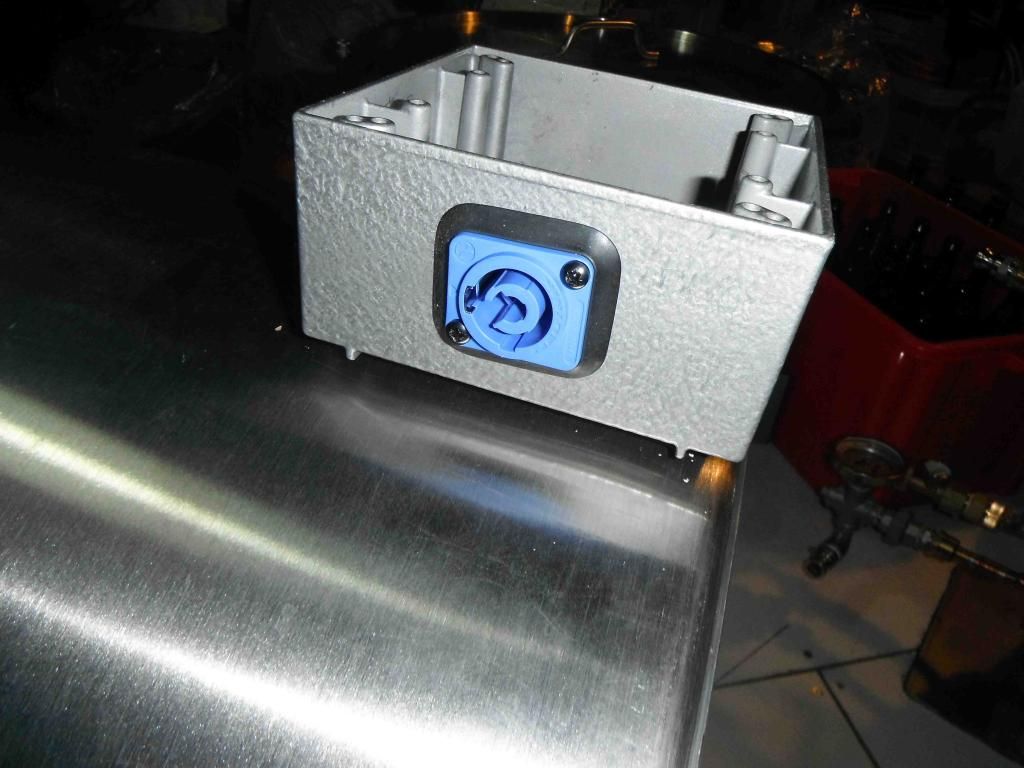
Powercon 20A socket fitted to 2400w element box:
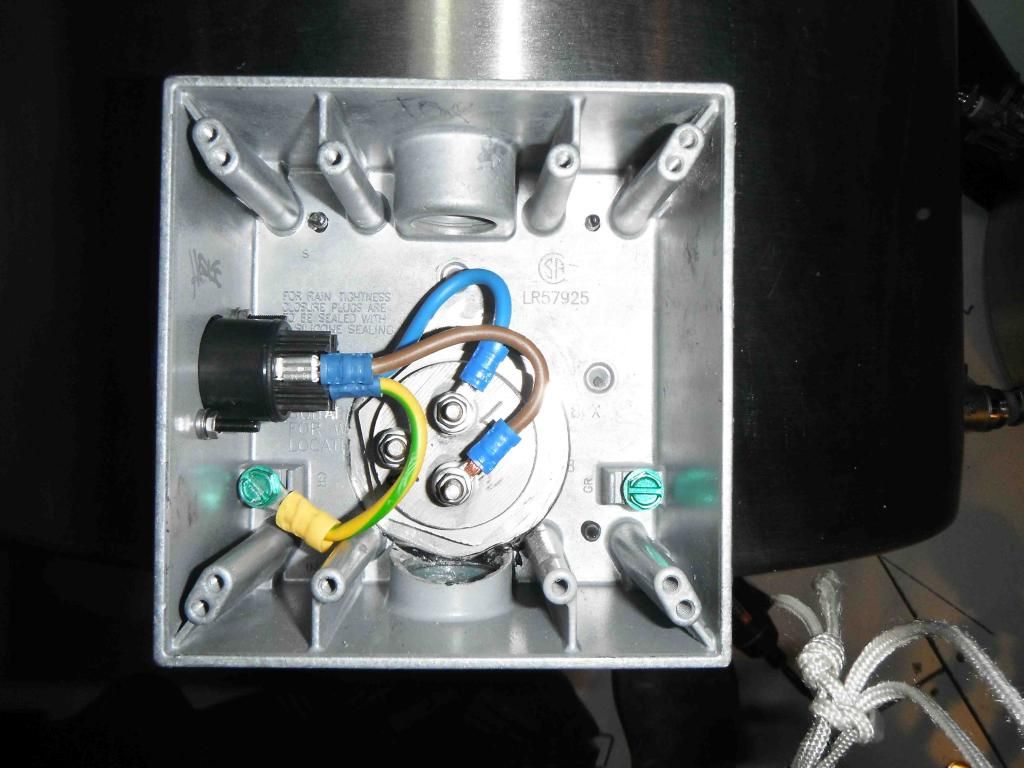
Internal view showing wiring to 2400w element. I didn't use the earth tag on the element itself as the element outer is in physical contact with the mounting box. I therefore used the earth mount screw in the box:
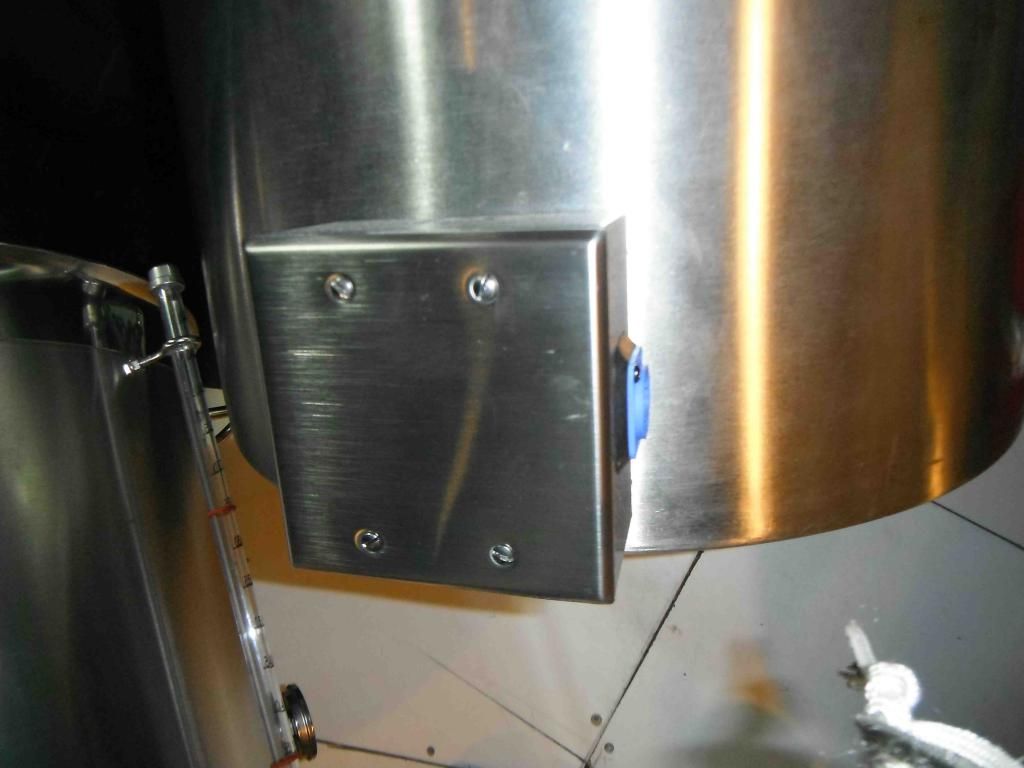
Exterior view of element mounting box with SS lid screwed on. There is a gasket under the lid to keep it watertight:
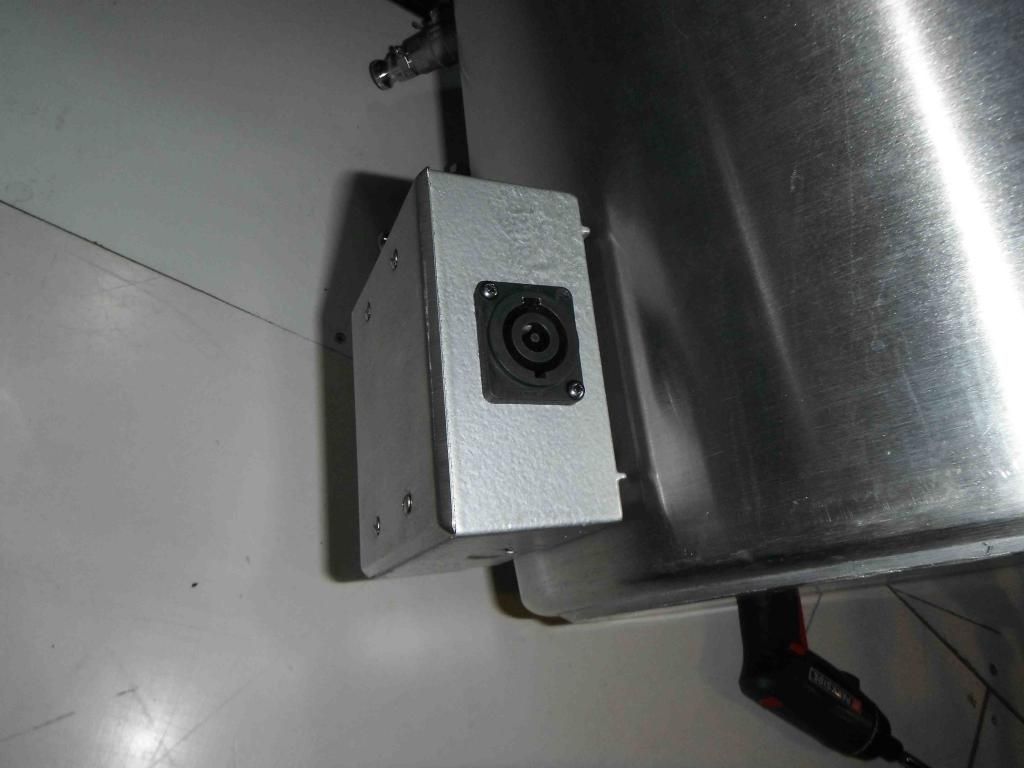
Mounting box for the 5500w element using a Powercon 32A socket.
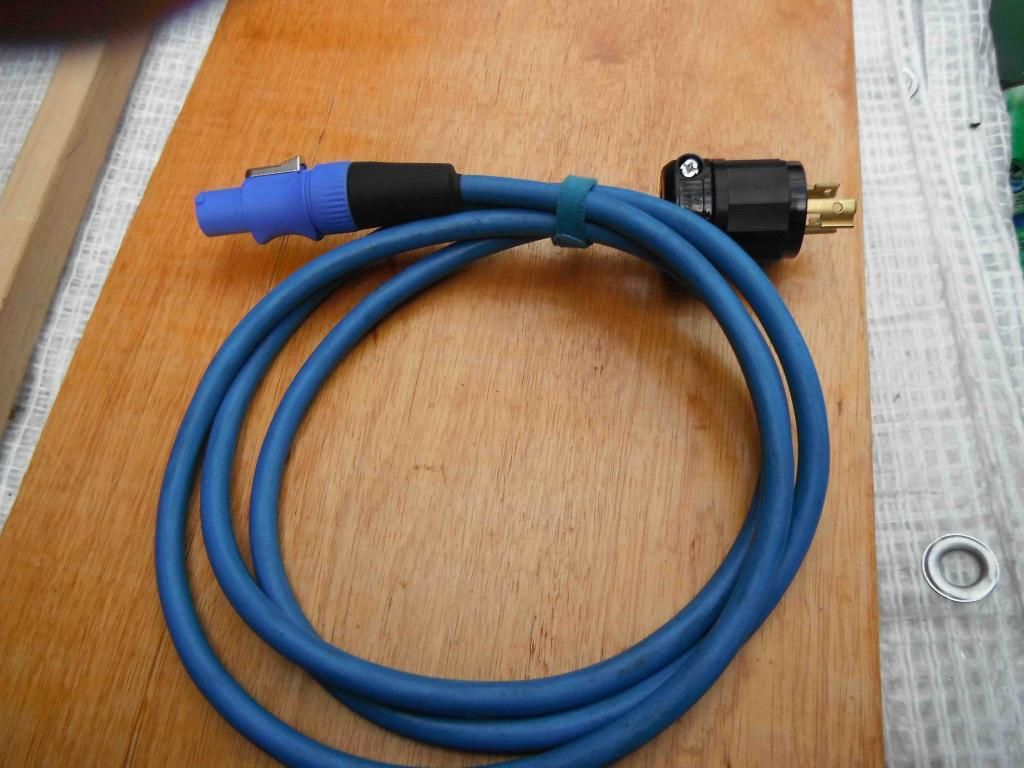
Power leads that plug into the 20A and 32A sockets. I used heat shrink cable to make the 32A plug waterproof. The 20A plug is fitted with the optional rubber boot that is available. Both leads plug into my control panel:

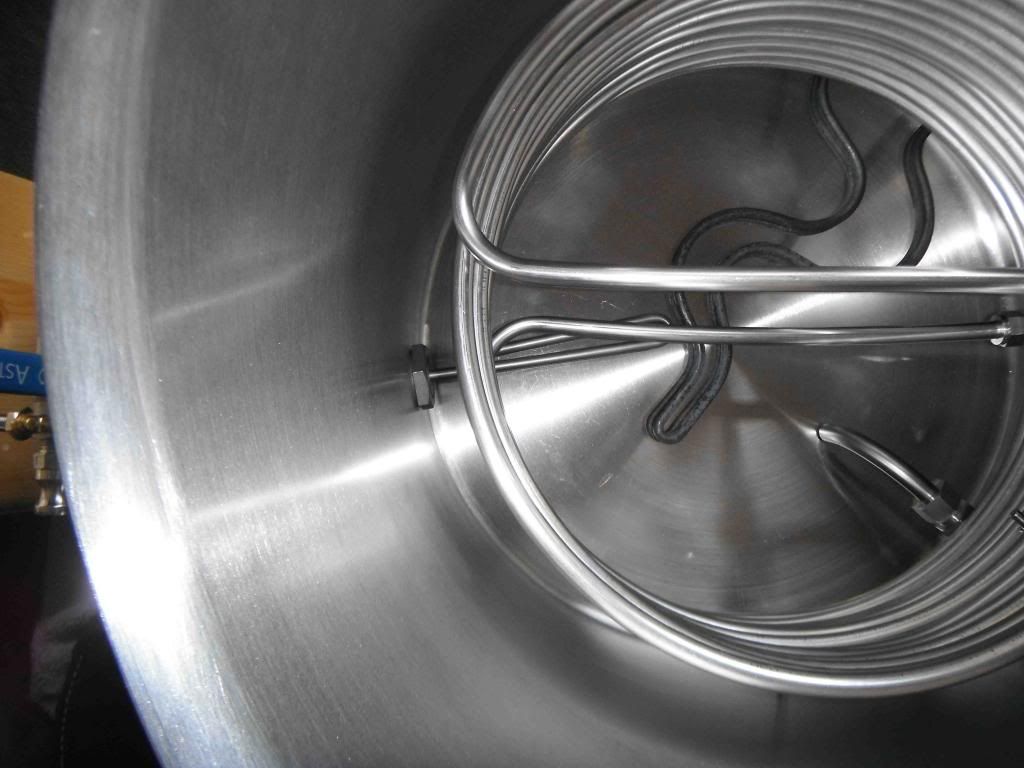
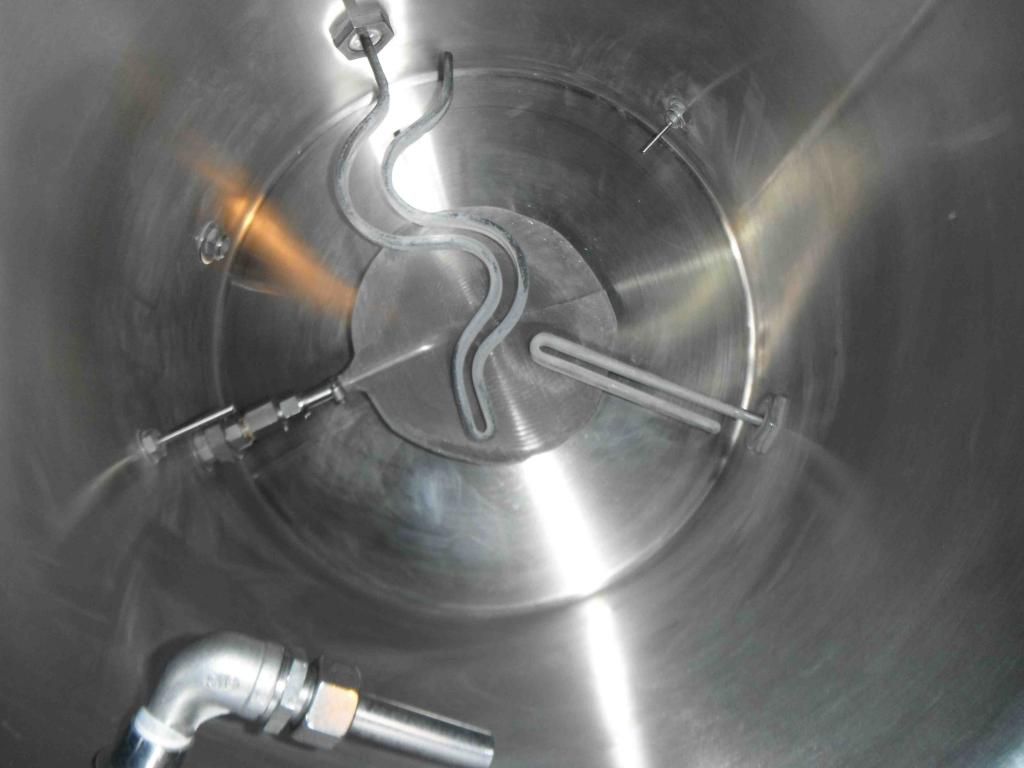
Views inside the HLT and Boil Kettle of the elements:
In fitting the elements I have used USA electrical parts as they seem better suited to a high-current electric home brewery. The element head and wiring connections are mounted in a Bell weatherproof two gang conduit box purchased from here: http://www.amazon.com/gp/product/B000BW0YDU/ref=as_li_tl?ie=UTF8&camp=1789&creative=390957&creativeASIN=B000BW0YDU&linkCode=as2&tag=theelectricbrewery-20&linkId=AZAIFA7O5P7PHX3E
I also bought the stainless steel blanking plates from the same source: http://www.amazon.com/gp/product/B0002BF3VS/ref=as_li_tl?ie=UTF8&camp=1789&creative=390957&creativeASIN=B0002BF3VS&linkCode=as2&tag=theelectricbrewery-20&linkId=OX6GHESCXS6D3J5L
Make sure you get the sealing gaskets: http://www.amazon.com/gp/product/B00C3YDJ18/ref=as_li_tl?ie=UTF8&camp=1789&creative=390957&creativeASIN=B00C3YDJ18&linkCode=as2&tag=theelectricbrewery-20&linkId=HO6SHS2A7SZVSQU3
On the back of the cast aluminium conduit box I drilled a 2.25 hole with a Starrett. Across the back of the box I bolted a square 1mm thick stainless steel plate, the dimensions of which all-round are 3/8 smaller than the box. In the exact middle of this plate I used a 1.25 Q-Max to make a hole concentric with the 2.25 hole in the box. I mounted the plate with stainless steel bolts of the countersunk type to ensure the exterior surface of the plate was flush. Before fitting the bolts and mounting the plate on the box I used JB Weld to make it watertight around the bolts, central hole and plate edges. The Q-Max 1.25 punch was also used to make a hole in the kettle for the element to pass through. To make the weldless fixing of the element I used a high temperature silicon O' ring ( http://www.amazon.com/gp/product/B000FMYSEM/ref=as_li_tl?ie=UTF8&camp=1789&creative=390957&creativeASIN=B000FMYSEM&linkCode=as2&tag=theelectricbrewery-20&linkId=HW7Y2XQ5SAB2CVVK ) and a stainless steel shim ( http://www.amazon.com/gp/product/B006U241XY/ref=as_li_tl?ie=UTF8&camp=1789&creative=390957&creativeASIN=B006U241XY&linkCode=as2&tag=theelectricbrewery-20&linkId=VFEEO33JSDI5RTPU ). To mount the element you pass it through the hole in the plate at the back of the conduit box and then through the hole in the pot, via the silicone O' ring and retaining shim. A 1 inch BSP stainless steel nut (supplied with the 2400w element) is screwed down as hard as you can on the element thread inside the pot. No washer is necessary under the nut.
Of course you have to make sure that you have enough ampage capability in your power supply to control, what for me, is a total element drain of 7900w in each brew pot. This could be over 34 amps. My control panel is only rated up to 30 amps, so I have built a break-out relay and switch box with its own SSR to provide the extra power. The break-out box is connected to the control lines for the element relays and SSR triggers inside the control panel. I will post up details on the break-out box at a later date.
|
|
| Back to top |
|
 |
foomench
Joined: 21 Feb 2012
Posts: 704
Location: Longmont, CO
Drinking: Pinot barrel aged quad
Working on: Flanders oude bruin in barrel, Flanders red fermenting to refill the barrel
|
| Link Posted: Mon Jul 21, 2014 4:43 pm Post subject: Re: Adding additional elements to my pots |
|
|
| chastuck wrote: | | Internal view showing wiring to 2400w element. I didn't use the earth tag on the element itself as the element outer is in physical contact with the mounting box. I therefore used the earth mount screw in the box:... |
You could easily connect to the element ground with another wire, either to the same earth mount screw in the box, or to the one on the other side. I'm not saying you have to, but it is nice that your element has a ground in the first place, and you can connect to it.
_________________
Brewery equipment photos (et al) here: https://picasaweb.google.com/114861423235799103704
|
|
| Back to top |
|
|
chastuck
Joined: 06 Oct 2013
Posts: 193
Location: Beckenham, Kent, UK
Drinking: Bitter
Working on: IPA
|
| Link Posted: Mon Jul 21, 2014 6:50 pm Post subject: Re: Adding additional elements to my pots |
|
|
| foomench wrote: | | chastuck wrote: | | Internal view showing wiring to 2400w element. I didn't use the earth tag on the element itself as the element outer is in physical contact with the mounting box. I therefore used the earth mount screw in the box:... |
You could easily connect to the element ground with another wire, either to the same earth mount screw in the box, or to the one on the other side. I'm not saying you have to, but it is nice that your element has a ground in the first place, and you can connect to it. |
Thanks for the tip. Good idea. In my defence, I did check the earth continuity with a multimeter.
|
|
| Back to top |
|
|
|
|
|
|
|
|
You cannot post new topics in this forum
You cannot reply to topics in this forum
You cannot edit your posts in this forum
You cannot delete your posts in this forum
You cannot vote in polls in this forum
You cannot attach files in this forum
You can download files in this forum
|
Forum powered by phpBB © phpBB Group
|
|


