| View previous topic :: View next topic |
| Author |
Message |
ShortVersion
Joined: 06 Apr 2013
Posts: 26
Location: Florida

|
 Link Posted: Tue Jul 02, 2013 10:35 pm Post subject: Control Panel (30A Kit) Build with Some Mods Link Posted: Tue Jul 02, 2013 10:35 pm Post subject: Control Panel (30A Kit) Build with Some Mods |
 |
|
Hello everyone,
My name is Mehmet. I have recently completed building the control panel kit (Standard 30A Control Panel) I have purchased from Kal and Mike. If you are thinking about building the control panel, I would highly recommend getting the kit. Kal, thank you. I tip my hat to you. You are a class act! I know you have heard this many times but not from me. I have learned allot from you and from all the contributors to this forum. Thank you all.
And now its time to give back. Even though it will never equal to what was gained by me. During the build, I have taken quite a few pictures and in the next few days, as time permits, I will post some of those pictures here. As you will see, I have made some minor modifications. That's the advantage of building it yourself.
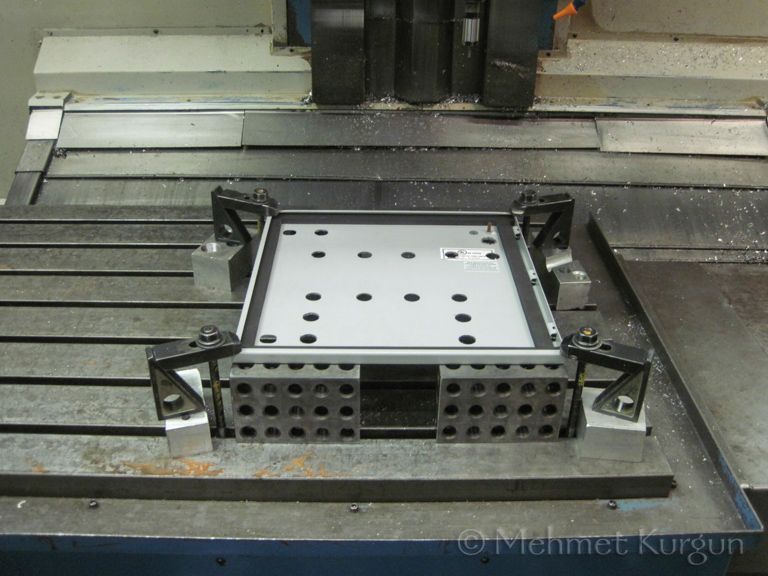
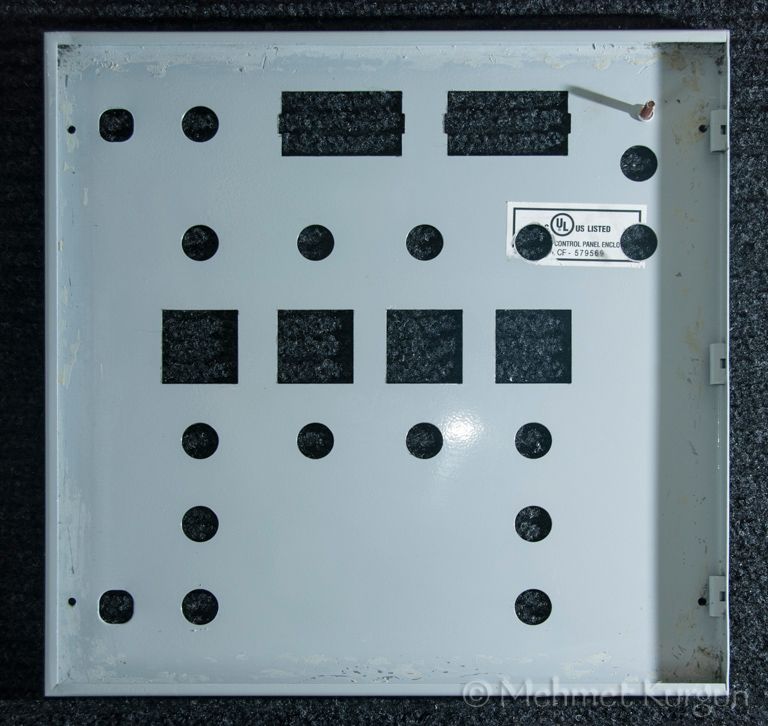
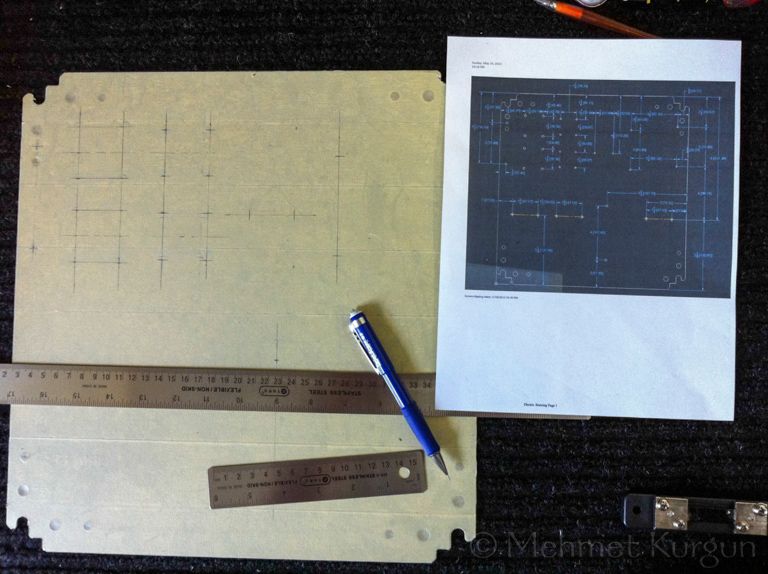
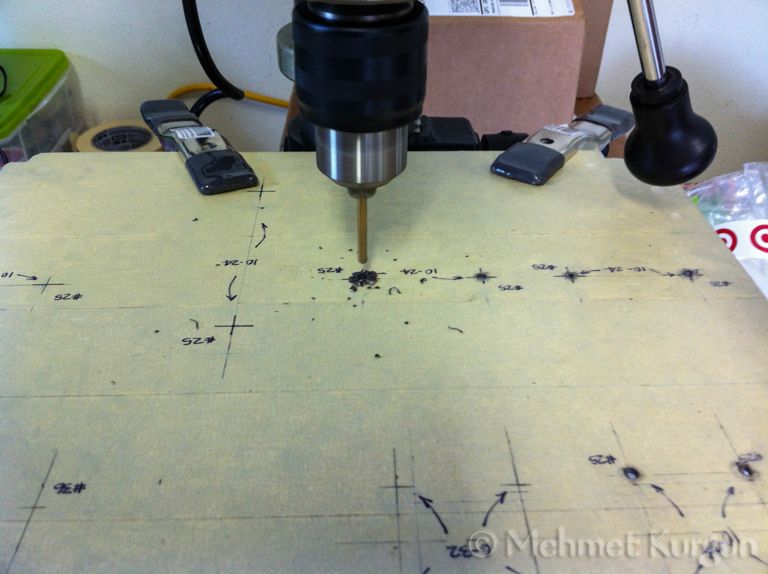
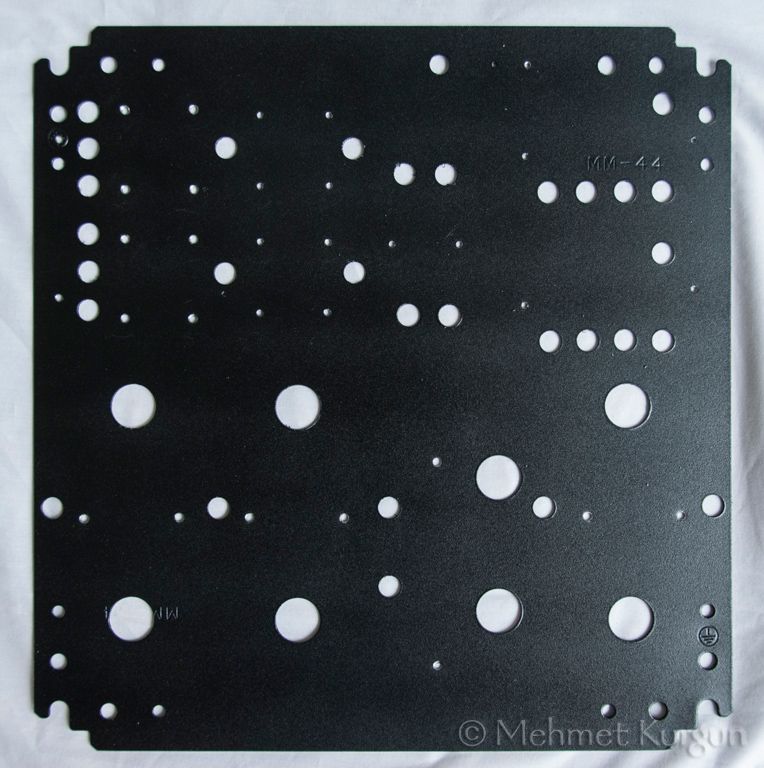
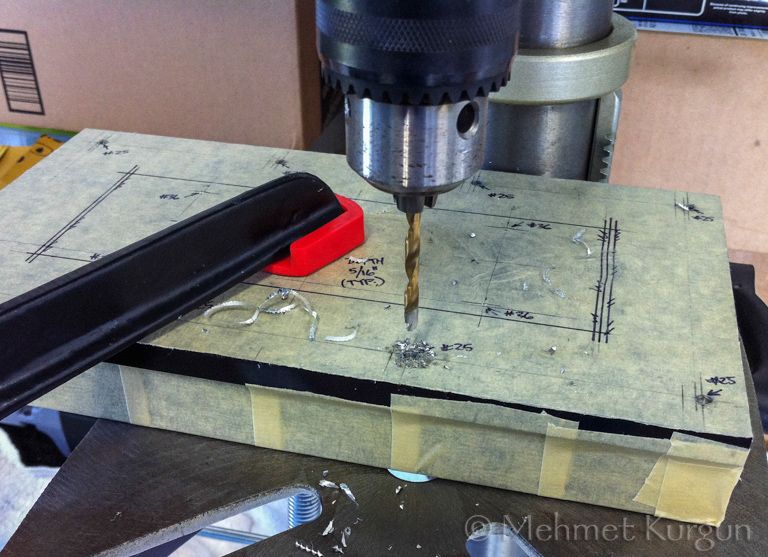
I found someone locally to mill the cutouts. Most water jet machines do not have the capacity to handle cutouts on the top and bottom of the box. I have provided them with my own CAD files.
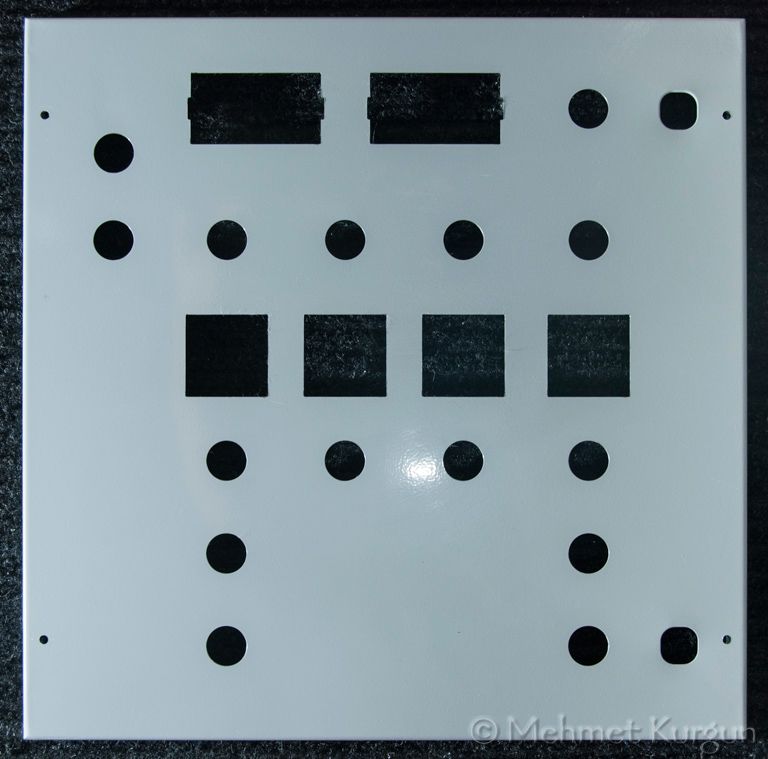
The CP had to be sand blasted to bare metal (see test area on the picture above) before powder coating so I had to remove the door gasket.
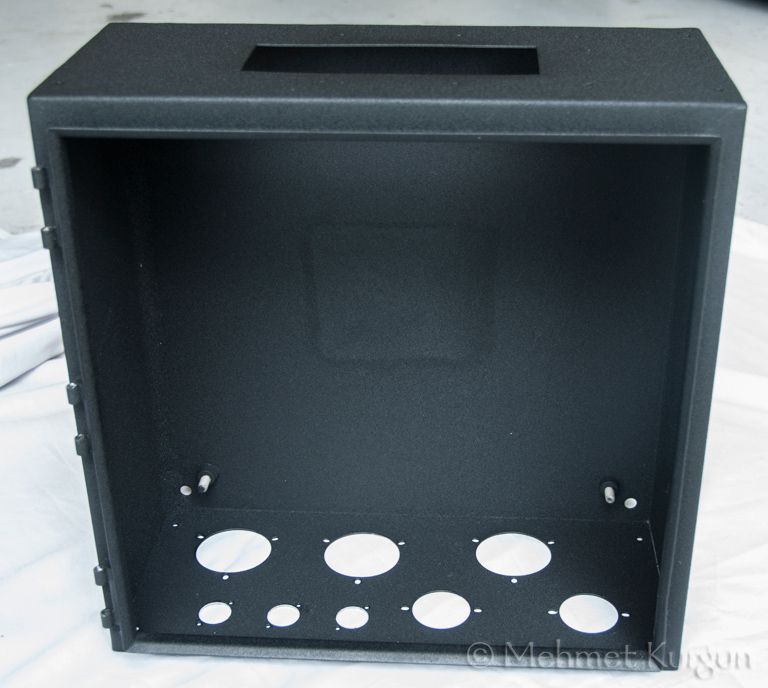
Powder coating turned out really nice. I have also applied a product called CeramLock over the powder coat finish. Its a clear ceramic coating. http://www.ceramlock.com/
|
|
| Back to top |
|
 |
ShortVersion
Joined: 06 Apr 2013
Posts: 26
Location: Florida
|
| Link Posted: Wed Jul 03, 2013 1:21 am Post subject: |
|
|
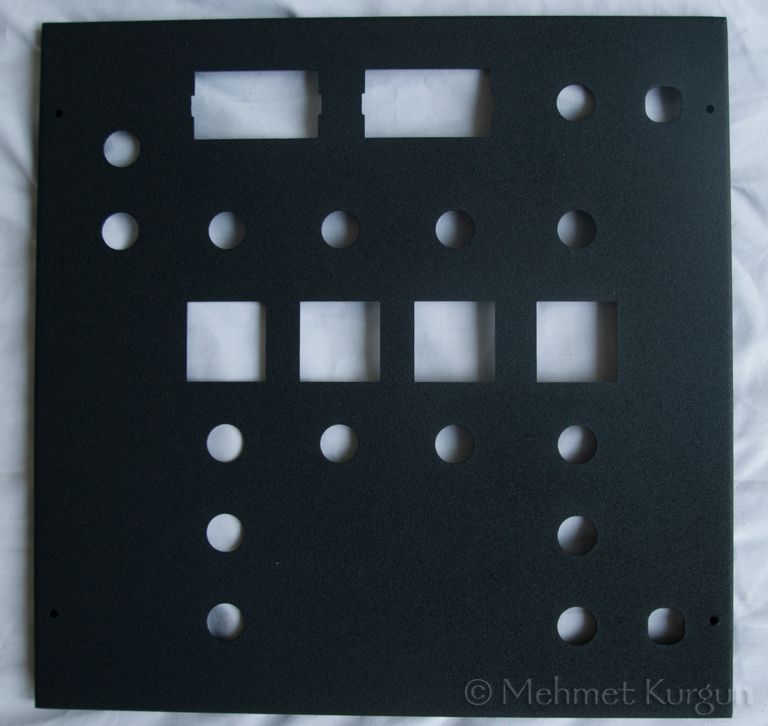
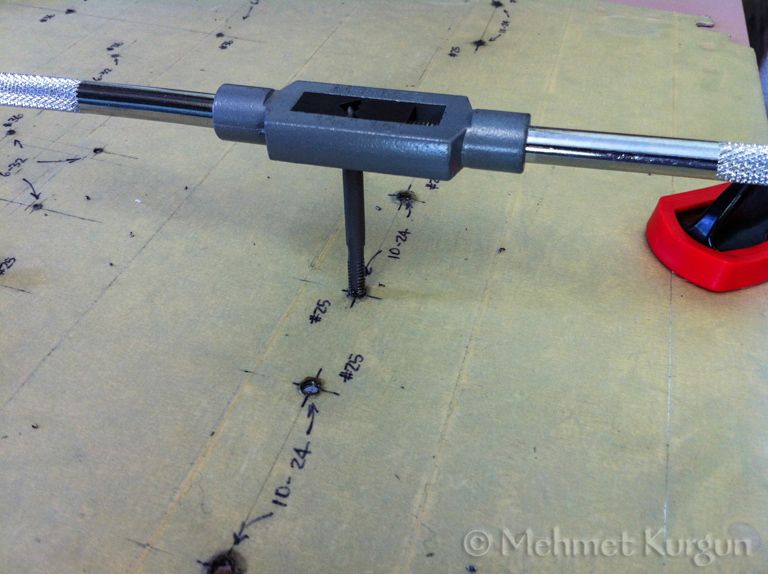
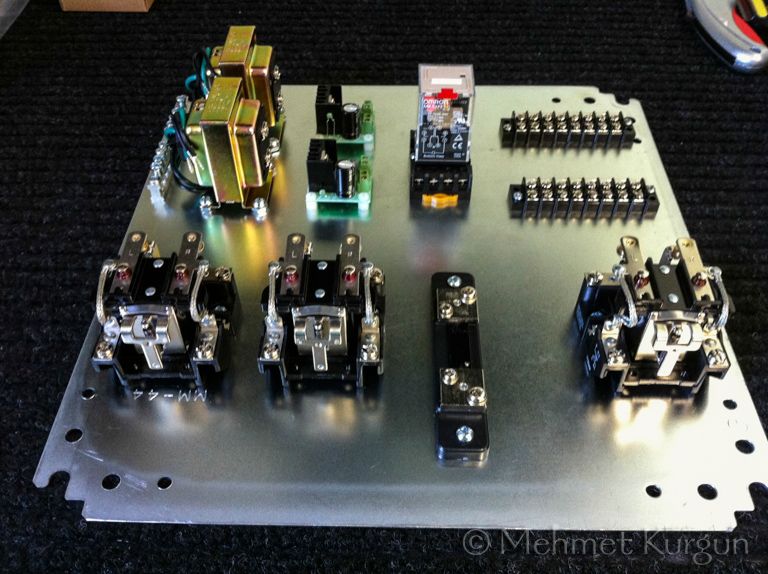
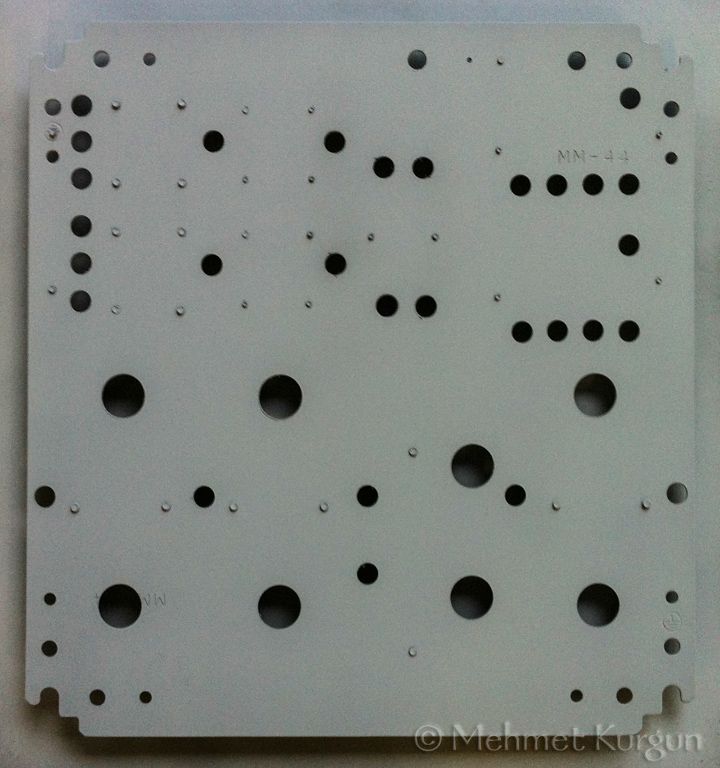
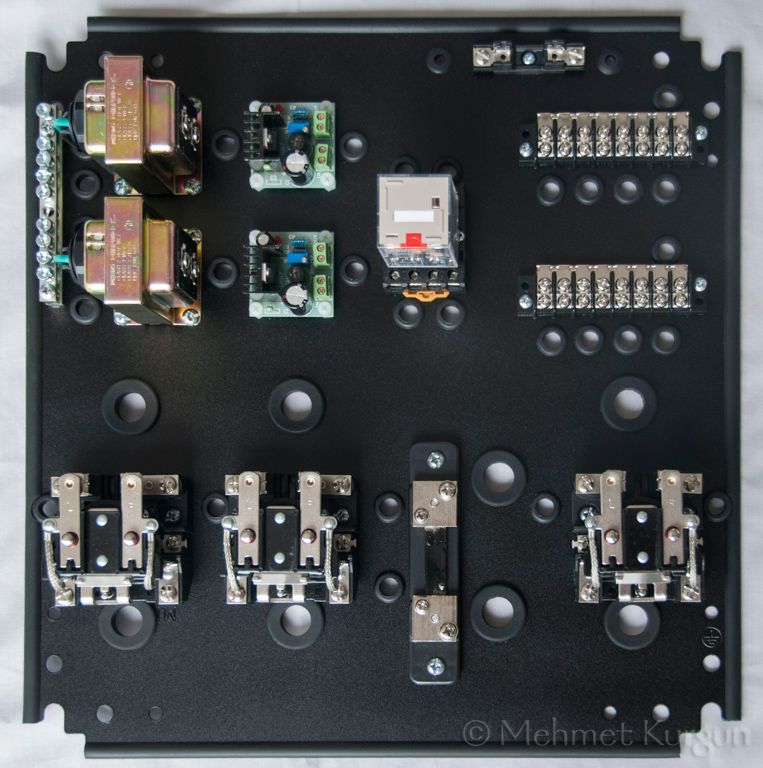
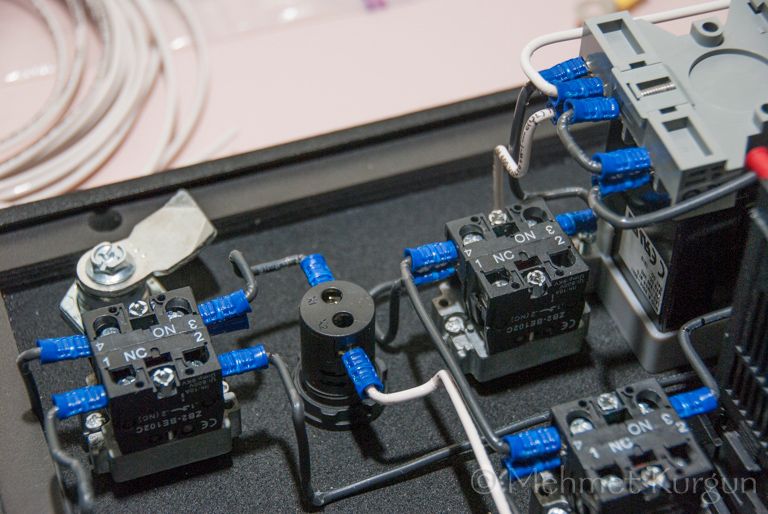
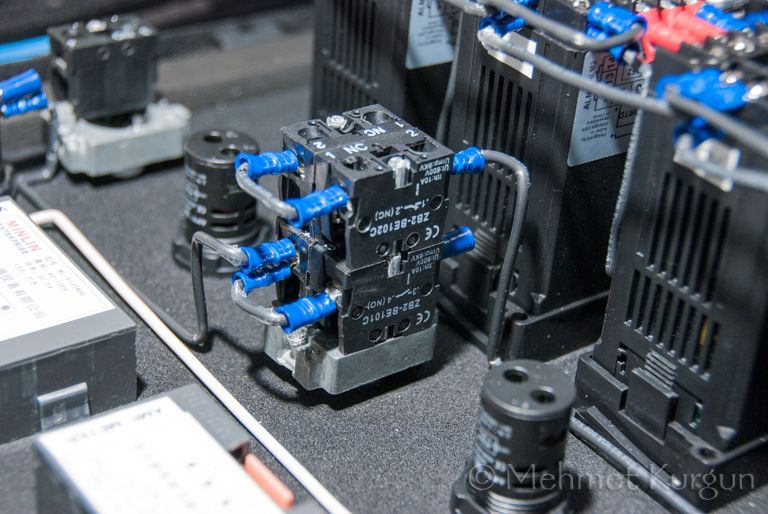
I worked on the internal panel while the CP was getting milled and powder coated.
|
|
| Back to top |
|
|
OMJ
Joined: 19 Nov 2012
Posts: 43
|
| Link Posted: Wed Jul 03, 2013 1:43 am Post subject: |
|
|
|
Wow. Amazing workmanship
|
|
| Back to top |
|
|
ShortVersion
Joined: 06 Apr 2013
Posts: 26
Location: Florida
|
| Link Posted: Wed Jul 03, 2013 1:55 am Post subject: |
|
|
| OMJ wrote: | | Wow. Amazing workmanship |
Thank you, OMJ.
|
|
| Back to top |
|
|
ShortVersion
Joined: 06 Apr 2013
Posts: 26
Location: Florida
|
| Link Posted: Wed Jul 03, 2013 1:59 am Post subject: |
|
|
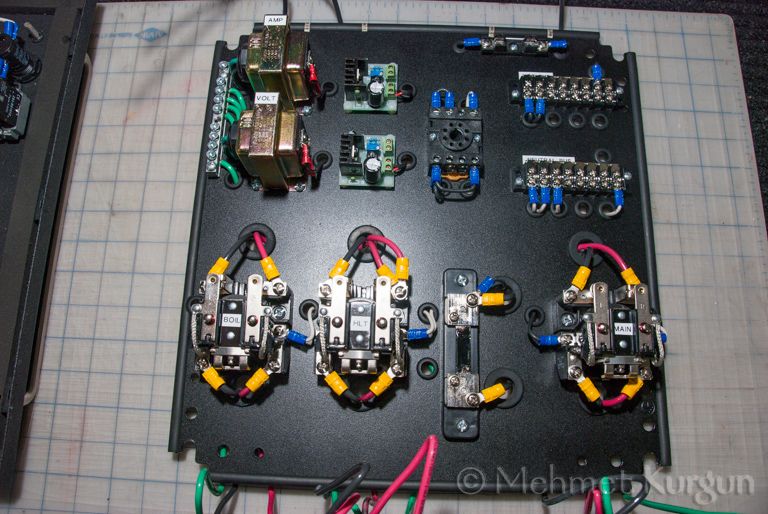
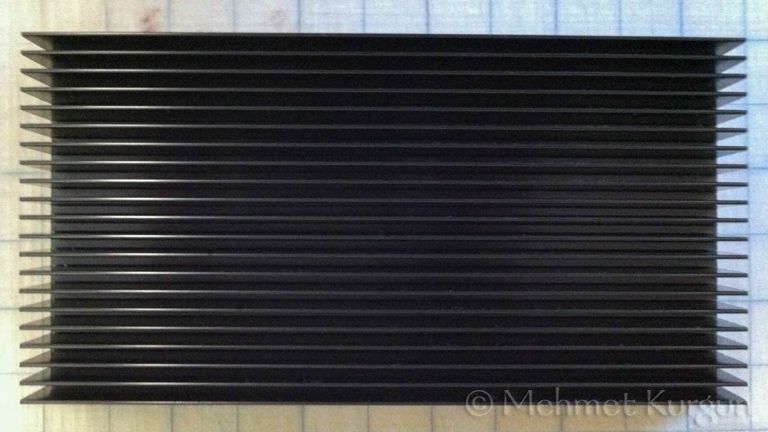
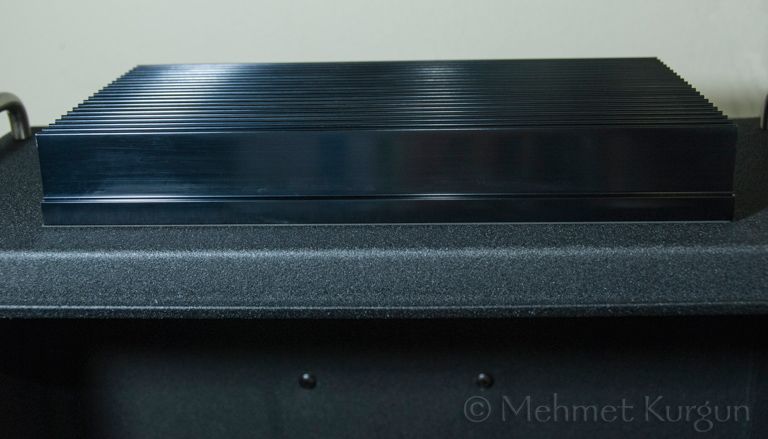
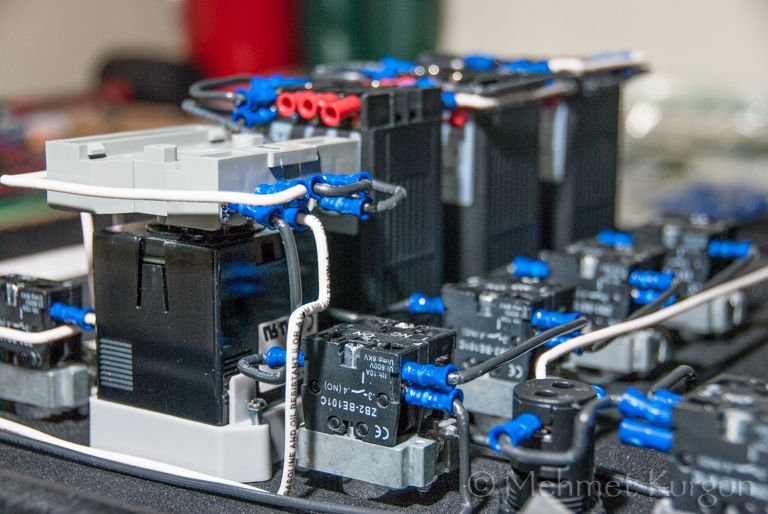
Work on the heat sink.


|
|
| Back to top |
|
|
ShortVersion
Joined: 06 Apr 2013
Posts: 26
Location: Florida
|
| Link Posted: Wed Jul 03, 2013 2:18 am Post subject: |
|
|
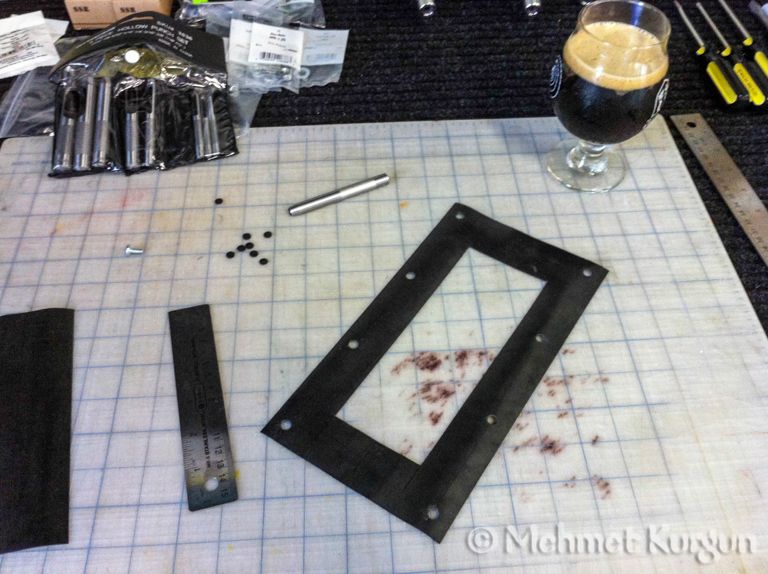
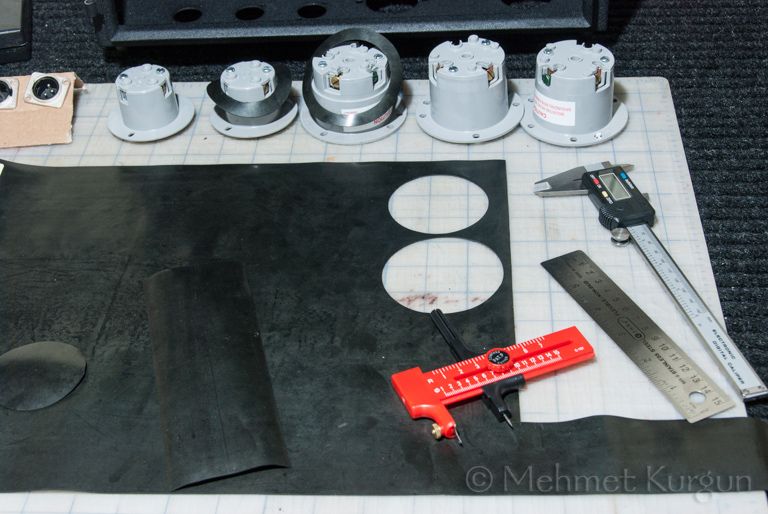
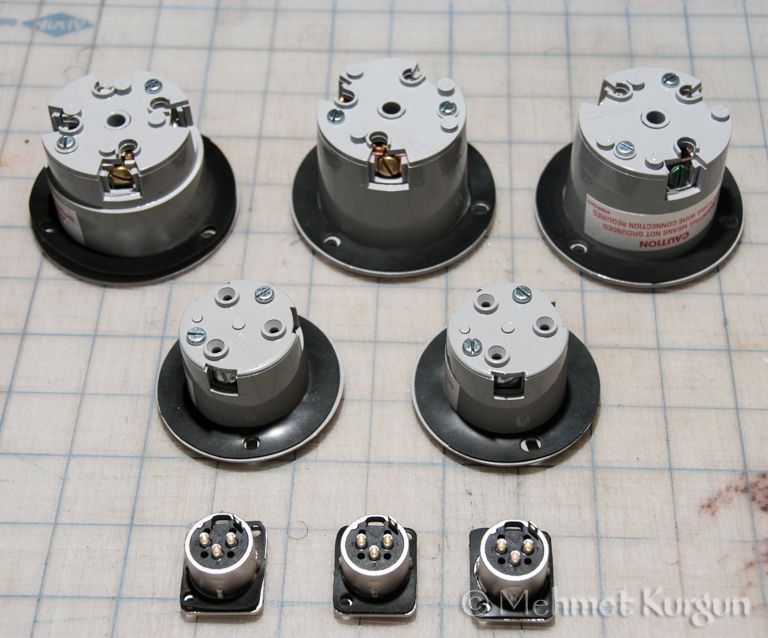
Silicone sealant is messy during application, makes it difficult to remove and re-install an item if needed and it does not look good. So, I custom fabricated seals from a 0.032" thick EPDM rubber sheet.
|
|
| Back to top |
|
|
Sketchin
Joined: 08 Jan 2013
Posts: 169
Location: Calgary
|
| Link Posted: Wed Jul 03, 2013 2:45 am Post subject: |
|
|
|
Wow, nice work! Love the rubber seals idea!
|
|
| Back to top |
|
|
woodenboatguy
Joined: 19 Sep 2012
Posts: 96
Location: Mississauga, ON
|
| Link Posted: Wed Jul 03, 2013 1:27 pm Post subject: |
|
|
Very well done! I am now officially daunted as I contemplate drilling the backplate. I really like your approach to the wiring on it especially.
Let me add my vote to Sketchin's on the rubber seals.
This forum is amazing.
Regards,
|
|
| Back to top |
|
|
kal
Forum Administrator

Joined: 12 Dec 2010
Posts: 11121
Location: Ottawa, Canada
Drinking: Pub Ale, Electric Creamsicle, Mild, Pliny the Younger, Belgian Dark Strong, Weizen, Russian Imperial Stout, Black Butte Porter
|
| Link Posted: Wed Jul 03, 2013 1:39 pm Post subject: |
|
|
Wow! I'm impressed.
I saw the larger holes in the backplate as I was scrolling down before the wiring was in and thought.... "he's not actually going to move all the wiring to the back is he?....". I kept scrolling down and yup! 
It should give you a very nice clean look. Very nice!
Only issue is if you decide to change some wiring it's going to be a lot more difficult but there's really no reason you'd ever have to change wiring (without changing parts as well).
I look forward to seeing more - especially how you handle the wiring to the door.
And thank you for using rubber grommets on those passthrough holes. You obviously have lots of experience in this and it shows. The custom rubber gaskets are also a good idea.
Kal
_________________
Our new shop with over 150 new products: shop.TheElectricBrewery.com
We ship worldwide and support our products and customers for life.
Purchasing through our affiliate links helps support our site at no extra cost to you. We thank you!
My basement/bar/brewery build 2.0
|
|
| Back to top |
|
|
g8tors
Joined: 05 Oct 2011
Posts: 211
|
| Link Posted: Wed Jul 03, 2013 2:54 pm Post subject: |
|
|
|
good idea on the rubber seals.
|
|
| Back to top |
|
|
ShortVersion
Joined: 06 Apr 2013
Posts: 26
Location: Florida
|
| Link Posted: Wed Jul 03, 2013 3:33 pm Post subject: |
|
|
| Sketchin wrote: | | Wow, nice work! Love the rubber seals idea! |
Thank you, Sketchin. They did turn out nice.
| woodenboatguy wrote: | Very well done! I am now officially daunted as I contemplate drilling the backplate. I really like your approach to the wiring on it especially.
Let me add my vote to Sketchin's on the rubber seals.
This forum is amazing. |
Thank you, woodenboatguy. I agree with you on the forum.
| kal wrote: | | It should give you a very nice clean look. Very nice! |
Thank you, Kal. It was planned for that and it did turn out nice. Wait till you see the pictures of the finished panel.
| kal wrote: | | Only issue is if you decide to change some wiring it's going to be a lot more difficult but there's really no reason you'd ever have to change wiring (without changing parts as well). |
I thought about that and came to the same conclusion. There should not be any reason why I would change the wiring. If I have to, I can do it. If anything, it will be a part that will go bad which will need to be changed and that is an easy task. That is the beauty of your design. I like and appreciate things that are designed well, function well and look well.
| kal wrote: | | And thank you for using rubber grommets on those passthrough holes. |
That's pretty basic stuff. I don't know if you noticed or not, I have also used rounded rubber edge trim.
| kal wrote: | | You obviously have lots of experience in this and it shows. |
Well, I don't know about having lots of experience in this because its the first time I have built something like this. Other than putting together a fermentation temp controller using a couple of Love controllers. I manage construction projects by profession.
| kal wrote: | | The custom rubber gaskets are also a good idea. |
Thanks.
|
|
| Back to top |
|
|
ShortVersion
Joined: 06 Apr 2013
Posts: 26
Location: Florida
|
| Link Posted: Wed Jul 03, 2013 3:40 pm Post subject: |
|
|
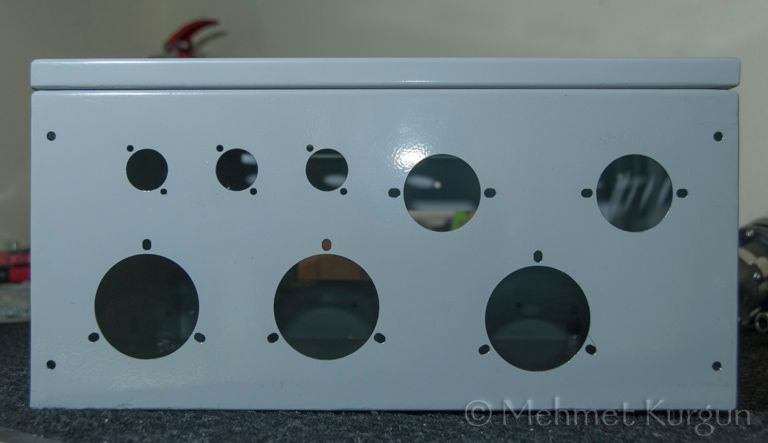
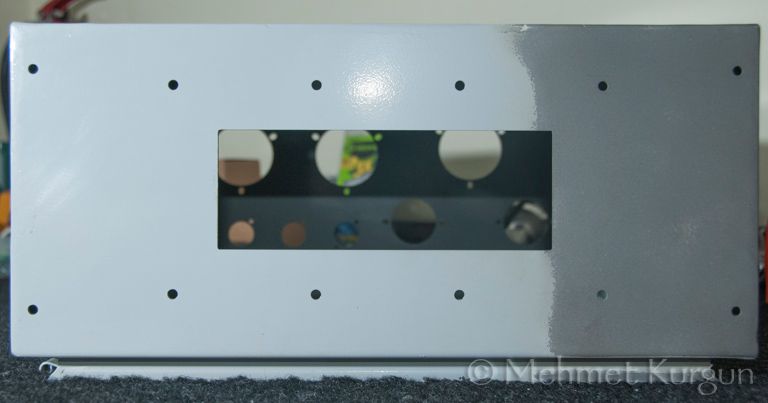
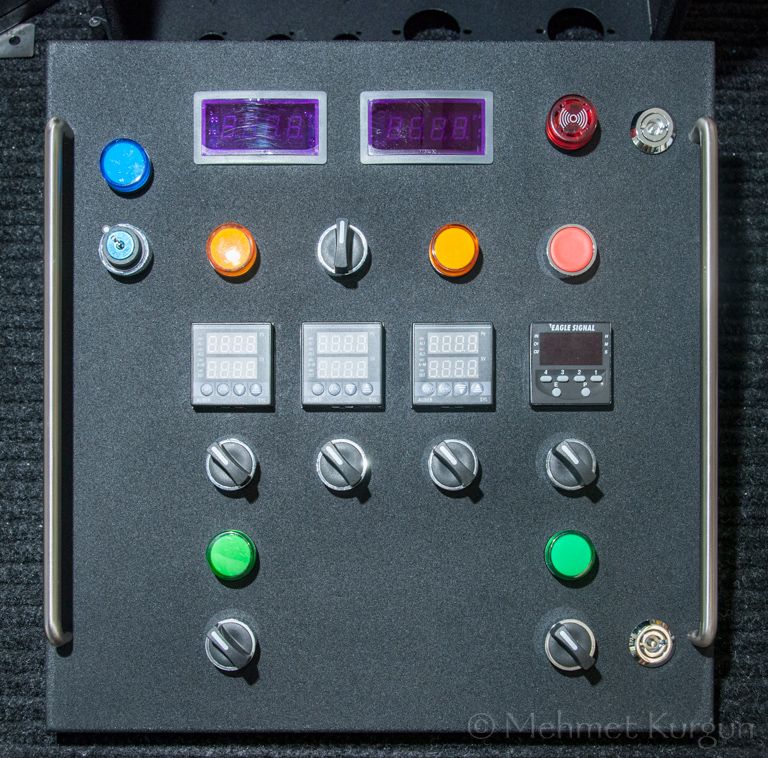
Here are some pictures of the panel door.
|
|
| Back to top |
|
|
ShortVersion
Joined: 06 Apr 2013
Posts: 26
Location: Florida
|
| Link Posted: Wed Jul 03, 2013 3:54 pm Post subject: |
|
|
| g8tors wrote: | | good idea on the rubber seals. |
Thanks, g8tors. Cool username.
|
|
| Back to top |
|
|
ShortVersion
Joined: 06 Apr 2013
Posts: 26
Location: Florida
|
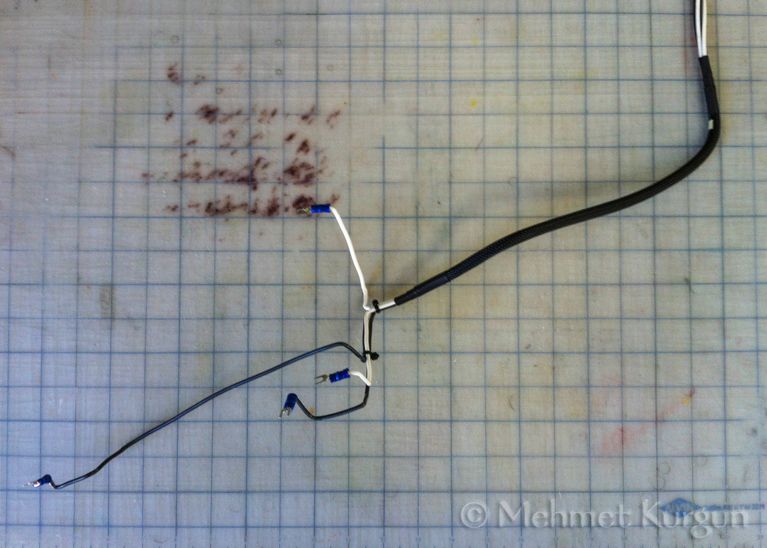
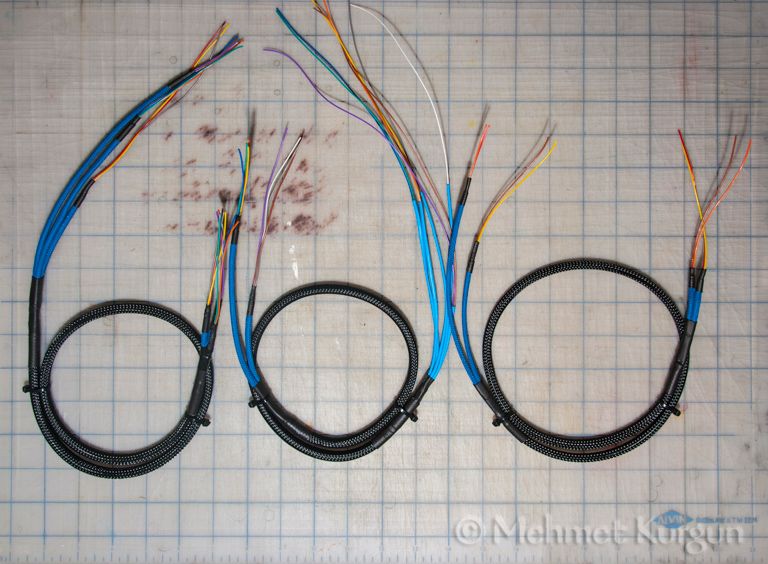
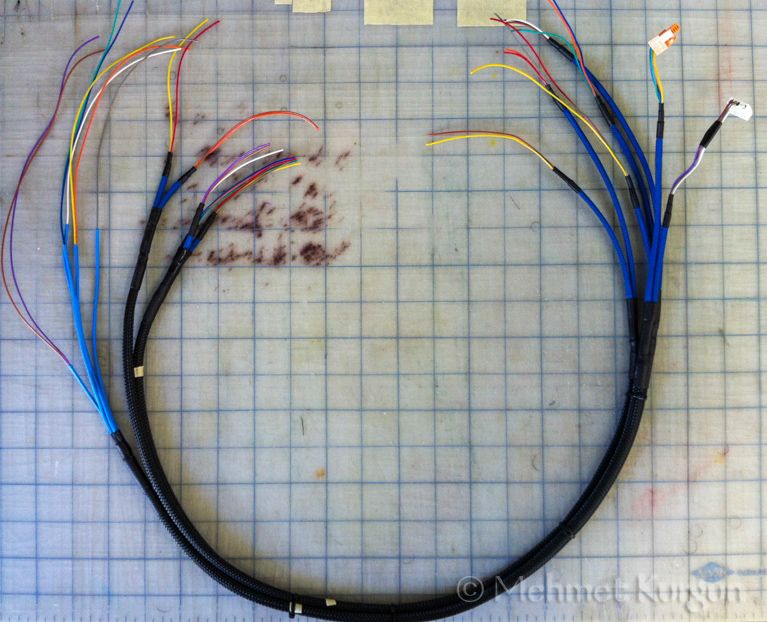
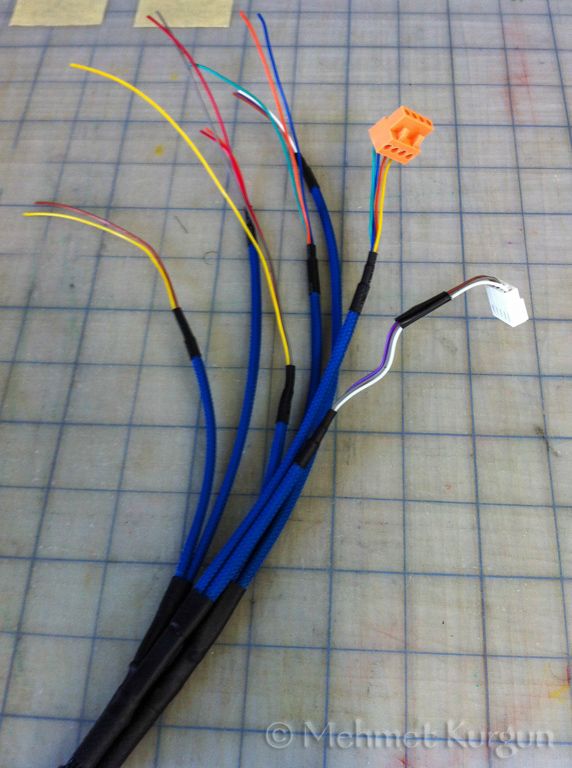
| Link Posted: Wed Jul 03, 2013 3:58 pm Post subject: |
|
|
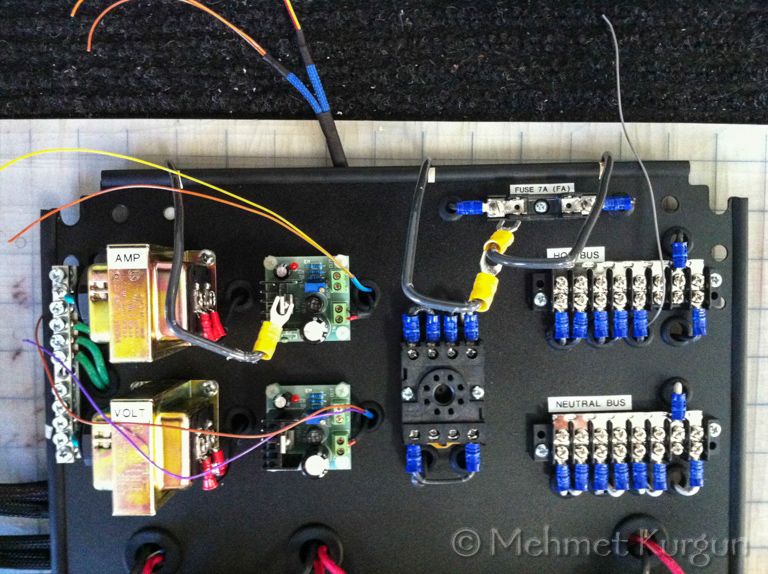
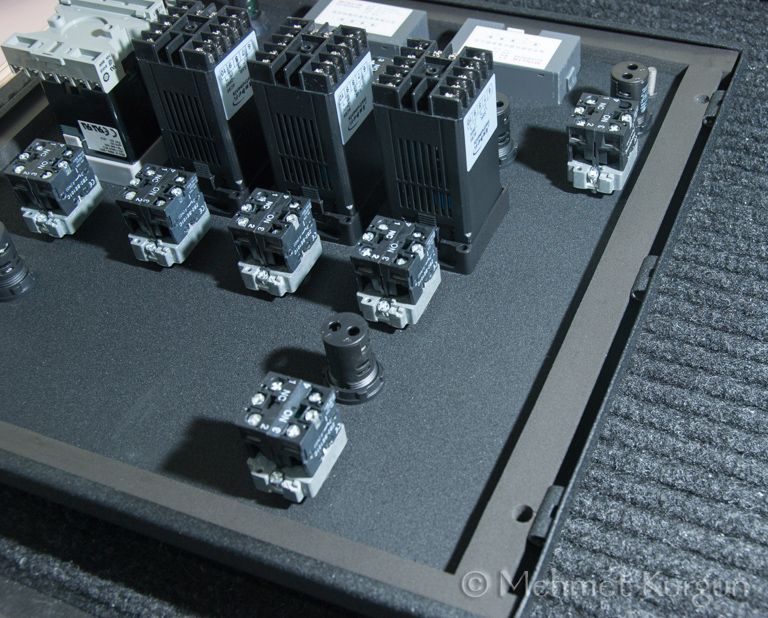
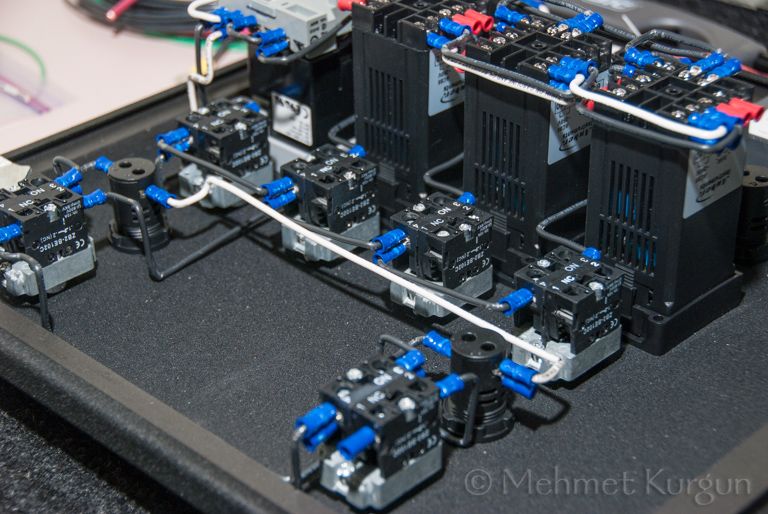
I made wiring harnesses for connecting the door and internal instrumentation.

|
|
| Back to top |
|
|
foomench
Joined: 21 Feb 2012
Posts: 704
Location: Longmont, CO
Drinking: Pinot barrel aged quad
Working on: Flanders oude bruin in barrel, Flanders red fermenting to refill the barrel
|
|
| Back to top |
|
|
southwoodbrew
Joined: 25 Mar 2013
Posts: 68
|
| Link Posted: Wed Jul 03, 2013 6:44 pm Post subject: |
|
|
|
Am I the only one that can't see the pictures in this thread?
|
|
| Back to top |
|
|
foomench
Joined: 21 Feb 2012
Posts: 704
Location: Longmont, CO
Drinking: Pinot barrel aged quad
Working on: Flanders oude bruin in barrel, Flanders red fermenting to refill the barrel
|
|
| Back to top |
|
|
kal
Forum Administrator
Joined: 12 Dec 2010
Posts: 11121
Location: Ottawa, Canada
Drinking: Pub Ale, Electric Creamsicle, Mild, Pliny the Younger, Belgian Dark Strong, Weizen, Russian Imperial Stout, Black Butte Porter
|
| Link Posted: Wed Jul 03, 2013 11:07 pm Post subject: |
|
|
| ShortVersion wrote: | | That's pretty basic stuff. I don't know if you noticed or not, I have also used rounded rubber edge trim. |
I did! You're going to need it for the wires going to the receptacles and the door.
Your wiring harnesses are very nice - this is similar to what is done in the automotive industry for car wiring (mostly between the instrument panel and the various items in the car) though yours is lot cleaner/nicer. Auto manufucturers used split corrugated plastic tubing and lots of electrical tape because it's faster.
Kal
_________________
Our new shop with over 150 new products: shop.TheElectricBrewery.com
We ship worldwide and support our products and customers for life.
Purchasing through our affiliate links helps support our site at no extra cost to you. We thank you!
My basement/bar/brewery build 2.0
|
|
| Back to top |
|
|
ShortVersion
Joined: 06 Apr 2013
Posts: 26
Location: Florida
|
| Link Posted: Thu Jul 04, 2013 12:15 pm Post subject: |
|
|
| foomench wrote: | | That is insane good looking. Nice work. |
Thanks, foomench.
| kal wrote: | | Your wiring harnesses are very nice - this is similar to what is done in the automotive industry for car wiring (mostly between the instrument panel and the various items in the car) though yours is lot cleaner/nicer. Auto manufucturers used split corrugated plastic tubing and lots of electrical tape because it's faster. |
Thanks. Unlike auto manufacturers or any business for that matter, I was not concerned about time or cost. At least not in this case. 
|
|
| Back to top |
|
|
Spike Innovations
TheElectricBrewery.com manufacturer
Joined: 26 Feb 2011
Posts: 245
Location: ME
Working on: Your Brewery!
|
|
| Back to top |
|
|
|
|


